


Web Development Articles
How to Use Firebase Firestore for Real-Time Data in Web Apps
Web Designing Roadmap 2026: Best Guide to Become a Successful Web Designer


Get In Touch For Details! Request More Information

HTML Tutorial: A Comprehensive Guide for Web Development
Sep 22, 2026 7 Min Read 12491 Views
(Last Updated)
Ever opened a webpage’s source code and wondered how a browser turns that jumble of tags into the page you actually see? This HTML tutorial answers exactly that. That structure comes from one foundational language every website is built on.
HTML, short for Hypertext Markup Language, is the markup language used to structure the content of a web page, providing elements and tags that define headings, paragraphs, links, images, and everything else a browser renders.
It’s the skeleton every website is built on, and understanding it is the first real step into web development.
This HTML tutorial walks you through HTML’s core structure, its most-used elements, text formatting, forms, accessibility, and a few advanced techniques worth knowing once you’ve got the basics down.
Table of contents
- TL;DR Summary
- HTML Tutorial: Structure of an HTML Document
- HTML Tutorial: Core Elements and Tags
- Headings
- Paragraphs
- Links
- Images
- Lists
- HTML Tags Quick Reference
- HTML Tutorial: Text Formatting
- Bold Text
- Italic Text
- Underlined Text
- Superscripts and Subscripts
- Creating Links and Navigation with HTML
- Basic Links
- Linking to Sections Within the Same Page
- Opening Links in a New Tab
- Linking Email Addresses
- Working with Images and Multimedia in HTML
- Adding Image Captions
- Embedding Videos
- Adding Audio Content
- Organizing Content with HTML Lists and Tables
- Ordered and Unordered Lists
- Nested Lists
- Creating Tables
- Styling Pages with CSS
- Inline, Internal, and External Styles
- CSS Selectors
- Building HTML Forms and Handling User Input
- Basic Form Structure
- Form Validation
- Handling Form Submissions
- Ensuring Accessibility and SEO Best Practices
- Accessibility
- SEO
- Common Mistakes Beginners Make
- Semantic vs Non-Semantic Elements: Why It Matters
- HTML Tutorial: Advanced Techniques
- Semantic Elements
- Embedding External Content
- Custom Data Attributes
- Web Components
- Further Reading: Official Resources
- Concluding Thoughts…
- FAQs
- How to do web development with HTML?
- What are the 3 types of web development?
- What are the 5 uses of HTML?
- What is HTML syntax?
TL;DR Summary
- What this HTML tutorial covers: the markup language that structures every web page, using elements and tags to define headings, text, links, images, and more
- Core structure: every document has a doctype declaration, a
<head>for metadata, and a<body>for visible content - What it works with: pairs with CSS for styling and JavaScript for interactivity, together forming the foundation of front-end development
- Where beginners trip up: missing closing tags, broken links, and forgetting alt text on images
- Why it still matters: every framework and modern tool still compiles down to this same underlying markup
HTML Tutorial: Structure of an HTML Document
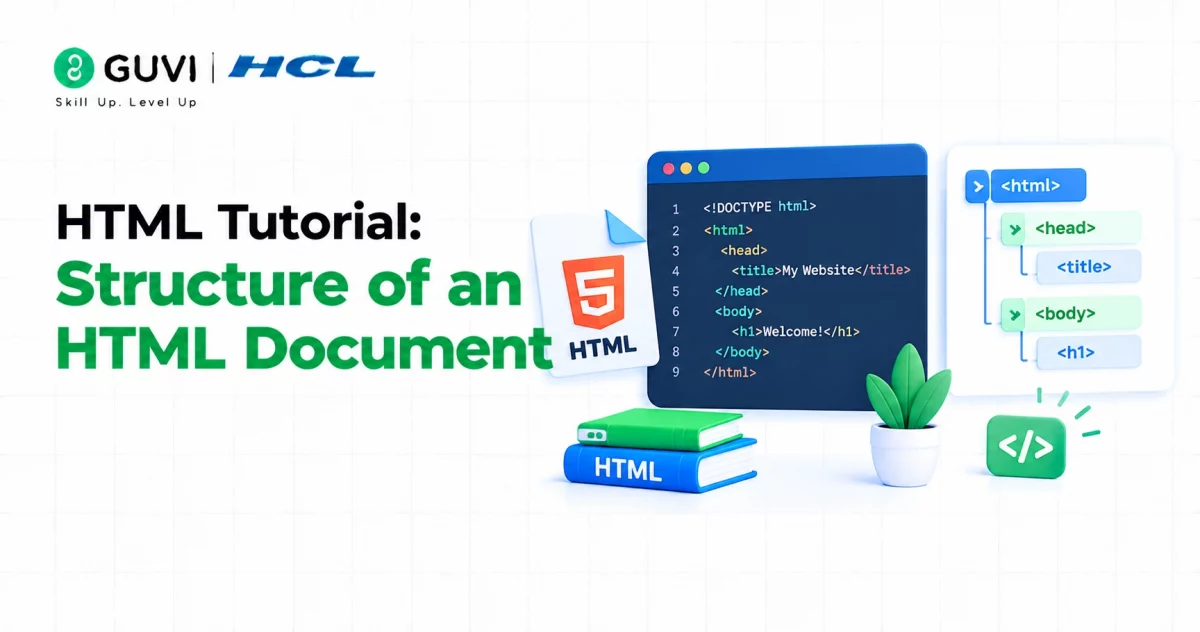
Every HTML document follows a specific pattern. It starts with a doctype declaration that tells the browser which version is being used, followed by the root element, inside which you’ll find two main sections.
As this HTML tutorial’s structure section explains, the <head> section holds metadata, things like the title, character encoding, and links to external stylesheets and scripts. The <body> section holds the actual HTML content: text, images, links, and everything else a visitor sees.
Here’s a basic example of that structure:
<!DOCTYPE html>
<html>
<head>
  <title>My Web Page</title>
  <meta charset="UTF-8">
  <link rel="stylesheet" href="styles.css">
</head>
<body>
  <h1>Welcome to My Web Page</h1>
  <p>This is the content of my web page.</p>
</body>
</html>
Also Read: 10 Best HTML and CSS Project Ideas for Beginners
HTML Tutorial: Core Elements and Tags
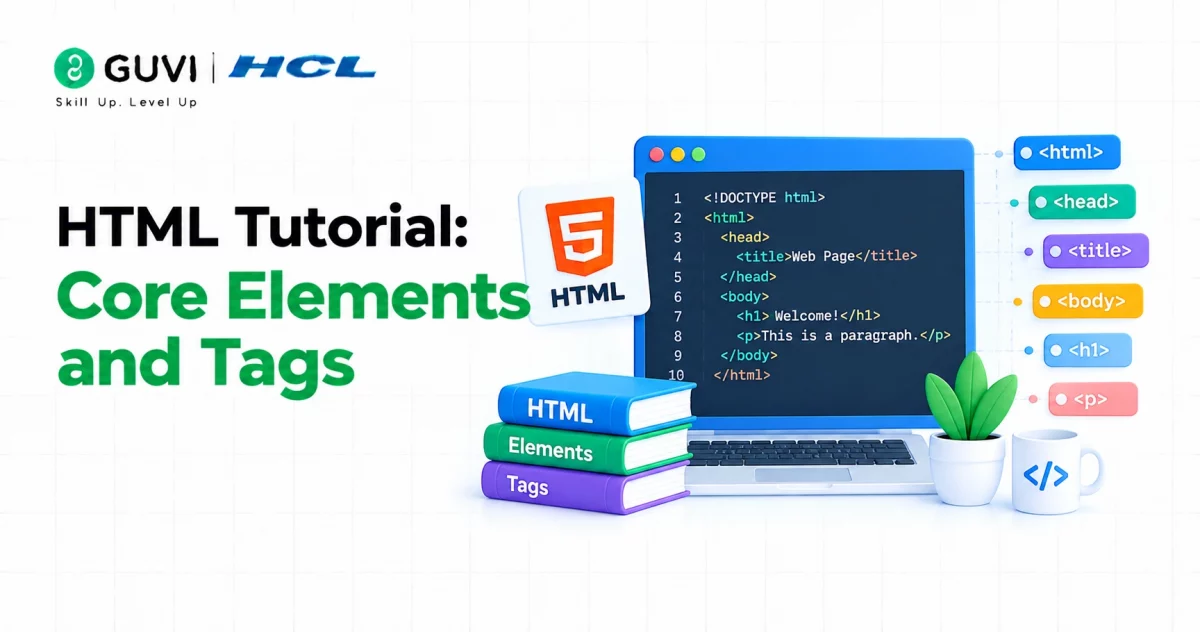
As with any good HTML tutorial, it helps to start with the building blocks: HTML elements are the foundation of a web page. Each is represented by a pair of tags, an opening tag and a closing tag, with the content placed between them. Some elements are self-closing and don’t require a closing tag at all.
As part of this HTML tutorial, let’s look at some of the most commonly used HTML tags:
1. Headings
Headings define the structure and hierarchy of a page’s content, from <h1> (most important) down to <h6> (least important):
<h1>This is a Heading Level 1</h1>
<h2>This is a Heading Level 2</h2>
<h3>This is a Heading Level 3</h3>
2. Paragraphs
The <p> element groups blocks of text together, the standard way to write body content:
<p>How we behave with others, is how we also behave with ourselves. So, be kind and brave.</p>3. Links
The <a> element creates a hyperlink, with the destination set through the href attribute:
<a href="https://www.guvi.in">Visit our website</a>4. Images
This HTML tutorial’s image section starts here: the <img> element inserts an image, using src for the file and alt for accessible, descriptive text:
<img src="image.jpg" alt="A beautiful sunset">5. Lists
There are two list types: ordered (<ol>), for when sequence matters, and unordered (<ul>), for when it doesn’t. Each item sits inside an <li> element:
<ul>
  <li>Item 1</li>
  <li>Item 2</li>
  <li>Item 3</li>
</ul>
Learn More: Introduction to HTML Tags: A Comprehensive Guide With Examples
HTML Tags Quick Reference
Before moving further into this HTML tutorial, here’s a compact reference for the elements covered so far and what’s coming next.
| Element | Purpose | Self-Closing? |
|---|---|---|
<h1> to <h6> | Headings, in order of importance | No |
<p> | Paragraph of text | No |
<a> | Hyperlink | No |
<img> | Image | Yes |
<ul> / <ol> / <li> | Unordered / ordered list / list item | No |
<strong> / <em> | Bold / italic emphasis | No |
<table> / <tr> / <td> | Table / row / cell | No |
<form> / <input> | Form container / input field | No |
<video> / <audio> | Embedded media | No |
HTML Tutorial: Text Formatting
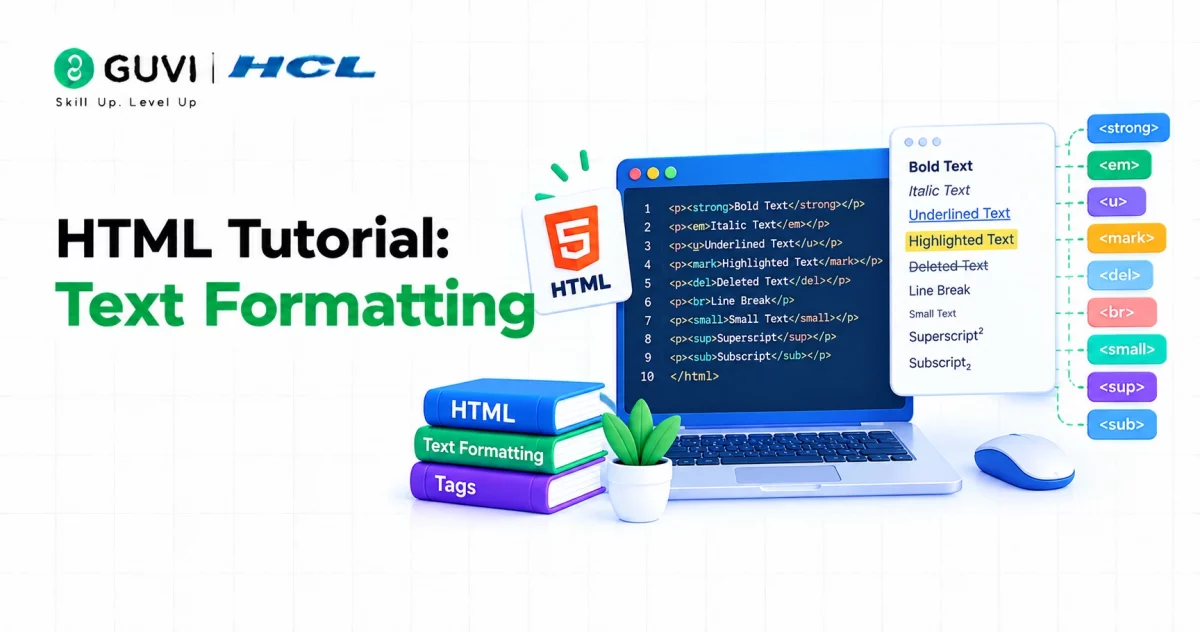
HTML provides a range of tags to format and style text directly: bold, italic, underlined, or even superscripts and subscripts.
1. Bold Text
Use <strong> or <b>:
<p>This is <strong>bold</strong> text.</p>2. Italic Text
Use <em> or <i>:
<p>This is <em>italic</em> text.</p>3. Underlined Text
Another formatting option this HTML tutorial covers, use <u>:
<p>This is <u>underlined</u> text.</p>4. Superscripts and Subscripts
Use <sup> and <sub> respectively:
<p>This is a mathematical equation: H<sub>2</sub>O.</p>These HTML tags can be combined freely to achieve the styling you’re after. Experiment with different combinations to build visually clear, well-structured text.
Must Read: A Comprehensive Guide to HTML and CSS Roadmap
Creating Links and Navigation with HTML
This HTML tutorial now moves into links, which let users move between pages and resources, all built with HTML’s <a> element.
1. Basic Links
The most fundamental link this HTML tutorial covers:
<a href="https://www.guvi.in">Visit our website</a>2. Linking to Sections Within the Same Page
Use an anchor tag with the href set to a target section’s ID:
<a href="#section1">Jump to Section 1</a>
...
<h2 id="section1">Section 1</h2>
3. Opening Links in a New Tab
Another common HTML tutorial technique: set the target attribute to _blank:
<a href="https://www.guvi.in" target="_blank">Visit our website</a>4. Linking Email Addresses
Use the mailto protocol to open the visitor’s default email client with a pre-filled address:
<a href="mailto:[email protected]">Contact us</a>These techniques give you effective navigation and a seamless user experience across your pages.
Practice all these on HCL GUVI’s fully assisted practice platform WebKata to master these fundamentals and more with ease!
Working with Images and Multimedia in HTML
This part of the HTML tutorial covers images and multimedia, elements that do a lot of work for a page’s visual appeal and interactivity.
1. Adding Image Captions
Back to this HTML tutorial’s media section: wrap an image in <figure>, with <figcaption> holding the caption text:
<figure>
  <img src="image.jpg" alt="A beautiful sunset">
  <figcaption>Caption for the image</figcaption>
</figure>
2. Embedding Videos
Use <video>, with a <source> for the file and <track> for captions:
<video controls>
  <source src="video.mp4" type="video/mp4">
  <track src="captions.vtt" kind="captions" srclang="en" label="English">
</video>
3. Adding Audio Content
Use <audio>, with a <source> for the file:
<audio controls>
  <source src="audio.mp3" type="audio/mpeg">
</audio>
Must Read: How to Create a Simple “Hello World” Page
Organizing Content with HTML Lists and Tables
This stretch of the HTML tutorial covers lists and tables.
1. Ordered and Unordered Lists
<ol>
  <li>First item</li>
  <li>Second item</li>
  <li>Third item</li>
</ol>
2. Nested Lists
Lists can nest inside other lists to build hierarchical structures:
<ul>
  <li>Item 1
    <ul>
      <li>Subitem 1</li>
      <li>Subitem 2</li>
    </ul>
  </li>
  <li>Item 2</li>
</ul>
3. Creating Tables
This HTML tutorial’s table section starts here: tables use <table>, <tr> for rows, <td> for cells, and <th> for header cells:
<table>
  <tr>
    <th>Name</th>
    <th>Age</th>
  </tr>
  <tr>
    <td>John Doe</td>
    <td>30</td>
  </tr>
</table>
Also Read: Top 9 AI Tools for Content Creation That You Shouldn’t Miss
Styling Pages with CSS
This HTML tutorial wouldn’t be complete without a note on styling: CSS (Cascading Style Sheets) is what controls appearance and layout, and combined with HTML, it’s how you build visually polished, responsive pages.

1. Inline, Internal, and External Styles
Apply styles directly with the style attribute:
<p style="color: blue; font-size: 20px;">This is a styled paragraph.</p>Or define them within a <style> block in the <head>:
<style>
  p {
    color: blue;
    font-size: 20px;
  }
</style>
Or link an entirely separate file:
<link rel="stylesheet" href="styles.css">2. CSS Selectors
Though not strictly part of this HTML tutorial, selectors let you target specific elements by tag, class, ID, or other attributes:
p {
  color: blue;
}

.my-class {
  background-color: yellow;
}

#my-id {
  font-weight: bold;
}
Also Explore: HTML vs CSS: Critical Differences Developers Can’t Ignore
Building HTML Forms and Handling User Input
No HTML tutorial is complete without forms: HTML forms let users submit data and interact with an application, all built from a defined set of input elements.
1. Basic Form Structure
<form>
  <label for="name">Name:</label>
  <input type="text" id="name" name="name">

  <label for="email">Email:</label>
  <input type="email" id="email" name="email">

  <input type="submit" value="Submit">
</form>
2. Form Validation
This HTML tutorial’s form-validation tip: built-in attributes like required, minlength, and maxlength catch bad input before submission:
<input type="text" id="name" name="name" required minlength="3" maxlength="20">3. Handling Form Submissions
Specify a destination with the action attribute:
<form action="submit.php" method="POST">
  <input type="submit" value="Submit">
</form>
Also Know: The Role of AI in Predictive User Interface Design
Ensuring Accessibility and SEO Best Practices
Rounding out this HTML tutorial with accessibility and SEO matters just as much as the fundamentals: following good practices here means your pages are usable by everyone and rank well in search results.
1. Accessibility
- Use proper heading tags to structure content logically
- Provide alt text for images so screen readers can describe them
- Use descriptive link text that makes sense out of context
- Ensure sufficient colour contrast between text and background
- Test pages with assistive technologies to catch real issues
2. SEO
- Use descriptive, relevant
<title>elements - Work relevant keywords naturally into headings and link text
- Use descriptive URLs that reflect the page’s content
- Provide meta descriptions summarising each page
- Build genuine backlinks from reputable sites
Also Explore: 10 Best DevOps Practices You Should Know
Common Mistakes Beginners Make
Any thorough HTML tutorial needs to cover where beginners actually go wrong: a handful of recurring mistakes cause most of the visible bugs in a beginner’s first few pages.
- Forgetting closing tags. Unclosed elements like a missing </div> can quietly break the layout of everything that follows it.
- Skipping the alt attribute on images. This isn’t just an accessibility gap, it also hurts SEO and leaves nothing behind if the image fails to load.
- Nesting elements incorrectly. Block-level elements like
<div>shouldn’t sit inside inline elements like<a>in certain contexts, this produces unpredictable rendering. - Using
<br>tags to fake spacing. Reaching for line breaks instead of proper CSS margin or padding creates layout that’s fragile and hard to maintain. - Hardcoding styles with the style attribute everywhere. It works, but it makes a page a nightmare to restyle later, an external stylesheet scales far better.
Semantic vs Non-Semantic Elements: Why It Matters
This distinction trips up beginners constantly, and it’s worth understanding clearly before this HTML tutorial moves on.
A semantic element tells you and the browser exactly what kind of content it holds, <header>, <article>, <nav>, and <footer> are all examples. A non-semantic element like <div> or <span> gives no information about its content at all, it’s just a generic container.
| Type | Examples | What It Communicates |
|---|---|---|
| Semantic | <header>, <nav>, <article>, <section>, <footer> | Clear meaning about the content’s role |
| Non-semantic | <div>, <span> | Nothing, purely structural |
Why this matters in practice: screen readers use semantic elements to help visually impaired users navigate a page efficiently, and search engines use them to better understand what each part of your page actually contains.
As this HTML tutorial’s semantic section shows, a page built entirely from <div> tags still renders fine visually, but it’s harder to maintain, harder to make accessible, and generally ranks worse in search results than the same page built with proper semantic structure.
HTML Tutorial: Advanced Techniques
This part of the HTML tutorial goes beyond the basics, covering a few more advanced techniques worth knowing.
1. Semantic Elements
A key concept in any modern HTML tutorial: elements like <header>, <nav>, <article>, <section>, and <footer> add real meaning to a page’s structure, helping both search engines and assistive technologies understand your content properly.
2. Embedding External Content
This HTML tutorial’s last technique before Web Components: the <iframe> element and similar tags let you embed content from other sources, social media posts, maps, videos, enriching a page with content that isn’t natively part of it.
3. Custom Data Attributes
One more advanced technique this HTML tutorial covers: the data-* attribute pattern lets you attach custom data to any element, genuinely useful for JavaScript interactions and targeted styling without cluttering the markup with extra classes.
4. Web Components
Web Components are a set of web platform APIs for building reusable custom elements, encapsulating structure, styling, and JavaScript together so complex interfaces become easier to build and maintain.
Kickstart your Full Stack Development journey by enrolling in HCL GUVI’s certified Full Stack Development Career Program with placement assistance, where you’ll master the MERN stack (MongoDB, Express.js, React, Node.js) and build real-life projects.
Alternatively, if you’d like a self-paced option, try HCL GUVI’s HTML & CSS Self-Paced course.
Further Reading: Official Resources
Once you’re past the fundamentals covered in this HTML tutorial, these official resources are worth bookmarking.
- MDN Web Docs: HTML: Mozilla’s comprehensive, browser-agnostic reference for every element and attribute, widely considered the most authoritative day-to-day reference for working developers.
- W3C Markup Validation Service: paste in a URL, upload a file, or enter code directly to check your document against the official specification, genuinely useful for catching unclosed tags and invalid nesting before they cause rendering bugs.
- WHATWG HTML Living Standard: the actual, continuously updated specification that modern browsers implement, worth a look once you want to go deeper than tutorial-level detail.
Concluding Thoughts…
By now, you should have a solid grip on the core HTML elements, tags, and techniques covered in this HTML tutorial. HTML is the foundation of web development, and with what you’ve picked up in this guide, you’re well-equipped to build accessible, well-structured pages.
Combine HTML with CSS and JavaScript to bring real visual polish and interactivity into your projects, that pairing is what modern front-end development is actually built on.
We hope you found this guide useful, and we encourage you to keep exploring and experimenting to expand your web development skills.
Must Read: Top 20 HTML & CSS Interview Questions With Answers
FAQs
How to do web development with HTML?
HTML, or Hypertext Markup Language, is the standard language for creating web pages. To start web development with HTML, you need to learn its basic syntax, tags, and structure. This guide above will help you master all the basics.
What are the 3 types of web development?
The main types of web development are front-end, back-end, and full-stack development, each focusing on different aspects of a website’s functionality.
What are the 5 uses of HTML?
Hypertext Markup Language is primarily used for creating and structuring web pages, formatting text, embedding images, links, and multimedia, and designing web forms.
What is HTML syntax?
HTML syntax refers to the set of rules governing the structure and formatting of HTML code, including elements, tags, attributes, and their placement within a document.
Success Stories

About the Author
Jebasta
I translate the language of data into stories that anyone can understand. As a writer with a data science background, I simplify analytics, AI, and decision-making so beginners and enthusiasts can confidently explore the world of data.
View all posts by Jebasta
Connect with me @































Did you enjoy this article?