


Full Stack Development Articles
Claude for Architecture and Engineering Documentation
Freelancing as a Python Developer: Getting Your First Client

Get In Touch For Details! Request More Information
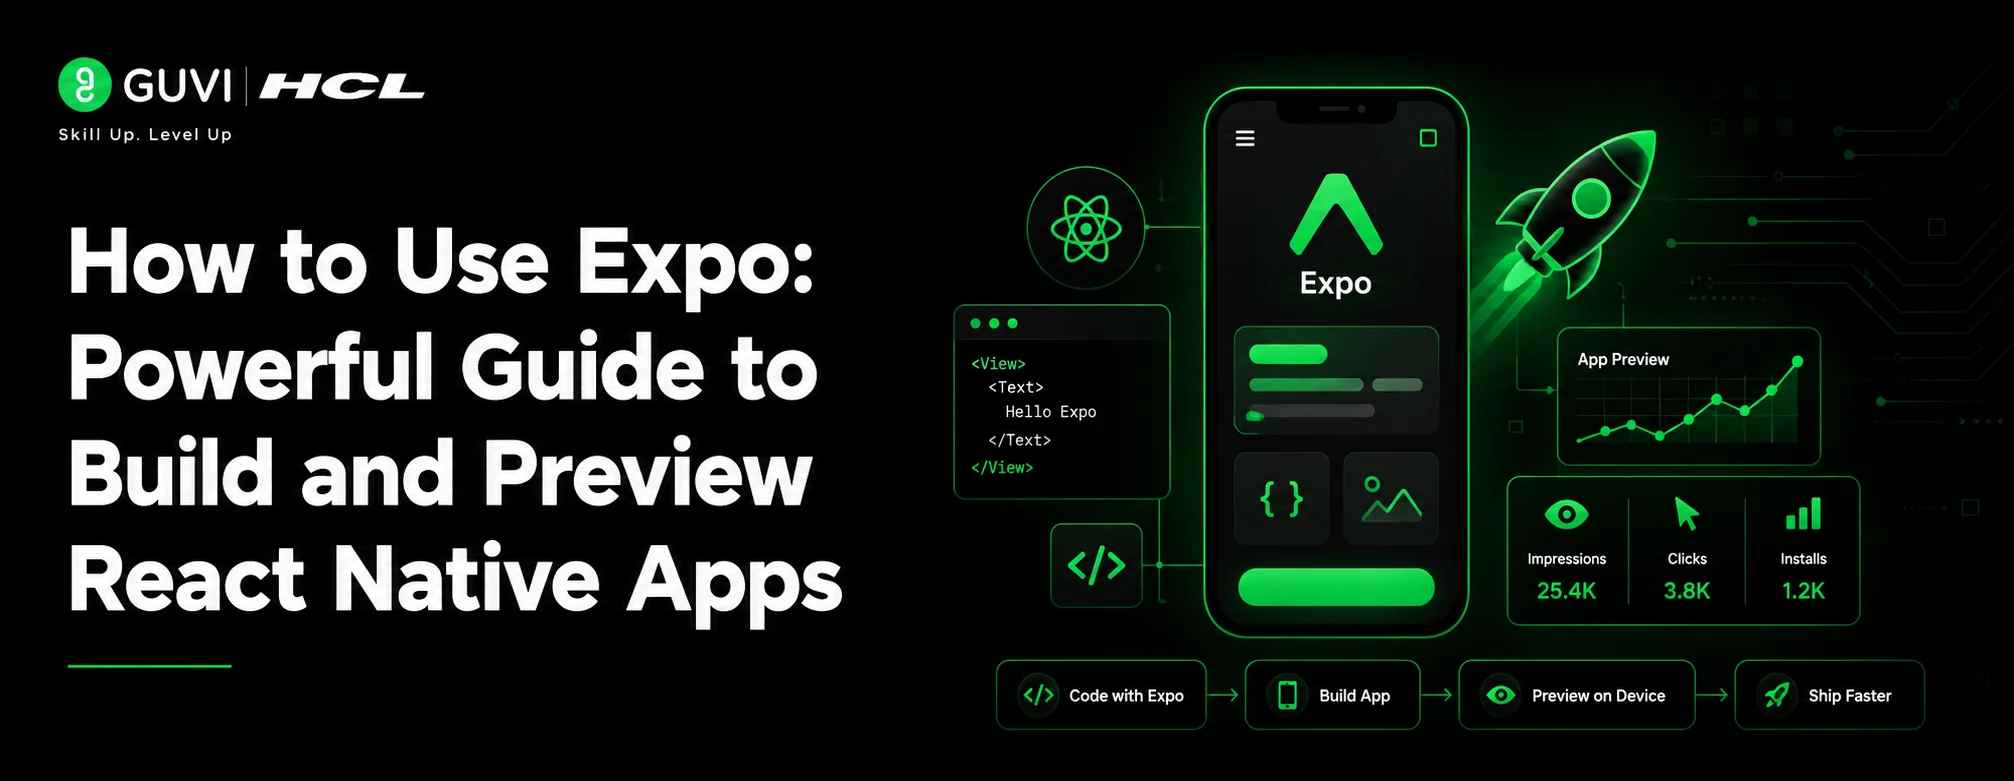
How to Use Expo: Powerful Guide to Build and Preview React Native Apps
Jul 09, 2026 8 Min Read 363 Views
(Last Updated)
Table of contents
- TL;DR Summary
- What is the Expo in React Native?
- What does Expo do?
- Simple Explanation
- Why Should Beginners Use Expo?
- Key Benefits of Expo
- Expo vs React Native CLI: What is the Difference?
- Which one should you choose?
- What Do You Need Before Using Expo?
- Prerequisites for Expo React Native Development
- Setup checklist for beginners
- How to Set Up Expo Step by Step
- Step 1: Create a new Expo project
- Step 2: Start the Expo development server
- Step 3: Install Expo Go on your phone
- What happens behind the scenes?
- How to Preview a React Native App Instantly with Expo Go
- Step-by-step Expo Go preview flow
- When Expo Go is enough
- How to Edit Your First Expo App Screen
- Simple Expo app example
- What should you try next?
- What Are Expo Development Builds?
- Simple Explanation
- When should you use development builds?
- What is the EAS Build in Expo?
- What can EAS Build create?
- Expo Go vs Development Build vs EAS Build
- Real-World Example of Using Expo
- Example: Food delivery MVP
- Common Mistakes to Avoid While Using Expo
- Using phone and laptop on different networks
- Thinking Expo Go supports every native library
- Confusing preview with production build
- Ignoring SDK compatibility
- Skipping basic React knowledge
- Best Practices for Beginners Using Expo
- Start with one simple screen
- Use Expo Go for early learning
- Keep your project folder clean
- Test on a real phone
- Learn debugging slowly
- Career Relevance: Why Expo Matters for Learners
- Skills you build with Expo
- Build Full Stack Skills With HCL GUVI
- Conclusion
- FAQs
- What is Expo used for in React Native?
- Is Expo good for beginners?
- How do I create a new Expo app?
- How do I preview an Expo app on my phone?
- Do I need Android Studio for Expo?
- Do I need Xcode for Expo iOS development?
- What is the difference between Expo Go and development builds?
- Can I build production apps with Expo?
- Is Expo better than React Native CLI?
- What should I build after my first Expo app?
TL;DR Summary
Expo helps you build and preview React Native apps instantly using JavaScript, React, and the Expo Go mobile app. To start, you need Node.js, a code editor, a mobile phone, and the create-expo-app command. After creating a project, you can run npx expo start, scan the QR code with Expo Go, and preview your app on Android or iOS without setting up Android Studio or Xcode first. Expo is best for beginners, prototypes, MVPs, and fast mobile app development.
Expo is one of the easiest ways to build and preview React Native apps without a complex native setup.
It lets you create a mobile app, run a local development server, scan a QR code, and instantly preview the app on your Android or iOS phone.
If you are a beginner, this guide will help you understand Expo, set it up, build your first app, preview it with Expo Go, and avoid common setup mistakes.
What is the Expo in React Native?
Expo is a React Native framework that gives you tools to create, preview, test, and build mobile apps faster.
In simple words, Expo removes a lot of early setup friction from React Native development.
Instead of configuring Android Studio and Xcode immediately, you can start with JavaScript, React, and the Expo Go app.
What does Expo do?
Expo helps you:
- Create a React Native project quickly
- Preview apps on Android and iOS using Expo Go
- Use built-in APIs for camera, location, notifications, media, and more
- Test changes instantly during development
- Build app binaries using EAS Build
- Share development previews with teammates
- Move faster from idea to working mobile app
This makes Expo especially useful for students, freshers, and beginners who want to build mobile apps without getting stuck in native setup errors.
Simple Explanation
Think of Expo as a ready-made development environment for React Native.
You write your app using JavaScript or TypeScript.
Expo handles many native setup tasks in the background, so you can focus on learning components, screens, navigation, and app logic first.
Why Should Beginners Use Expo?
Beginners should use Expo because it makes React Native app development faster and easier to start.
You do not need to install Android Studio or Xcode just to preview your first app on a phone.
This is helpful when your main goal is to learn app development, build a college project, create a portfolio app, or test an idea quickly.
Beginners can also explore React Native project ideas to practise Expo with simple, portfolio-friendly apps.
Key Benefits of Expo
Expo is useful because it offers:
- Quick project setup
- Instant preview through Expo Go
- Easier testing on real devices
- Less native configuration in the beginning
- Access to many ready-to-use APIs
- Support for Android, iOS, and web
- Cloud build support through EAS Build
For beginners, this means less time fixing setup errors and more time building useful screens.
Expo Go lets beginners preview React Native apps on a real Android or iOS phone without creating a full native build first. This makes it useful for quick learning, UI testing, college projects, MVPs, and early app demos before moving to development builds or EAS Build.
Expo vs React Native CLI: What is the Difference?
Expo and React Native CLI both help you build React Native apps, but they are not the same.
Expo gives you a faster, managed development workflow.
React Native CLI gives you direct access to native Android and iOS project files from the beginning.
Developers comparing mobile app development frameworks can also look at how Ionic and React Native differ before choosing a stack.
| Factor | Expo | React Native CLI |
| Setup difficulty | Easier for beginners | More technical |
| First app preview | Very fast with Expo Go | Needs emulator or native setup |
| Android Studio needed initially | Not required for Expo Go preview | Required for Android builds |
| Xcode needed initially | Not required for Expo Go preview | Required for iOS builds |
| Native folders | Not exposed by default in the managed flow | Available by default |
| Best for | Beginners, MVPs, prototypes, fast testing | Custom native apps and deeper platform control |
| Native module flexibility | Strong with Expo SDK and development builds | Full native control |
| App-store builds | Done through EAS Build or local builds | Done through native build tools |
Which one should you choose?
Choose Expo if you want to build and preview React Native apps quickly.
Choose React Native CLI if your app needs full native project control from day one.
For most beginners, Expo is the better starting point because it reduces setup complexity.
If you want to move beyond Expo later, learning proper React Native environment setup will help you understand native Android and iOS workflows.
What Do You Need Before Using Expo?
You need only a few tools to start building with Expo.
This is one of the biggest reasons beginners prefer it.
Prerequisites for Expo React Native Development
Before you start, install or prepare:
- Node.js LTS version
- npm, yarn, pnpm, or bun
- VS Code or any code editor
- Expo Go app on your Android or iOS phone
- A stable Wi-Fi connection
- Basic knowledge of JavaScript and React
- You write your app using JavaScript or TypeScript.
You can use Expo on Windows, macOS, or Linux.
For the first app preview, you do not need Android Studio or Xcode.
Setup checklist for beginners
Run these commands in your terminal:
node -v
npm -v
If both commands show version numbers, your basic setup is ready.
If not, install Node.js LTS first and then continue.
How to Set Up Expo Step by Step
Expo setup starts with creating a new project using create-expo-app.
This command creates a ready React Native project with Expo configuration.
Since Expo setup starts with terminal commands, basic command-line knowledge can make the workflow easier.
Step 1: Create a new Expo project
Open your terminal and run:
npx create-expo-app@latest MyFirstExpoApp
This creates a new Expo project named MyFirstExpoApp.
Now move into the project folder:
cd MyFirstExpoApp
Step 2: Start the Expo development server
Run this command:
npx expo start
This starts the Expo development server.
You will see a QR code in the terminal or browser-based developer tools.
Step 3: Install Expo Go on your phone
Install Expo Go from the Play Store or App Store.
Make sure your phone and laptop are connected to the same Wi-Fi network.
Now scan the QR code shown in the terminal.
Your React Native app should open instantly on your phone.
What happens behind the scenes?
When you run npx expo start, Expo starts a local development server.
Expo Go connects to that server and loads your app bundle.
When you edit your code and save the file, the app refreshes automatically.
This is what makes Expo feel instant for beginners.
How to Preview a React Native App Instantly with Expo Go
Expo Go is a mobile app that lets you preview your React Native project without building a native app file first.
It is the fastest way to test your app on a real Android or iOS device.
Step-by-step Expo Go preview flow
Follow this flow:
- Create an Expo project
- Run npx expo start
- Install Expo Go on your phone
- Connect phone and laptop to the same network
- Scan the QR code
- Preview the app instantly
- Edit code and save changes
- Watch the app update automatically
This workflow is perfect when you are learning React Native basics.
You can test layouts, buttons, screens, styling, and simple APIs without worrying about native build errors.
When Expo Go is enough
Expo Go is enough when your app uses supported Expo SDK features.
It is great for:
- Learning projects
- UI practice
- College mini projects
- Prototypes
- MVP screens
- Simple API-based apps
- Navigation practice
- Portfolio demos
If your app needs custom native code, you may need a development build instead.
You can use React Native app examples like to-do apps, weather apps, notes apps, and food ordering UIs to practise Expo Go previews.
How to Edit Your First Expo App Screen
Once your app is running, open the project in VS Code.
Find the main app file.
Depending on the template, it may be App.js, App.tsx, or a file inside the app folder if the project uses Expo Router.
For a simple beginner setup, open App.js or App.tsx.
Simple Expo app example
Replace the existing content with this:
import { StyleSheet, Text, View } from ‘react-native’;
export default function App() {
return (
<View style={styles.container}>
<Text style={styles.title}>My First Expo App</Text>
<Text style={styles.subtitle}>Previewed instantly with Expo Go</Text>
</View>
);
}
const styles = StyleSheet.create({
container: {
flex: 1,
alignItems: ‘center’,
justifyContent: ‘center’,
padding: 20,
},
title: {
fontSize: 26,
fontWeight: ‘700’,
textAlign: ‘center’,
},
subtitle: {
fontSize: 16,
marginTop: 12,
textAlign: ‘center’,
},
});
Save the file.
Your app should refresh automatically on your phone.
What should you try next?
After this first screen, try changing:
- Text content
- Font size
- Background colour
- Button layout
- Image component
- Screen spacing
- Component structure
These small changes help you understand React Native UI building faster.
What Are Expo Development Builds?
Expo development builds are custom versions of Expo Go made specifically for your app.
They are useful when your app needs native libraries or custom native configuration that Expo Go does not support.
Simple Explanation
Expo Go is a shared preview app.
A development build is your own preview app.
That means you can add native packages, custom configurations, and app-specific native features while still keeping a smooth Expo development workflow.
When should you use development builds?
Use a development build when your app needs:
- Custom native modules
- Native SDKs not available in Expo Go
- Advanced push notification setup
- Native payment SDKs
- Custom permissions
- App-specific native configuration
- More realistic testing before production
For example, if your app integrates a payment gateway SDK or a custom analytics SDK, Expo Go may not be enough.

A development build gives you more control without fully leaving the Expo ecosystem.
Expo is not only for beginner projects. With development builds and EAS Build, developers can add native modules, test custom app features, and create Android/iOS builds for real devices or app-store submission. This means learners can start simple with Expo Go and gradually move toward production-ready workflows.
What is the EAS Build in Expo?
EAS Build stands for Expo Application Services Build.
It helps you create installable app binaries for Android and iOS using cloud build infrastructure.
In simple words, EAS Build helps you move from “previewing the app” to “creating an app file for testing or store submission.”
What can EAS Build create?
EAS Build can help create:
- Android APK files
- Android AAB files
- iOS simulator builds
- iOS device builds
- Production builds for app stores
- Internal testing builds
This is useful when you want to test your app outside Expo Go or prepare it for Play Store and App Store submission.
Expo Go vs Development Build vs EAS Build
| Feature | Expo Go | Development Build | EAS Build |
| Main purpose | Instant preview | Custom app testing | Build app binaries |
| Best for | Beginners and simple apps | Apps with native modules | Testing and app-store builds |
| Needs custom native setup | No | Sometimes | Depends on build type |
| Works with QR preview | Yes | Yes, with dev client | Not mainly for preview |
| Suitable for production | No | No, mainly development | Yes |
Real-World Example of Using Expo
Imagine a startup in Chennai wants to test a food delivery app idea quickly.
The team needs to show a working prototype to college students, restaurant partners, and early investors.
Using Expo, one developer can quickly build screens for restaurant listing, menu items, cart, login, and order tracking.
Example: Food delivery MVP
The first version may include:
- Login screen
- Restaurant list
- Food item cards
- Cart screen
- Order confirmation page
- Basic API integration
- Location-based restaurant suggestions
With Expo Go, the founder can preview the app instantly on a phone and share the demo with teammates.
Once the idea is validated, the team can move to development builds and EAS Build for deeper testing and production builds.
This is why Expo is powerful for MVPs, college projects, hackathons, and startup prototypes.
Common Mistakes to Avoid While Using Expo
Expo is beginner-friendly, but mistakes can still happen.
Most beginner issues come from network problems, unsupported packages, or confusion between Expo Go and production builds.
Expo makes setup easier, but it does not replace React fundamentals.
1. Using phone and laptop on different networks
Expo Go needs to connect to your local development server.
If your phone and laptop are on different networks, the QR preview may fail.
Keep both devices on the same Wi-Fi network or use tunnel mode when needed.
2. Thinking Expo Go supports every native library
Expo Go supports many Expo SDK features, but not every custom native package.
If your app needs a package with custom native code, use a development build.
This avoids confusion when a package works in documentation but not inside Expo Go.
3. Confusing preview with production build
Expo Go is for development preview.
It is not the final app that users install from the Play Store or App Store.
Use EAS Build when you need installable APK, AAB, or iOS builds.
4. Ignoring SDK compatibility
Expo projects depend on Expo SDK versions.
If you install a package that does not match your SDK version, errors may occur.
Always check package compatibility before installing new libraries.
5. Skipping basic React knowledge
Expo makes setup easier, but it does not replace React fundamentals.
You still need to understand components, props, state, hooks, and styling.
Learn the basics before jumping into large app projects.
Best Practices for Beginners Using Expo
Expo is easiest when you follow a clean learning workflow.
Start small, test often, and avoid adding too many packages in the first project.
Start with one simple screen
Build one screen first.
Add text, buttons, images, and simple styles.
Once you understand the structure, move to multiple screens and navigation.
Use Expo Go for early learning
Expo Go is perfect for your first few projects.
Use it to understand UI, styling, components, API calls, and navigation.
Move to development builds only when your app needs custom native features.
Keep your project folder clean
Avoid spaces and special characters in folder names.
Use simple names like:
MyFirstExpoApp
StudentApp
FoodOrderApp
This reduces path-related errors.
Test on a real phone
A real phone helps you see how your app looks and behaves for actual users.
This is better than checking only a browser or simulator.
For mobile app learning, real-device testing builds confidence.
Learn debugging slowly
When an error appears, read the message carefully.
Most beginner errors are caused by wrong imports, missing packages, incorrect file paths, or network issues.
Fix one error at a time instead of changing too many things at once.
Learning JavaScript debugging will help you fix wrong imports, missing packages, file path issues, and runtime errors more confidently.
Career Relevance: Why Expo Matters for Learners
Expo is useful for learners because it helps you build mobile projects quickly.
For freshers, this is valuable because a working app is stronger than just mentioning React Native theory on a resume.
If you already know JavaScript and React, Expo can help you move into mobile app development faster.
You can build projects for college submissions, hackathons, internships, startup ideas, and portfolio demonstrations.
After building your first Expo app, you can upload your project to GitHub to showcase it in your portfolio.
Skills you build with Expo
By building your first Expo app, you learn:
- React Native project setup
- Mobile UI development
- Component-based thinking
- Styling in React Native
- Real-device testing
- Expo Go preview workflow
- Basic debugging
- App prototyping
- Build workflow basics through EAS
These skills help you take the first step toward React Native app development.
Build Full Stack Skills With HCL GUVI
Expo helps you build and preview React Native apps quickly, but creating real-world mobile applications also requires strong foundations in JavaScript, React, APIs, databases, debugging, Git, and deployment.
Explore HCL GUVI’s Full Stack Development Course to build practical development skills through hands-on projects, mentor-led learning, and career-focused training.
Conclusion
Expo is one of the fastest ways to start building and previewing React Native apps. It removes much of the early native setup, so you can focus on learning components, screens, styling, and app logic. With create-expo-app, Expo Go, and npx expo start, you can create and preview your first app within minutes. As your app grows, you can move to development builds and EAS Build for native features and production builds. Start with a simple app, test it on your phone, and keep improving it project by project.
FAQs
1. What is Expo used for in React Native?
Expo is used to create, preview, test, and build React Native apps faster. It gives beginners a simpler workflow with tools like Expo Go, Expo SDK, and EAS Build.
2. Is Expo good for beginners?
Yes, Expo is very beginner-friendly because it lets you preview apps on a phone without setting up Android Studio or Xcode at the start.
3. How do I create a new Expo app?
You can create a new Expo app by running npx create-expo-app@latest MyFirstExpoApp in your terminal.
4. How do I preview an Expo app on my phone?
Run npx expo start, install Expo Go on your phone, and scan the QR code shown in the terminal or browser window.
5. Do I need Android Studio for Expo?
You do not need Android Studio to preview your first app with Expo Go. You may need native tools later for advanced local builds or custom native development.
6. Do I need Xcode for Expo iOS development?
You do not need Xcode to preview a simple Expo app on an iPhone using Expo Go. However, iOS native builds and app-store workflows may require Apple tools or EAS Build.
7. What is the difference between Expo Go and development builds?
Expo Go is a shared app for previewing supported Expo projects. A development build is a custom version of your app that supports your own native modules and configurations.
8. Can I build production apps with Expo?
Yes, Expo can be used for production apps. EAS Build helps create Android and iOS binaries for testing and app-store submission.
9. Is Expo better than React Native CLI?
Expo is better for beginners, prototypes, and faster development. React Native CLI is better when you need full native control from the start.
10. What should I build after my first Expo app?
After your first Expo app, build a to-do app, student attendance app, weather app, food ordering UI, notes app, or API-based news app.
Success Stories

About the Author
Reemsha Khan
Always been a storyteller at heart. Now, I turn complex topics into simple, easy-to-understand stories through content. Hope you find it helpful.
View all posts by Reemsha Khan
Connect with me @




























Did you enjoy this article?