Post thumbnail
PROJECT

8 Beginner Python Projects to Kickstart Your Journey (with code)

Python’s popularity as a programming language is unmatched, securing its place as the most sought-after skill amongst developers, as highlighted by a 2020 Stack Overflow survey.

Its simplicity, coupled with an extensive library and compatibility across platforms, makes Python the go-to for beginners and seasoned programmers alike, embarking on Python projects like calculators, games, and web applications.

This article sets the stage for newcomers to dive into programming, offering 15 Python project ideas ranging from creating a simple calculator and tic-tac-toe game to more advanced ventures in web scrapping and AI with Python and Pandas.

These Python projects not only solidify the fundamentals but also inspire creativity and problem-solving, essential skills in the developers’ toolkit.

Table of contents


  1. Why Python Projects Matter for Beginners
  2. 8 Must-Know Python Projects for All Beginners
    • 1) Building a Simple Calculator
    • 2) Developing a Number Guessing Game
    • 3) Creating a Personal Contacts Book
    • 4) Building a Rock, Paper, Scissors Game
    • 5) Tic-Tac-Toe Game
    • 6) Basic Web Scraper
    • 7) Data Visualization with Python
    • 8) To-Do List Application
  3. Concluding Thoughts...
  4. FAQs
    • How to create a simple Python project?
    • What kind of projects can be created using Python?
    • How can I practice Python as a beginner?
    • What is == in Python?

Why Python Projects Matter for Beginners

Engaging in Python projects is crucial for beginners, providing a hands-on approach that complements theoretical learning. Here’s why starting with Python projects is beneficial:

  1. Practical Application of Knowledge: Beginners can apply what they’ve learned about Python syntax and structures in real-world scenarios, enhancing understanding and retention.
  2. Skill Development: Python projects like building calculators or games allow novices to practice defining functions, using conditional statements, and managing data flow.
  3. Community Engagement: The vast Python community offers support and resources, making learning interactive and less daunting for new programmers.
  4. Portfolio Building: Completing Python projects gives beginners tangible outcomes to showcase their skills, crucial for career advancement.
  5. Versatility of Python: Python’s use in diverse fields from web development to data science means learners can explore various interests and career paths.
  6. Cross-Platform Compatibility: Python’s ability to run on different operating systems without modification broadens learning and application opportunities.
  7. Automation and Efficiency: Python can automate mundane tasks, allowing beginners to focus on more complex and creative aspects of programming.

By starting with simple Python projects and gradually tackling more complex challenges, beginners not only build confidence but also make their learning journey exciting and productive.

Also Read: How to remove an element from a list in Python? 4 Methods

8 Must-Know Python Projects for All Beginners

Now, let us dive into our list of the top beginner-friendly Python projects that you can build on your own with the help of this article and a little curiosity.

1) Building a Simple Calculator

Essential Tools and Setup

To embark on creating a simple calculator in Python, you’ll need a few basic tools:

  1. Text Editor or Integrated Development Environment (IDE): Any text editor will suffice, though IDEs like PyCharm or Visual Studio Code offer additional features like syntax highlighting and code completion.
  2. Python Installation: Ensure Python is installed on your computer. You can download it from the official Python website.
  3. Understanding of Python Basics: Familiarity with Python syntax, variables, data types, and basic functions is crucial.

Must Read: What Is Python Used For?

Step-by-Step Guide to Building Your Calculator

Step 1: Set Up Your Project

Create a new Python file named calculator.py. This file will contain all your code.

Step 2: Gather User Inputs

Utilize the input() function to prompt users for two numbers:

num1 = float(input("Enter first number: "))
num2 = float(input("Enter second number: "))

Step 3: Implement Operation Choices

Allow the user to choose from five operations: addition, subtraction, multiplication, division, and exponents. Implement this using conditional statements:

operation = input("Choose the operation (+, -, *, /, ^): ")
if operation == '+':
    result = num1 + num2
elif operation == '-':
    result = num1 - num2
elif operation == '*':
    result = num1 * num2
elif operation == '/':
    result = num1 / num2
elif operation == '^':
    result = num1 ** num2
else:
    print("Invalid Input")

Step 4: Output the Result

Display the result using the print() function:

print(f"The result is {result}")

Step 5: Enhancements and Error Handling

To improve the calculator, consider:

  • Allowing multiple calculations without restarting the script.
  • Adding error handling for division by zero and non-integer inputs.
  • Implementing a loop to continue calculations until the user decides to exit.

Advanced Features and Further Learning

Once comfortable with the basics, explore adding more complex features like a graphical user interface using the tkinter library, or extending the calculator’s functionality with more mathematical operations.

These enhancements not only improve the utility of your calculator but also deepen your understanding of Python’s capabilities.

Would you like to master Python and learn to build impressive projects? Then GUVI’s self-paced Python with IIT-M Certification is the perfect choice for you, taught by industry experts, this course equips you with everything you need to know.

MDN

2) Developing a Number Guessing Game

Essential Components and Logic

To develop a number guessing game in Python, essential components include the use of the random module for generating numbers and conditional statements for evaluating guesses. Here’s a structured approach:

Step 1: Generate a Random Number

Use Python’s random module to generate a random number within a specified range:

import random
target_number = random.randint(lower_bound, upper_bound)

Step 2: Set Game Parameters

Define the range (lower_bound and upper_bound) and the maximum number of attempts:

lower_bound = 1
upper_bound = 100
max_attempts = 10

Step 3: Create the Guessing Loop

Initiate a loop that continues until the player guesses correctly or exhausts the maximum attempts:

for attempt in range(max_attempts):
    guess = int(input(f"Guess the number between {lower_bound} and {upper_bound}: "))
    if guess < target_number:
        print("Too low!")
    elif guess > target_number:
        print("Too high!")
    else:
        print("Congratulations! You guessed the number!")
        break

Also Explore: Popular 6 Python libraries for Parallel Processing

Enhancements and Customization

To make the game more engaging, consider adding features such as a scoring system, hints, or varying levels of difficulty:

  • Scoring System: Deduct points or give more points based on the number of attempts used.
  • Hints: Provide hints after certain incorrect guesses, such as indicating if the guess is far off or very close.
  • Levels of Difficulty: Implement levels by adjusting the range of numbers or the number of allowed attempts.

Advanced Features

For those looking to further enhance the game:

  • Time Limits: Introduce a time limit for each guess to add pressure and excitement.
  • Graphical User Interface (GUI): Use libraries tkinter to create a more interactive and visually appealing game interface.
  • Leaderboard: Maintain a record of high scores or fastest times to encourage competition among multiple players.

By following these steps and considering additional features, developers can create a fun and challenging number-guessing game that helps reinforce Python programming skills.

Must Explore: How to remove an element from a list in Python? 4 Methods

3) Creating a Personal Contacts Book

Initial Setup and Tools

To start building a personal contacts book with Python, the first step involves setting up a minimal yet functional PyQt GUI application. This serves as the foundation for the contacts book, allowing interactive user engagement.

  1. Project Structure: Establish a main package and an entry-point script to execute the application.
  2. GUI Development: Utilize PyQt to create the user interface, which includes a table view for displaying the contact list and buttons for adding, deleting, and clearing contacts.

Database Integration with SQLite

The backbone of the contacts book is its database, managed through SQLite with PyQt’s SQL support:

  1. Database Setup: Implement createConnection() to establish and open a database connection.
  2. Table Creation: Use _createContactsTable() to construct the contacts table within the database.
  3. Sample Data: Insert sample data into the database to facilitate testing and initial usage.

Managing Contacts

Developing functionalities to add, display, and update contacts involves several key components:

  1. Data Model: Create a ContactsModel class to manage interactions with the database table.
  2. View Integration: Connect the table view widget to the data model, ensuring that all contact information is accurately displayed.

User Interaction

Enhancing user experience through interactive dialogs and input validation is crucial:

  1. Adding Contacts: Introduce a pop-up dialog via the AddDialog class, allowing users to input new contact details such as name, job, and email.
  2. Input Processing: Implement the accept() slot to validate and process user input effectively.

Contact Management Class

For streamlined contact handling:

  1. Contact Class: Develop a Contact class with attributes like name and mobileNo, initialized in the class constructor.
  2. Information Display: Include a method showInfo() to print detailed contact information.

By following these steps, users can efficiently manage their personal contacts through a custom-built Python application, leveraging PyQt for GUI development and SQLite for database management.

This Python project not only enhances Python programming skills but also provides a practical tool for everyday use.

Also Read About The Role of AI in Predictive User Interface Design

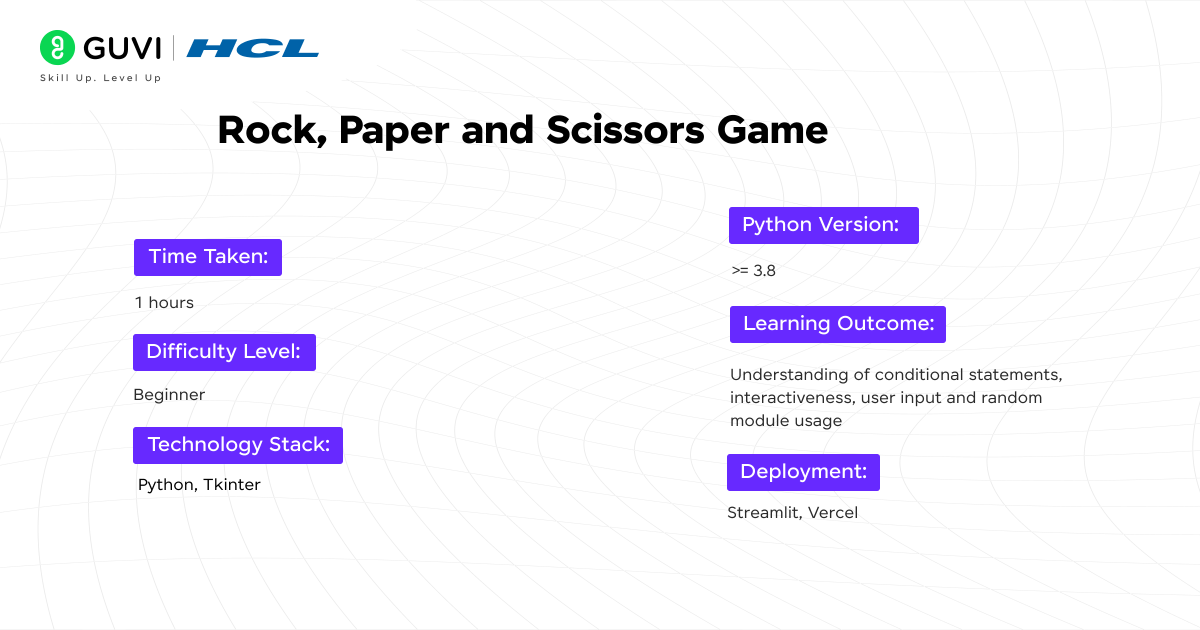
4) Building a Rock, Paper, Scissors Game

Essential Setup and Tools

To start building a Rock, Paper, Scissors game in Python, ensure you have the following:

  1. Python Installation: Confirm Python is installed on your system. You can download it from the official Python website.
  2. Text Editor: Use any text editor like Sublime Text or an Integrated Development Environment (IDE) such as PyCharm for writing and executing your code.

Step-by-Step Guide to Building the Game

Step 1: Import Required Modules

Begin by importing the random module, which is essential for enabling the computer to make random choices:

import random

Step 2: Define the Rules

Set up the possible actions for the game:

possible_actions = ["rock", "paper", "scissors"]

Step 3: Create the Game Loop

Implement a while loop to allow multiple rounds of the game:

while True:
    # Game implementation goes here

Step 4: Capture User Input

Use the input() function to receive the player’s choice:

user_action = input("Enter a choice (rock, paper, scissors): ")

Step 5: Computer’s Random Choice

The computer’s move is determined randomly from the possible actions:

computer_action = random.choice(possible_actions)

Step 6: Determine the Winner

Compare the user’s and the computer’s choices to determine the winner using conditional statements:

if user_action == computer_action:
    print(f"Both players selected {user_action}. It's a tie!")
elif user_action == "rock":
    if computer_action == "scissors":
        print("Rock smashes scissors! You win!")
    else:
        print("Paper covers rock! You lose.")
# Additional conditions to be added here

Step 7: Replay Option

Allow the player to choose whether to play another round:

play_again = input("Play again? (yes/no): ")
if play_again.lower() != "yes":
    break

Enhancements and Customization

To further enhance the game:

  • Add Color to Console: Utilize the colorama package to make the output more colorful and engaging.
  • Advanced Game Logic: Incorporate enum.IntEnum for action choices to avoid string comparison issues and streamline the code.

By following these steps, beginners can successfully create a fun and interactive Rock, Paper, Scissors game, while practicing essential Python programming concepts such as loops, conditionals, and user input handling.

Also Read: Python | List Of Lists Changes Reflected Across Sublists

5) Tic-Tac-Toe Game

Essential Components and Setup

To create a tic-tac-toe game using Python and Tkinter, it’s essential to understand the basic components:

  1. Tkinter GUI: The game utilizes Tkinter’s Frame and Button widgets to construct a 3×3 grid, providing a simple and interactive user interface.
  2. Python Classes: Core game functionalities are encapsulated within Python classes such as Player, Move, and TicTacToeGame.
  3. Game Logic: The game logic includes validating moves, checking for a winner or a tie, and toggling between players after each move.

Game Flow and Logic

The tic-tac-toe game flow involves several critical steps:

  1. Initializing the Game: Set up the game board using Tkinter widgets and initialize game states.
  2. Player Moves: Players interact with the game by clicking on the grid buttons, triggering the game logic to record their moves.
  3. Checking Game Status: After each move, the game checks for a win, tie, or continuation of the game.
  4. Updating the Board: The visual game board is updated to reflect each player’s move, enhancing the interactive experience.

Advanced Features and Player Options

To enhance the game and increase reusability:

  1. Replayability: Implement features allowing players to start a new game or exit once the current game concludes.
  2. Game Enhancements: Consider adding features like player score tracking, multiple game rounds, or different difficulty levels.

By following these guidelines, developers can build a functional and enjoyable tic-tac-toe game, providing a practical application of Python programming skills and GUI development.

Must Read: Top 5 Reasons to Choose Python for Game Development

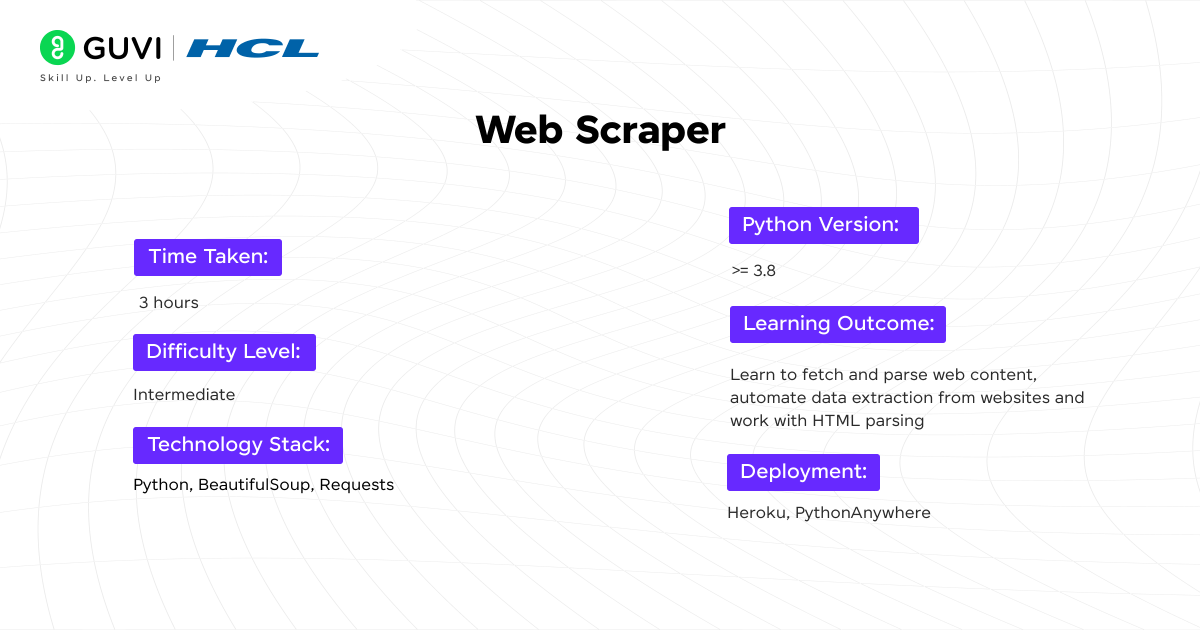
6) Basic Web Scraper

Essential Tools and Libraries

To embark on building a basic web scraper with Python, several key tools and libraries are indispensable:

  1. Python Environment: Ensure Python is installed on your system, and you can use Python’s built-in IDLE editor or any IDE of your choice for coding.
  2. Libraries for Web Scraping:
    • Requests: For making HTTP requests to retrieve web pages.
    • Beautiful Soup: For parsing HTML and XML documents.
    • Lxml: For processing XML and HTML in Python.
    • Selenium: For automating web browser interaction.
    • Urllib: For working with URLs.

Setting Up Your Web Scraper

Step 1: Install Necessary Libraries

pip install requests beautifulsoup4 lxml selenium

Step 2: Import Libraries

import requests
from bs4 import BeautifulSoup
import lxml
from selenium import webdriver

Step 3: Make a Request to a Web Page

url = 'http://example.com'
response = requests.get(url)
data = response.text

Step 4: Parse the HTML Content

soup = BeautifulSoup(data, 'lxml')

Extracting Data

Step 1: Locate Elements by ID or Class

Use methods to find elements by their HTML attributes:

posts = soup.find_all('div', class_='post-class')

Step 2: Extract Text and Attributes

Retrieve text or attributes from the HTML elements:

for post in posts:
    title = post.find('h2').text
    link = post.find('a')['href']
    print(title, link)

Interacting with Forms

For web scrapers that need to interact with forms:

from selenium import webdriver
driver = webdriver.Chrome()
driver.get(url)
search_box = driver.find_element_by_name('q')
search_box.send_keys('web scraping')
search_box.submit()

Scheduling Scraping Tasks

To automate and schedule scraping tasks:

import schedule
import time

def job():
    print("Scraping Website...")
    # Insert scraping code here

schedule.every(10).minutes.do(job)

while True:
    schedule.run_pending()
    time.sleep(1)

Practical Applications

Web scraping is highly beneficial for fields like data science and business intelligence, where up-to-date data is crucial.

Examples include creating a COVID-19 vaccine tracker or an email extractor, showcasing the versatility and power of Python in web scraping tasks.

Also Read: Best Python Deep Learning Libraries You Should Know!

7) Data Visualization with Python

Data visualization transforms complex data sets into visual graphics, making it easier to understand and analyze trends and patterns.

Python, with libraries like Matplotlib and Seaborn, offers robust tools for creating diverse visual representations.

Essential Visualization Types and Tools

  1. Matplotlib: Ideal for basic plotting such as line charts and bar graphs.
  2. Seaborn: Enhances Matplotlib with more options and simpler syntax for complex charts like heatmaps and violin plots.

Practical Python Project Ideas

1) Bar Charts and Time Series Visualization

  • Python Project: Analyze stock returns using data from financial websites like Yahoo Finance. Plot daily returns as a time series graph to identify trends and volatility.
  • Tools: Use Matplotlib for plotting the time series and Seaborn for creating detailed bar charts of aggregated data.

2) Analyzing Box Plots and Word Clouds

  • Python Project: Generate a box plot to compare the opening and closing prices of stocks. For text analysis, create a word cloud from movie reviews to visualize common words used.
  • Tools: Utilize Seaborn for box plots and Python libraries like WordCloud for generating word clouds.

3) Interactive Geographical Data Visualization

  • Python Project: Create an interactive map to display the distribution of bioluminescence organisms in Australia.
  • Tools: Implement this using Python’s Plotly library, which supports interactive features.

4) Advanced Graphical Representations

  • Python Project: Develop a race bar chart to show changes in the population of Turkish provinces over time.
  • Tools: Use Bar Chart Race in Python to animate the population growth and decline dynamically.

Each Python project enhances your understanding of Python’s capability in handling and visualizing data, making these skills applicable in various professional fields.

Project Link: data-visualization-python

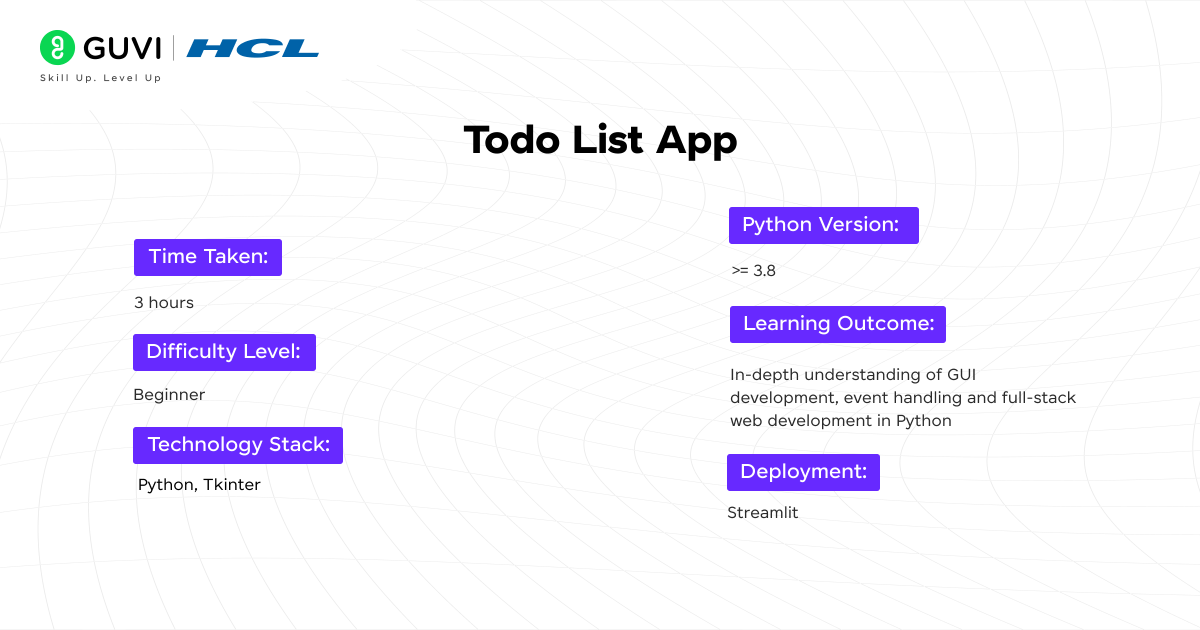
8) To-Do List Application

Creating a to-do list application is a practical Python project that can help beginners enhance their programming skills while creating a useful tool.

This Python project can be approached using various Python libraries such as PyQt5, Tkinter, or Django, depending on the desired complexity and user interface preferences.

Choosing the Right Library

For those new to Python or seeking to create a straightforward application, Tkinter offers an accessible starting point.

It is Python’s standard GUI library and provides basic elements like buttons, lists, and text entry fields, which are sufficient for a basic to-do list application.

Basic Features of a To-Do List Application

The core functionality of any to-do list application includes:

  1. Adding Tasks: Users should be able to input and add tasks to their list.
  2. Viewing Tasks: The application should display all the tasks that have been added.
  3. Marking Tasks as Done: Users need the option to mark tasks as completed.
  4. Deleting Tasks: The option to remove tasks from the list should also be available.

Step-by-Step Guide to Building a To-Do List with Tkinter

Step 1: Set Up Your Environment

Ensure Python is installed on your system and set up your IDE or text editor. For Tkinter, no additional installation is required as it comes built-in with Python.

Step 2: Import Tkinter

import tkinter as tk
from tkinter import messagebox

Step 3: Create the Main Application Window

root = tk.Tk()
root.title("To-Do List")

Step 4: Define Functions for Task Management

Define functions to add tasks, remove selected tasks, and mark tasks as complete.

def add_task():
    # Code to add the task
def remove_task():
    # Code to remove the task
def mark_task():
    # Code to mark the task as complete

Step 5: Set Up the GUI Layout

Use tkinter widgets to create the layout, including list boxes, buttons, and entry widgets.

tasks = tk.Listbox(root)
add_button = tk.Button(root, text="Add Task", command=add_task)
remove_button = tk.Button(root, text="Remove Task", command=remove_task)
mark_button = tk.Button(root, text="Mark as Done", command=mark_task)

Step 6: Main Loop

Keep the window running with the main loop of tkinter.

root.mainloop()

Advanced Features

Once the basic functionalities are in place, consider enhancing the application by adding features such as:

  • Task Prioritization: Allow users to set priorities for their tasks.
  • Due Dates: Include an option to add due dates to tasks.
  • Task Editing: Enable editing of existing tasks.

This Python project not only reinforces basic Python programming concepts such as using variables, loops, and functions but also provides a real-world application that users can continue to develop and use daily.

Also Explore: Top 20 Python Applications in the Real World

Would you like to master Python as well as Full Stack Development and build an impressive portfolio? Then GUVI’s Full Stack Development Bootcamp is the perfect choice for you, taught by industry experts, this boot camp equips you with everything you need to know along with extensive placement assistance!

Concluding Thoughts…

Each Python project discussed in this article, from creating basic calculators and games to web scraping and data visualization, serves not just as an exercise in coding, but as a stepping stone towards mastering Python.

By engaging with these Python projects, learners cultivate a practical understanding of Python’s syntax and its application across various domains, reinforcing the foundational skills requisite in the vast landscape of programming.

The significance of these Python projects transcends the immediate satisfaction of building something functional; it lies in the incremental development of problem-solving abilities, logical thinking, and creative innovations in programming solutions.

Must Read: 18 Famous Websites Built with Python in 2024

FAQs

How to create a simple Python project?

To create a simple Python project, start by defining your project goals, setting up a development environment, writing your code using Python syntax, and testing your project for functionality. Learn more with the article above.

What kind of projects can be created using Python?

Python is versatile and can be used for various projects including web development, data analysis, artificial intelligence, automation, and more.

How can I practice Python as a beginner?

Beginners can practice Python by solving coding challenges on platforms like LeetCode or HackerRank, building small projects, following online tutorials, and reading Python documentation.

MDN

What is == in Python?

In Python, the double equals sign (==) is used as the equality operator to compare if two values are equal.

Career transition

Did you enjoy this article?

Schedule 1:1 free counselling

Similar Articles

Share logo Whatsapp logo X logo LinkedIn logo Facebook logo Copy link
Free Webinar
Free Webinar Icon
Free Webinar
Get the latest notifications! 🔔
close
Table of contents Table of contents
Table of contents Articles
Close button

  1. Why Python Projects Matter for Beginners
  2. 8 Must-Know Python Projects for All Beginners
    • 1) Building a Simple Calculator
    • 2) Developing a Number Guessing Game
    • 3) Creating a Personal Contacts Book
    • 4) Building a Rock, Paper, Scissors Game
    • 5) Tic-Tac-Toe Game
    • 6) Basic Web Scraper
    • 7) Data Visualization with Python
    • 8) To-Do List Application
  3. Concluding Thoughts...
  4. FAQs
    • How to create a simple Python project?
    • What kind of projects can be created using Python?
    • How can I practice Python as a beginner?
    • What is == in Python?