

VFX Articles
Top 16 AI-Driven Tools for 3D Animation and VFX
VFX Artist Resume: A Comprehensive Guide With Examples
CGI vs VFX: Everything You Must-Know
How to Learn VFX in 2026: Complete Roadmap from Zero to Job-Ready


Get In Touch For Details! Request More Information

9 Must-Know VFX Project Ideas for Beginners in 2026
Sep 29, 2026 9 Min Read 18997 Views
(Last Updated)
A VFX project is one of the best ways to turn visual effects concepts into practical skills. Instead of learning tools only through tutorials, a beginner project gives you a clear outcome to build, test, improve, and add to your portfolio.
The nine VFX project ideas below progress from basic tracking and animation to more advanced simulations and CGI integration. You can start with the software you already have, then move to more complex tools as your skills improve.
By the end, you will know which project to start with, what each project teaches, and how to present your work as part of a beginner VFX portfolio.
Table of contents
- TL;DR; Summary
- What Is a VFX Project and Why Should Beginners Build One?
- Understanding VFX Project Fundamentals
- Core VFX Concepts and Terminology
- Essential software and tools
- Essential Software and Tools for a VFX Project
- Top 9 VFX Project Ideas for Beginners in 2026
- Beginner-Friendly Projects
- Intermediate Projects
- Advanced Projects
- How Should You Present a VFX Project in Your Portfolio?
- Common Mistakes to Avoid While Building a VFX Project
- Want to Build Stronger VFX Projects?
- Conclusion
- FAQs
- What is a VFX project?
- Which VFX project is best for a beginner?
- Can I make a VFX project using free software?
- How many VFX projects should I include in a beginner portfolio?
- Can AI create a complete VFX project?
- What makes a VFX project portfolio ready?
- Should I learn After Effects or Blender for VFX work?
- How long should a beginner VFX project be?
TL;DR; Summary
A good VFX project helps you learn visual effects by building something you can actually show in a portfolio. Beginners should start with motion tracking, text animation, glow effects, and weather simulation before moving to green screen compositing, day to night conversion, explosions, character integration, and photorealistic CGI.
Each project in this list develops a different skill such as tracking, masking, keying, particles, lighting, animation, or compositing. In 2026, tools such as Adobe After Effects, Blender, DaVinci Resolve with Fusion, Houdini, and Maya can support different project types and difficulty levels.
What Is a VFX Project and Why Should Beginners Build One?
A VFX project is a practical visual effects task where you create, modify, or combine digital elements with video or computer generated imagery. A beginner project may involve tracking text onto moving footage, replacing a green screen, creating rain, or adding a glowing object.
Building multiple projects helps you practise the main stages of an effects workflow: planning the shot, preparing assets, creating the effect, compositing layers, matching lighting and colour, testing the result, and rendering the final sequence.
A project based approach also gives you work you can show in a portfolio. Instead of saying you know tracking, keying, or compositing, you can show the final shot and explain how you created it.

- Skill Development: Master industry-standard tools like Adobe After Effects, Blender, and Nuke.
- Portfolio Building: Showcase your work to potential clients or employers.
- Creative Exploration: Experiment with unique effects to develop your artistic style.
- Career Opportunities: VFX skills are in high demand in industries like film, gaming, and advertising.
Understanding VFX Project Fundamentals
Let’s build a strong foundation before exploring specific VFX project ideas. Visual effects blend creativity, design, technology, and problem-solving to create stunning imagery that takes storytelling to new heights.
Core VFX Concepts and Terminology

Your path to VFX mastery starts with these fundamental concepts:
- Compositing: Combining different elements into a single cohesive image
- Motion Tracking: Matching digital elements with live footage movements
- Rotoscoping: Manual tracing of elements for precise VFX integration
- Keying: Using color (typically green or blue) as a matte layer
- Matte Painting: Creating digital environments and set extensions
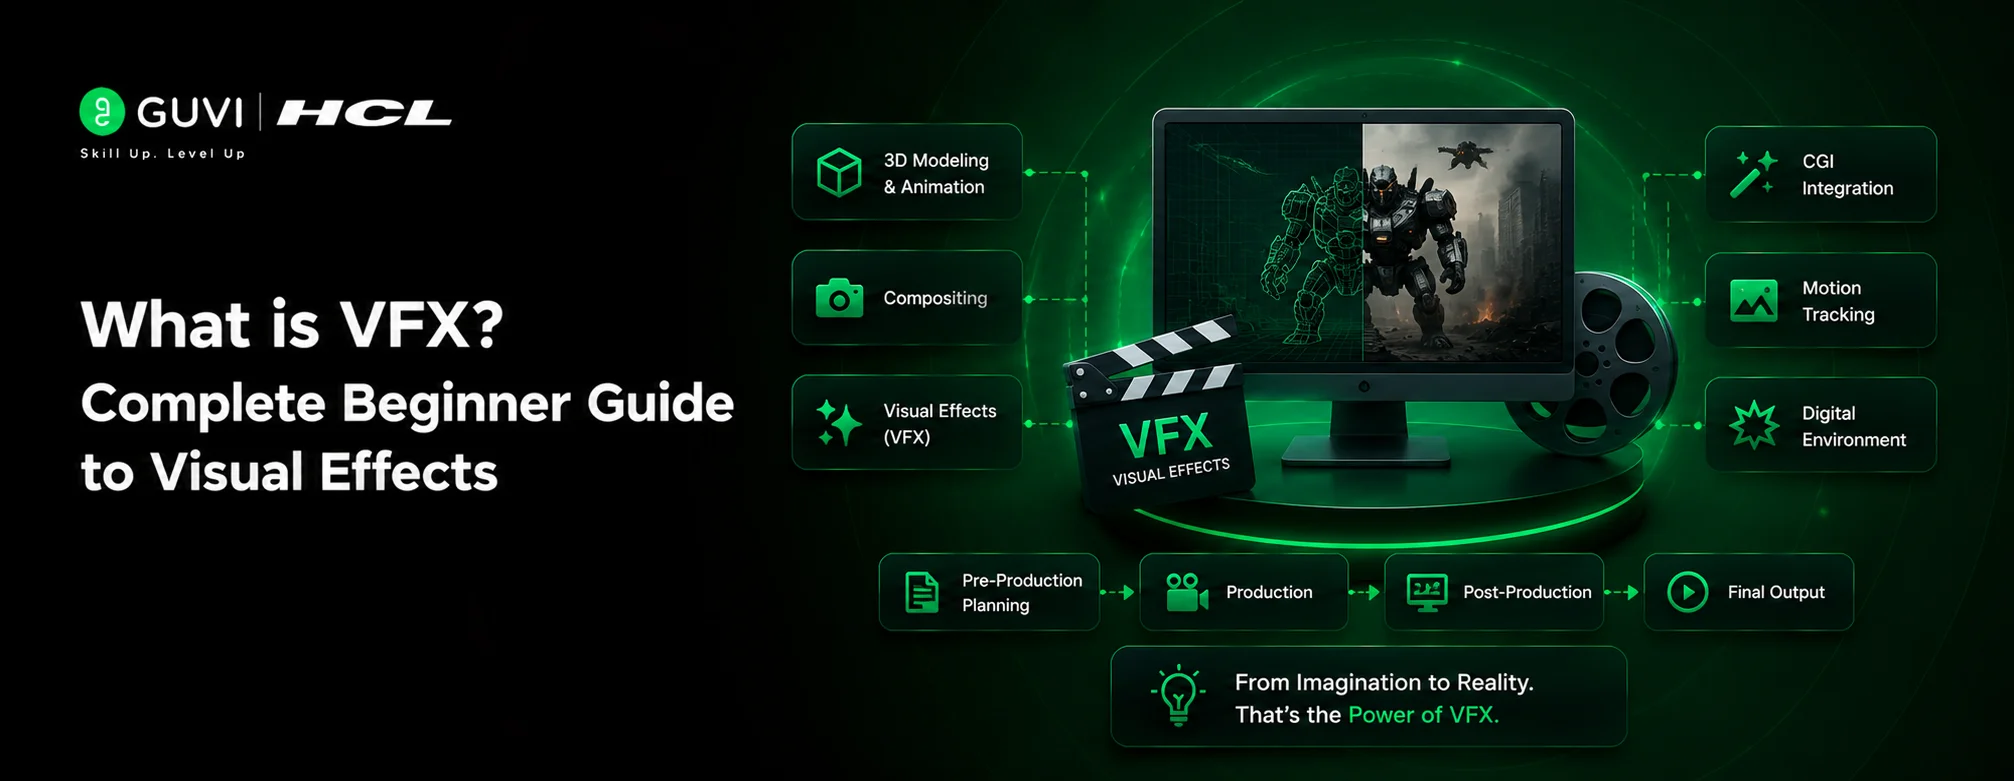
These concepts appear repeatedly across every VFX project in this guide. If you want a beginner friendly explanation before starting the projects, use HCL GUVI’s complete guide to what VFX is and how visual effects workflows work.
Essential software and tools
The VFX world depends on specific software tools. Each tool serves a unique purpose in your creative pipeline:
Essential Software and Tools for a VFX Project
The right software depends on the effect you want to build rather than on one “best” application.
| Software | Best Suited For |
| Adobe After Effects | Motion tracking, masking, keying, text animation, glow effects, and compositing |
| Blender | 3D modelling, animation, camera tracking, particles, simulations, and CGI integration |
| DaVinci Resolve with Fusion | Editing, colour grading, tracking, keying, and node based compositing |
| Nuke | Advanced node based compositing and professional VFX workflows |
| Houdini | Procedural effects, particles, smoke, fire, destruction, and simulations |
| Maya | 3D modelling, rigging, character animation, lighting, and rendering |
If you are still choosing software for your first project, compare HCL GUVI’s free VFX software for beginners and best VFX software guides before paying for a professional tool.
AI assisted tools are also becoming part of 3D animation and VFX workflows in 2026, especially for motion capture, rigging, concept generation, and repetitive production tasks. Use them to support your workflow, but keep the final creative and technical decisions under your control.
Top 9 VFX Project Ideas for Beginners in 2026
The best way to choose a project is to start with your VFX Career one core skill and increase the difficulty gradually. Begin with tracking, keyframes, masking, and simple compositing before moving into particles, character work, simulations, and realistic CGI integration.
The nine ideas below follow that progression. Keep the existing step by step instructions under each project, but replace the headings and opening paragraphs with the updated versions below.
Beginner-Friendly Projects
For those just starting with VFX, beginner projects focus on mastering the basics, such as using keyframes, layers, and simple effects. These projects are designed to familiarize users with essential tools and techniques while ensuring achievable results. Let’s get started with these first:
1. Simple Motion Tracking
Track a logo, label, or graphic onto a moving object in a short video. Keep the camera movement simple so you can focus on selecting good tracking points and correcting drift. This VFX project teaches motion tracking, keyframes, perspective, and motion blur.

Steps to Build:
- Import the Footage: Use software like Adobe After Effects or Blender. Ensure the video is well-lit and clear to simplify tracking.
- Identify a Tracking Point: Choose a distinct feature in the video, such as a corner, logo, or high-contrast object.
- Apply the Tracker Tool: Enable the motion tracking feature, set the tracker to follow the selected point frame by frame, and generate tracking data.
- Link Digital Assets: Import a text or object layer and bind its position to the tracking data, ensuring it moves naturally with the footage.
- Refine and Stabilize: Adjust keyframes to correct errors and add motion blur for realism.
What you’ll learn: By working on motion tracking, you’ll gain expertise in anchoring digital assets to real-world objects. You’ll learn to analyze video footage for distinct tracking points, use software tools like Adobe After Effects or Blender effectively, and fine-tune keyframes for seamless integration. This project also builds an understanding of motion dynamics, which is a cornerstone of creating realistic VFX.
Applications: Motion tracking is commonly used in advertisements to attach branding to moving elements, in vlogs to add interactive effects, and in AR apps for integrating virtual objects into real-world environments.
2. Adding Basic Text Animations
Create a short title sequence where text enters, changes, and exits with intentional movement. This project is useful for practising keyframes, easing, timing, typography, and layer controls without needing complex footage.

Steps to Build:
- Type the Text: Open a project in After Effects and create a text layer with your desired content.
- Select Animation Presets: Choose built-in animation options like “fade-in” or “typewriter effect.” These presets are easy to apply and modify.
- Customize Keyframes: Set keyframes for properties such as position, opacity, and rotation to create unique transitions.
- Enhance with Effects: Add shadows, glows, or colored strokes to make the text pop against the background.
- Polish with Easing: Apply easing effects like Easy Ease to smooth out abrupt movements and achieve a professional finish.
What you’ll learn: This project introduces you to text animation principles, helping you understand how to create smooth transitions using keyframes and easing effects. You’ll master using built-in animation presets, customizing typography, and adding visual elements like shadows and glows. These skills are essential for producing engaging titles, subtitles, or explanatory text for videos, enhancing their visual appeal.
Applications: Dynamic text animations are essential in creating YouTube videos, social media posts, and educational tutorials. They help convey information in a visually appealing way, ensuring viewer engagement.
3. Glowing Effects (e.g., Lightsaber or Neon Sign)
Use a neon sign, energy effect, or glowing prop to practise masking, tracking, blending modes, glow controls, and light interaction. The result should match the movement and lighting of the footage instead of looking like an effect placed on top.

Steps to Build:
- Prepare the Video Footage: Use footage featuring a physical object like a stick for a lightsaber or a signboard outline for neon lights.
- Mask the Object: In After Effects, use the Pen Tool to draw a mask around the object. Keyframe the mask’s position to track its movement.
- Apply Glow Filters: Add a glow effect to the masked layer and customize the intensity, radius, and color to achieve the desired illumination.
- Animate the Effect: If the object moves or interacts dynamically, ensure the glow’s intensity and position adapt accordingly.
- Add Secondary Lighting: Simulate the object’s light reflecting on nearby surfaces to increase realism.
What you’ll learn: Creating glowing effects teaches you about masking, blending modes, and glow filters. You’ll learn how to track and keyframe objects effectively, simulate lighting interactions with the surrounding environment, and use color theory to create visually stunning effects. This project improves your ability to add cinematic elements to scenes, making them more immersive and dramatic.
Applications: Glowing effects are widely used in sci-fi movies, advertisements for neon-lit products, and music videos with surreal or futuristic themes. They add a sense of vibrancy and intrigue to the visuals.
4. Simulating Rain or Snow
This project introduces particle systems and environmental compositing. Build the weather in layers so foreground and background particles have different sizes, speeds, blur, and opacity. Add reflections, mist, scene colour, and light changes to make the result more believable.

Steps to Build:
- Set Up a Particle Emitter: Use tools like Blender or After Effects to create an emitter. Configure it to release particles downward for rain or scatter them gently for snow.
- Customize Particle Properties: Adjust size, speed, opacity, and density to mimic real-world rain or snow. For instance, snowflakes are soft and slow, while raindrops are fast and sharp.
- Integrate with Footage: Composite the particle simulation over video footage, ensuring it matches the scene’s perspective and motion.
- Add Environmental Details: Include puddles, reflections, or fog for rain effects and soft light scatter for snow.
- Enhance with Depth of Field: Simulate focus differences to make particles closer to the camera appear sharper than those in the background.
What you’ll learn: Through this project, you’ll delve into the mechanics of particle systems and environmental compositing. You’ll understand how to simulate natural phenomena like rain or snow by customizing particle properties such as density, speed, and opacity. You’ll also learn how to integrate weather effects with live-action footage and enhance them with depth-of-field and atmospheric details.
Applications: These effects are frequently used in films to create melancholic or dramatic settings, in commercials for seasonal products, and in games to enhance realism in outdoor environments.
Intermediate Projects
Intermediate-level projects dive deeper into compositing, integration, and more complex effects. These projects push artists to balance realism and creativity while expanding their knowledge of advanced tools. I hope you enjoy building these as much as I did exploring about them:
5. Green Screen Compositing
Use evenly lit green screen footage and replace the background with another environment. Focus on creating a clean key, reducing colour spill, matching colour, adding believable shadows, and matching the sharpness of the foreground and background.

Steps to Build:
- Shoot Footage on a Green Screen: Ensure the screen is evenly lit to avoid shadows or color inconsistencies.
- Import into Software: Load the footage into tools like Adobe After Effects or DaVinci Resolve.
- Apply Chroma Keying: Use the chroma key tool to isolate and remove the green background.
- Insert a New Background: Add a digital environment, such as a cityscape, outer space, or a battlefield, behind the subject.
- Match Colors and Lighting: Adjust the foreground subject’s brightness, shadows, and color grading to blend seamlessly with the background.
What you’ll learn: Green screen compositing teaches you to isolate and replace backgrounds effectively, a skill critical for creating virtual environments. You’ll learn chroma keying techniques, color correction, and lighting adjustments to blend foreground and background elements seamlessly. This project improves your understanding of creating immersive environments and working with studio-shot footage.
Applications: Green screen compositing is a cornerstone of visual storytelling in movies, TV shows, and live-streamed content. It also powers virtual sets for interviews and e-learning modules.

6. Day-to-Night Scene Transformation
This project teaches colour grading, masking, relighting, and atmospheric effects. Instead of simply darkening daytime footage, adjust the sky, highlights, shadows, practical lights, windows, and colour temperature so the scene reads naturally as night.

By simulating a nighttime atmosphere, you’ll learn to create entirely new moods and settings for your footage. This skill is essential for crafting scenes that evoke emotion, suspense, or serenity. The ability to turn day into night seamlessly also showcases your expertise in storytelling through visual effects.
Steps to Build:
- Darken the Scene: Use color grading to reduce brightness and add cooler tones, mimicking the absence of sunlight.
- Simulate Night Lighting: Introduce artificial light sources, such as streetlights or moonlight, using light flares and gradients.
- Enhance Shadows: Deepen existing shadows and add subtle highlights for depth.
- Add Atmospheric Effects: Include elements like fog, noise, or distant stars for a cinematic touch.
- Refine Windows and Reflections: Mask windows to simulate internal lighting or reflections of nighttime elements.
What you’ll learn: This project provides a deep dive into color grading, shadow enhancement, and lighting simulations. You’ll learn how to manipulate footage to create entirely different moods, replicate natural and artificial light sources, and use masking for refined effects. Mastering this transformation enhances your ability to set the tone and atmosphere in storytelling.
Applications: This technique is invaluable in creating suspenseful or serene nighttime atmospheres in films, commercials, and social media storytelling.
7. Explosion Simulation
An explosion project is a useful intermediate challenge for learning particles, smoke, fire, debris, physics, lighting, and compositing. Start with a controlled shot and make the explosion affect the scene through light, shadows, smoke, and debris rather than appearing as an isolated overlay.

Explosion simulations require precision in layering elements and matching the surrounding environment for authenticity. Through this, you’ll gain invaluable insights into creating impactful and visually stunning effects for movies, games, and advertisements, showcasing your technical prowess and artistic flair.
Steps to Build:
- Create the Explosion Core: Use particle systems in Blender or Houdini to simulate fire and initial sparks.
- Add Smoke Trails: Configure secondary particle emitters for realistic smoke dispersal.
- Model Debris: Design fragments and simulate their motion using physics engines.
- Integrate into a Scene: Composite the explosion onto live-action footage, ensuring the scale and perspective are accurate.
- Add Dynamic Lighting: Simulate the illumination caused by the explosion on surrounding objects.
What you’ll learn: Simulating explosions helps you understand complex particle systems and physics simulations. You’ll gain insights into designing fire, smoke, and debris, and learn to synchronize their behavior for a cohesive effect. This project teaches dynamic lighting and compositing, allowing you to create highly realistic and impactful visuals for action-packed sequences.
Applications: Explosions are iconic in action films, video games, and simulations for educational or industrial purposes.
Advanced Projects
Advanced projects demand a high level of technical and artistic skill, focusing on photorealism, complex integrations, and dynamic effects. These projects challenge even seasoned professionals. And hence, you will need to have an expert-level VLSI skillset to start with these, let’s discuss them:
8. Full Character Animation and Interaction
Bringing a digital character to life is one of the most complex and rewarding VFX projects. This involves modeling, rigging, and animating a 3D character to interact naturally with live-action footage. You’ll learn how to replicate lifelike movements, synchronize interactions with actors or objects, and integrate lighting and shadows for a seamless blend.

This project enhances your understanding of biomechanics, storytelling, and attention to detail. Whether it’s creating a fantastical creature or a realistic humanoid, this project showcases your ability to merge creativity and technical expertise, essential for high-level work in animation or film production.
Steps to Build:
- Model the Character: Use software like Maya or Blender to design a detailed 3D character.
- Rig and Animate: Add a skeleton for movement and animate keyframes to define actions.
- Match Live-Action Timing: Sync the character’s movements with the footage to ensure seamless interaction.
- Blend Lighting and Shadows: Adjust the character’s lighting to match the environment’s source and add realistic shadows.
- Enhance with Textures: Apply high-quality textures and subtle imperfections for realism.
What you’ll learn: Building this project develops your skills in 3D modeling, rigging, and animation. You’ll learn to synchronize character movements with live-action footage, blend lighting and shadows seamlessly, and enhance realism through high-quality textures. This project significantly advances your technical and artistic abilities in creating lifelike digital characters.
Applications: This is used in blockbuster movies for integrating digital characters, in games for cutscenes, and in advertisements for creating memorable mascots.
9. Photo-Realistic CGI Integration
Photo-realistic CGI integration is the pinnacle of visual effects, requiring an acute sense of realism and meticulous attention to detail. This project involves designing and texturing 3D objects, matching live-action lighting conditions, and seamlessly blending them into real-world scenes.

You’ll work with advanced techniques like HDRI lighting, shadow matching, and camera parameter adjustments to ensure flawless alignment. The ability to integrate CGI elements convincingly into footage is highly sought after in industries like film, gaming, and advertising. Mastering this project will demonstrate your capability to create awe-inspiring visuals that blur the lines between reality and imagination.
Steps to Build:
- Design and Texture the Object: Model the CGI object with meticulous attention to detail and apply realistic textures.
- Capture Lighting Data: Use HDRI maps to replicate the scene’s natural lighting.
- Match Camera Parameters: Align the CGI camera’s focal length and perspective with the live-action footage.
- Composite the Scene: Overlay the CGI object onto the footage and refine blending properties.
- Add Environmental Effects: Introduce shadows, reflections, and environmental interactions for authenticity.
What you’ll learn: By working on CGI integration, you’ll master the art of blending digital objects with live-action footage. You’ll learn to design and texture objects realistically, replicate lighting conditions using HDRI, and match camera parameters for perfect alignment. This project hones your compositing skills and prepares you for professional-level VFX work, where realism is paramount.
Applications: This technique is widely used in architectural visualizations, product advertisements, and sci-fi films.
In 2026, AI assisted tools are increasingly used in animation and VFX for tasks such as markerless motion capture, rigging, concept generation, character animation, and production support. AI can speed up parts of production, but artists still need to judge composition, movement, lighting, continuity, and final quality.
How Should You Present a VFX Project in Your Portfolio?
Do not upload only the final shot. For each project, show a short breakdown containing the original footage, one or two work in progress stages, and the final composite. Mention the software and the specific technique you practised.
A beginner portfolio is stronger when every project demonstrates a different skill. One project can show tracking, another can demonstrate chroma keying, and another can focus on 3D integration. This makes your progress easier for recruiters, clients, and collaborators to understand.
If you want to turn these projects into a structured learning path, follow HCL GUVI’s 2026 guide on how to learn VFX from beginner level to job ready skills.
Common Mistakes to Avoid While Building a VFX Project
1. Choosing a project that is too advanced: Your first project should help you master one or two core skills before you attempt complex simulations.
2. Ignoring lighting and colour: A technically correct effect can still look fake if the digital element does not match the original footage.
3. Forgetting tracking and perspective: Any project that adds an object to moving footage needs believable position, scale, perspective, and motion.
4. Skipping test renders: Preview the shot at a lower quality before spending time on a full render. This helps you spot tracking, timing, and compositing problems earlier.
5. Showing only the final output: Include a short breakdown so viewers can understand what you created and which part of the shot was your work.
Want to Build Stronger VFX Projects?
If you want more structured practice, HCL GUVI’s Adobe After Effects for VFX course covers camera tracking, rotoscoping, masking, colour grading, compositing, and other practical workflows.
Use what you learn to create a project that demonstrates one specific technique, then repeat the process with increasingly difficult shots. This gives you a clearer learning path and useful work for your portfolio.
Conclusion
The best way to improve at visual effects is to complete one project at a time and understand why each shot works. Start with motion tracking, text, glow, or weather effects, then progress to compositing, simulations, character interaction, and CGI integration.
Do not try to make every project complex. A short, polished project with accurate tracking, lighting, colour, and compositing is more useful for learning than a large unfinished scene. In 2026, combine strong VFX fundamentals with modern software and AI assisted tools while keeping creative and technical judgement at the centre of your work.
FAQs
1. What is a VFX project?
A VFX project is a practical task in which you create or combine digital effects with footage or CGI. Beginners can use projects to practise tracking, compositing, masking, keying, particles, lighting, and animation.
2. Which VFX project is best for a beginner?
Simple motion tracking is a strong first project because it introduces footage analysis, tracking points, keyframes, positioning, and motion blur without requiring complex simulations.
3. Can I make a VFX project using free software?
Yes. Blender and the free version of DaVinci Resolve can support beginner workflows involving tracking, compositing, animation, colour work, and 3D elements.
4. How many VFX projects should I include in a beginner portfolio?
There is no fixed number. A small collection where every project demonstrates a different skill is more useful than many nearly identical effects.
5. Can AI create a complete VFX project?
AI can help with parts of production such as motion capture, rigging, asset generation, and experimentation. You still need to control the story, timing, composition, lighting, integration, and final quality.
6. What makes a VFX project portfolio ready?
A portfolio ready project should have a clear effect, clean execution, consistent lighting and colour, believable integration, and a short breakdown showing your contribution.
7. Should I learn After Effects or Blender for VFX work?
Choose based on the project. After Effects is useful for motion graphics and layer based compositing, while Blender is better when you need 3D modelling, animation, simulations, or CGI.
8. How long should a beginner VFX project be?
A beginner project can be only a few seconds long if it demonstrates the technique clearly. Focus on polishing the shot rather than making a long sequence.
Success Stories

About the Author
Reemsha Khan
Always been a storyteller at heart. Now, I turn complex topics into simple, easy-to-understand stories through content. Hope you find it helpful.
View all posts by Reemsha Khan
Connect with me @







Did you enjoy this article?