


AWS Kubernetes Articles
Crossplane Tutorial: A Practical Guide for Learners
Pulumi Infrastructure as Code Tutorial: A Beginner's Guide
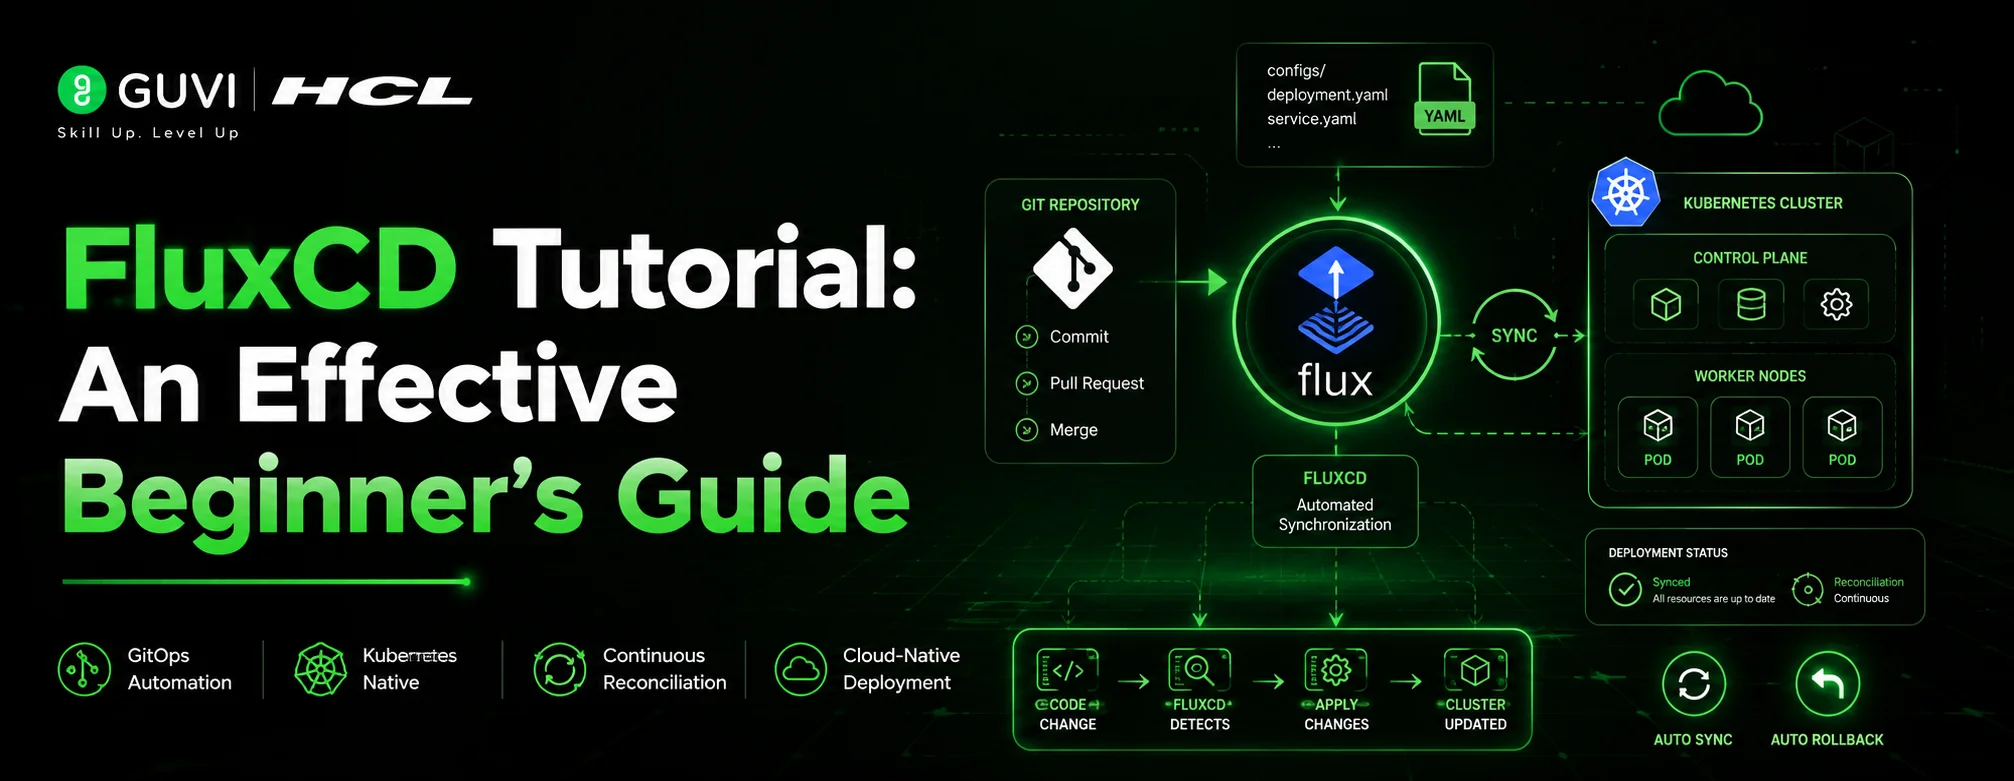
FluxCD Tutorial: An Effective Beginner's Guide
ArgoCD GitOps Tutorial: A Complete Beginner's Guide to Continuous Delivery


Get In Touch For Details! Request More Information
Istio Service Mesh Tutorial for Beginners
Jul 03, 2026 5 Min Read 34 Views
(Last Updated)
Something interesting happens as microservices grow: the code often becomes easier to manage than interservice communication. Suddenly, failed retries, certificate issues, and mysterious timeouts become everyday problems.
That’s where Istio steps in. If terms like mTLS, sidecars, and service mesh have always felt a bit mysterious, you’re about to see what they actually do and why so many Kubernetes teams rely on them.
Table of contents
- TL;DR Summary
- What Is Istio?
- How Does Istio Work in the Background?
- Why Does a Service Mesh Matter for Microservices?
- Step-by-Step Guide: Installing Istio for the First Time
- Common Beginner Mistakes
- Key Takeaways
- What to Do Next
- FAQs
- Is Istio difficult to learn for someone new to Kubernetes?
- Do I need Istio if I'm only running a handful of microservices?
- What's the difference between Istio's sidecar mode and ambient mode?
- Can Istio work with non-Kubernetes workloads?
- How does Istio handle service-to-service authentication?
TL;DR Summary
- Istio is an open-source service mesh that manages traffic, security, and observability between microservices without changing your application code.
- It works by attaching a lightweight Envoy proxy (“sidecar”) next to each service, so all traffic flows through a controllable, observable layer.
- Most beginners start with Istio’s demo profile on a local cluster (Minikube or kind) before touching production.
- The biggest beginner mistake is enabling Istio across an entire cluster on day one — start with one namespace.
- By the end of this guide, you’ll have a working mental model, a hands-on installation walkthrough, and a checklist for your first production rollout.
Istio’s data plane runs on Envoy, the battle-tested proxy technology used by companies like Lyft and parts of Google’s infrastructure at massive scale.
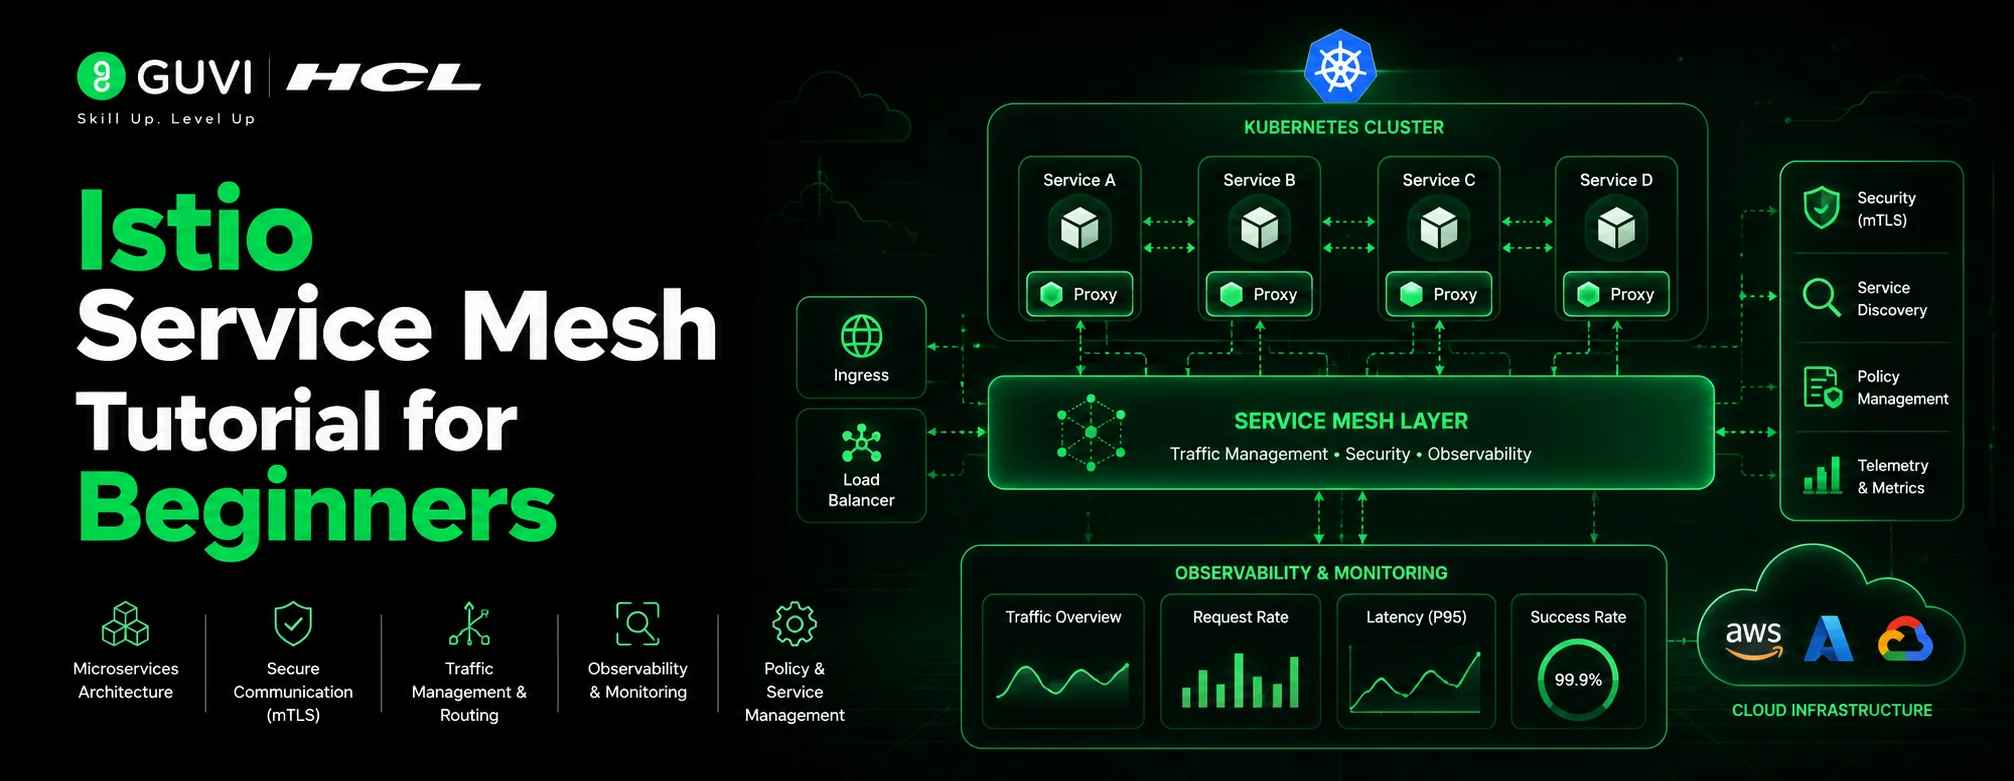
What Is Istio?
Istio is a service mesh — an infrastructure layer that handles communication between microservices so individual applications don’t have to. Think of it as a traffic control system sitting transparently between every service in your cluster, watching, securing, and routing every request that passes through.
Istio was originally developed by teams at Google, IBM, and Lyft, and it’s now a graduated project under the Cloud Native Computing Foundation [Source: Cloud Native Computing Foundation].
It runs on top of Kubernetes and uses Envoy, a high-performance proxy originally built at Lyft, as its data-handling engine.
A few core capabilities define what Istio actually does for your applications:
- Traffic management lets you control exactly how requests flow between services — splitting traffic between app versions, retrying failed calls automatically, and setting timeouts without touching application code.
This matters because it treats risky deployments, such as canary releases, as configuration changes rather than custom-built features.
- Security automatically encrypts service-to-service traffic using mutual TLS (mTLS), meaning both sides of a connection verify each other’s identities before any data is exchanged.
This closes a gap that a lot of teams don’t realize exists until a security audit flags unencrypted internal traffic.
- Observability provides metrics, logs, and distributed traces for every request that crosses the mesh, without instrumenting each service individually.
That’s the difference between guessing why a request was slow and actually seeing which of twelve downstream calls caused the delay.
Microservices run the internet. Time to learn what keeps them connected. Master traffic control, security, observability, and scaling with HCL GUVI’s Service Mesh Course. Build smarter systems. Ship bigger ideas. Stay ahead of the stack!
How Does Istio Work in the Background?
Istio’s architecture is split into two components: a data plane and a control plane. The data plane is the set of Envoy proxies deployed as sidecars — meaning one proxy container runs inside every pod alongside your application container.
The control plane, called Istiod, configures those proxies and keeps them in sync.
Here’s the part that trips up most beginners: your application no longer communicates directly with other services. Every inbound and outbound request is first intercepted by the local Envoy sidecar.
That sidecar enforces whatever rules Istiod has pushed down — encryption, routing, retries — completely outside your application code.
- Istiod is the brain of the mesh. It takes your configuration (written as Kubernetes custom resources), translates it into instructions that every Envoy proxy understands, and continuously pushes them out.
- Envoy sidecars are the muscle. Each one sits next to a single service instance, intercepting all inbound and outbound network traffic and applying policies in real time, without the application even knowing the proxy exists.
- The Kubernetes API server acts as the source of truth for configuration. Istio resources like VirtualService and DestinationRule get stored there just like any other Kubernetes object, which is why Istio feels native if you already know kubectl.
✅ Best Practice: Don’t try to learn Istio’s entire CRD (Custom Resource Definition) catalog at once. Start with just three resources — Gateway, VirtualService, and DestinationRule — since they cover roughly 80% of what beginners actually need in their first month.

Why Does a Service Mesh Matter for Microservices?
A service mesh matters because as the number of microservices grows, the complexity of managing their communication grows even faster.
With two or three services, you can handle retries and timeouts by hand in each codebase. With 30 services owned by 5 different teams, that approach breaks down quickly.
This is where the “why” behind Istio’s existence becomes obvious. Instead of every team reinventing retry logic, circuit breaking, and TLS handling in five different programming languages, the mesh handles it once, consistently, for everyone.
- Consistency across languages means a Python service and a Go service get the exact same retry behavior, timeout policy, and encryption — because the logic lives in the proxy, not the application runtime.
- Faster incident response comes from having one place to look — the mesh’s telemetry — instead of digging through five different logging systems built by five different teams with five different conventions.
- Safer deployments become possible because traffic-splitting rules let you send 5% of live traffic to a new version and watch error rates before committing further, all through configuration rather than custom feature flags.
Step-by-Step Guide: Installing Istio for the First Time
Now that you know what Istio does and why it exists, here’s how to actually get it running. This walkthrough assumes you have a local Kubernetes cluster (Minikube or kind) and kubectl already configured.
- Download the Istio CLI (istioctl). This tool handles installation, configuration validation, and diagnostics, and it’s the single most useful tool you’ll use while learning Istio. Run the official install script from istio.io and add the binary to your PATH.
- Install the demo profile. Run istioctl install –set profile=demo -y, which installs a configuration tuned for learning and experimentation rather than production hardening. The demo profile turns on more features than you’d want in production, which is exactly what makes it useful for exploring the system.
- Label your namespace for sidecar injection. Run kubectl label namespace default istio-injection=enabled, which tells Istio to automatically attach an Envoy sidecar to every new pod deployed into that namespace. Nothing happens to existing pods until you redeploy them.
- Deploy a sample application. Istio ships with a sample app called Bookinfo specifically for this purpose. Apply it using the standard manifest provided in the Istio documentation, then confirm that each pod shows 2/2 containers running — one app container and one Envoy sidecar.
- Verify the mesh with istioctl analyze. This command checks your configuration for common mistakes before they cause production issues, catching issues such as misconfigured gateways or missing destination rules. Get into the habit of running this after every change.
💡 Pro Tip: Run istioctl proxy-status after any configuration change. It shows you whether every Envoy sidecar in the mesh has actually synced the new config — a step beginners often skip, leading to confusion about “it works on some pods but not others”.
Common Beginner Mistakes
Most of the frustration beginners feel with Istio doesn’t come from the tool itself — it comes from skipping the on-ramp. A few patterns show up again and again.
- Enabling sidecar injection cluster-wide on day one. This turns every single pod restart into a potential mesh-related incident before your team has any operational familiarity with Istio. Start with one low-risk namespace and expand gradually as confidence builds.
- Ignoring mTLS mode mismatches. Istio can run in PERMISSIVE mode (accepting both encrypted and plaintext traffic) or STRICT mode (encryption only), and mixing the two across namespaces without understanding the difference causes mysterious connection failures. Check your PeerAuthentication policies before assuming a connectivity issue is something else.
- Treating the demo profile as production-ready. The demo profile enables tracing and access logging at a verbosity level that’s great for learning but expensive and noisy at scale. Always switch to a minimal or custom profile before going to production.
⚠️ Warning: Never copy Istio configuration examples from a blog post — including this one — directly into production without reviewing resource limits and mTLS policy. What’s appropriate for a tutorial cluster is rarely appropriate for live traffic.
Key Takeaways
- Istio is a service mesh, not a replacement for Kubernetes — it adds a control layer on top of your existing cluster rather than competing with it.
- The architecture splits into a control plane (Istiod) and a data plane (Envoy sidecars), and understanding that split makes every other concept click faster.
- Start small: one namespace, three core CRDs, and the demo profile before anything resembling production.
- Istio isn’t automatically the right choice — Linkerd and Cilium’s service meshes are legitimate alternatives, depending on team size and tolerance for complexity.
- istioctl analyze and istioctl proxy-status should become part of your regular workflow, not just troubleshooting tools you reach for during an outage.
- Real visibility gains often show up before security gains, especially in clusters that have grown organically with little cross-team coordination.
- Production readiness means moving off the demo profile and deliberately choosing your mTLS mode instead of accepting the defaults.
What to Do Next
- Spin up a local cluster with Minikube or kind and walk through the installation steps above with the Bookinfo sample app before touching any real service.
- Read through Istio’s official traffic management docs to understand VirtualService and DestinationRule in more depth than this tutorial can cover.
- Audit one existing namespace in your current cluster to identify which services would benefit most from mesh-level observability — that’s usually your best candidate for a pilot rollout.
FAQs
Is Istio difficult to learn for someone new to Kubernetes?
Istio has a learning curve, but it’s manageable if you know basic Kubernetes concepts like pods and namespaces.
Do I need Istio if I’m only running a handful of microservices?
Probably not. Istio usually makes more sense for larger environments with many services.
What’s the difference between Istio’s sidecar mode and ambient mode?
Sidecar mode uses a proxy for each pod, while ambient mode uses shared proxies to reduce overhead.
Can Istio work with non-Kubernetes workloads?
Yes, Istio can connect virtual machines and other non-Kubernetes workloads to the mesh.
How does Istio handle service-to-service authentication?
Istio uses mutual TLS (mTLS) to verify identities and automatically encrypt traffic.
Success Stories


Did you enjoy this article?