


Database Articles
SQL Window Functions: Practical Examples Every Analyst Needs
Microservices vs Monolith: Making the Right Architectural Choice


Get In Touch For Details! Request More Information
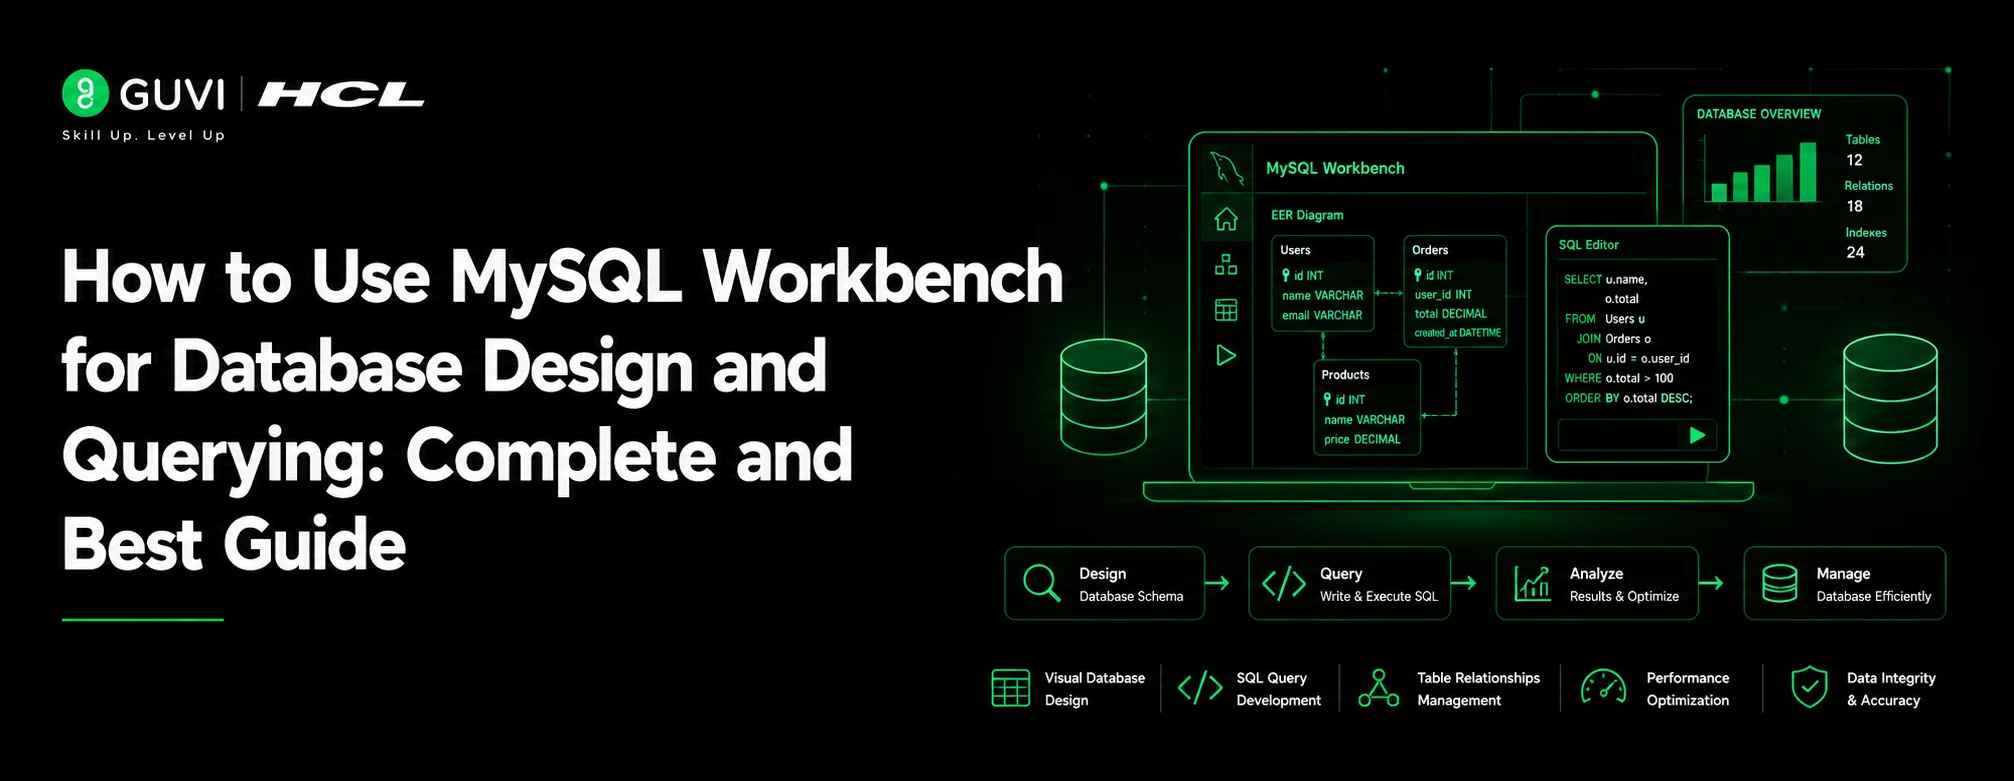
How to Use MySQL Workbench for Database Design and Querying: Complete and Best Guide
Jul 09, 2026 8 Min Read 431 Views
(Last Updated)
Table of contents
- TL;DR Summary
- What is MySQL Workbench?
- Why Use MySQL Workbench for Database Design and Querying?
- Key MySQL Workbench Features Beginners Should Know
- How to Install and Set Up MySQL Workbench
- How to Create a Database in MySQL Workbench
- Method 1: Create a Database Using SQL Query
- Method 2: Create a Database Using the GUI
- How to Design Tables in MySQL Workbench
- Example: Create a Students Table
- Create a Table Using the GUI
- How to Create Relationships Between Tables
- Example: Courses Table
- Example: Enrollments Table With Foreign Keys
- How to Create an ER Diagram in MySQL Workbench
- How to Write and Run SQL Queries in MySQL Workbench
- Insert Data
- View Data
- Filter Data
- Update Data
- Delete Data
- How to View, Edit, and Export Query Results
- Forward Engineering vs Reverse Engineering in MySQL Workbench
- Forward Engineering Example
- Reverse Engineering Example
- Real-World Example: Designing a Student Management Database
- Common MySQL Workbench Errors Beginners Face
- Cannot Connect to MySQL Server
- Access Denied for User
- Unknown Database
- Table Already Exists
- Foreign Key Constraint Fails
- Common Mistakes to Avoid When Using MySQL Workbench
- Confusing Schema and Database
- Not Selecting the Database Before Running Queries
- Forgetting Primary Keys
- Creating Tables Without Relationships
- Using Wrong Data Types
- Running DELETE or UPDATE Without WHERE
- Best Practices for Database Design in MySQL Workbench
- Build Full Stack Skills With HCL GUVI
- Final Thoughts
- FAQs
- What is MySQL Workbench used for?
- How do I create a database in MySQL Workbench?
- Is the schema the same as the database in MySQL Workbench?
- How do I write SQL queries in MySQL Workbench?
- How do I create tables in MySQL Workbench?
- What is an ER diagram in MySQL Workbench?
- What is forward engineering in MySQL Workbench?
- What is reverse engineering in MySQL Workbench?
- Can beginners use MySQL Workbench?
- Do I need coding knowledge to use MySQL Workbench?
TL;DR Summary
MySQL Workbench is a visual tool used to design databases, create tables, build ER diagrams, write SQL queries, and manage MySQL databases. To use MySQL Workbench, create a connection, open the SQL editor, create a database, design tables with primary and foreign keys, add relationships, and run queries to insert, view, update, or delete data. It is useful for beginners because it combines database design and querying in one graphical interface.
If you are learning SQL or database design, knowing how to use MySQL Workbench can make your learning much easier.
MySQL Workbench gives you a visual interface where you can create databases, design tables, build ER diagrams, write SQL queries, and view results without depending only on the command line.
For beginners, it is one of the most useful tools because it helps you understand both the structure of a database and the queries used to work with it.
In this guide, you will learn how to use MySQL Workbench for database design and querying with simple steps and practical examples.
What is MySQL Workbench?
MySQL Workbench is a graphical tool used to work with MySQL servers and databases.
In simple words, it helps you manage databases visually instead of writing every command manually in a terminal. You can use it to create databases, design tables, write SQL queries, create ER diagrams, manage connections, and inspect query results.
For example, if you want to create a student database, you can use MySQL Workbench to create tables like students, courses, and enrollments. You can also connect these tables using relationships and run SQL queries to view student records.
It is useful for students, backend developers, data analysts, database learners, and anyone who wants to understand how databases are designed and queried.
Since MySQL Workbench is used for creating and managing databases, beginners should also understand the basics of database management before working on larger projects.
Why Use MySQL Workbench for Database Design and Querying?
MySQL Workbench is useful because it combines visual database design and SQL querying in one place.
If you are a beginner, writing SQL commands directly can feel confusing at first. MySQL Workbench makes this easier by giving you a visual interface to create schemas, tables, relationships, and diagrams.
You can use MySQL Workbench to:
- Create and manage databases
- Design tables and columns
- Add primary keys and foreign keys
- Build ER diagrams
- Write and run SQL queries
- View query results
- Export data
- Reverse engineer an existing database
- Forward engineer a visual model into SQL tables
This makes it a practical tool for learning SQL, DBMS, database design, backend development, and data analytics.
If you want to understand how databases fit into larger applications, learning database design in system design can also help you connect database structure with real software architecture.
Key MySQL Workbench Features Beginners Should Know
Before using MySQL Workbench, you should understand its main features.
| Feature | What It Does |
| SQL Editor | Lets you write and run SQL queries |
| Schema Navigator | Shows databases, tables, views, and stored procedures |
| Table Editor | Helps create and modify table structure |
| EER Diagram | Shows tables and relationships visually |
| Forward Engineering | Converts a visual database model into a real database |
| Reverse Engineering | Creates a visual model from an existing database |
| Result Grid | Displays query output in rows and columns |
| Data Export and Import | Helps export or import database data |
You do not need to master every feature on day one. Start with connections, databases, tables, relationships, and SQL queries first.
How to Install and Set Up MySQL Workbench
To use MySQL Workbench, you need two things:
- MySQL Server
- MySQL Workbench
MySQL Server stores and runs your databases. MySQL Workbench is the visual tool used to connect to that server and work with databases.
Here is the basic setup process:
- Download and install MySQL Installer from the official MySQL website.
- Install MySQL Server and MySQL Workbench.
- Set a root password during installation.
- Open MySQL Workbench.
- Create or open a MySQL connection.
- Test the connection.
- Start using the SQL editor and schema navigator.
The exact interface may look slightly different based on your MySQL Workbench version, but the basic workflow remains the same.
How to Create a Database in MySQL Workbench
In MySQL Workbench, a database is often shown as a schema.
So, if you see the word “schema” in MySQL Workbench, beginners can understand it as the database they are working with.
There are two common ways to create a database in MySQL Workbench.
Method 1: Create a Database Using SQL Query
Open MySQL Workbench and connect to your local server.
Then open a new SQL tab and run this query:
CREATE DATABASE student_management;
After running the query, refresh the Schemas panel. You should see the new database name.
To start using the database, run:
USE student_management;
This tells MySQL that all upcoming table creation and queries should happen inside this database.
Method 2: Create a Database Using the GUI
You can also create a database visually.
Follow these steps:
- Open MySQL Workbench.
- Connect to your MySQL server.
- Go to the Schemas panel.
- Right-click in the Schemas area.
- Click Create Schema.
- Enter the database name.
- Click Apply.
- Review the SQL script.
- Click Apply again.
- Refresh the schema list.
This method is useful for beginners because you can see how MySQL Workbench generates SQL behind the scenes.
How to Design Tables in MySQL Workbench
A table stores data in rows and columns.
For example, in a student management database, you may need tables like:
- students
- courses
- enrollments
Each table should have clear columns, data types, and keys.
Example: Create a Students Table
You can create a table using SQL like this:
CREATE TABLE students (
student_id INT PRIMARY KEY AUTO_INCREMENT,
student_name VARCHAR(100) NOT NULL,
email VARCHAR(100) UNIQUE,
age INT,
city VARCHAR(50)
);
Here is what each part means:
- student_id is the primary key.
- AUTO_INCREMENT automatically creates a new ID.
- VARCHAR(100) stores text.
- NOT NULL means the value cannot be empty.
- UNIQUE means duplicate email values are not allowed.
Create a Table Using the GUI
You can also create a table visually.
Follow these steps:
- Expand your database in the Schemas panel.
- Right-click Tables.
- Click Create Table.
- Enter the table name.
- Add column names.
- Choose data types.
- Select the primary key if needed.
- Click Apply.
- Review the generated SQL.
- Click Apply again.
This is a good way to understand how tables are structured before writing complex SQL.
How to Create Relationships Between Tables
Relationships connect tables with each other.
For example, one student can enroll in many courses. So, the enrollments table should connect students and courses.
This is usually done using a foreign key.
A primary key uniquely identifies a row in one table. A foreign key connects one table to the primary key of another table.
Example: Courses Table
CREATE TABLE courses (
course_id INT PRIMARY KEY AUTO_INCREMENT,
course_name VARCHAR(100) NOT NULL,
duration_months INT
);
Example: Enrollments Table With Foreign Keys
CREATE TABLE enrollments (
enrollment_id INT PRIMARY KEY AUTO_INCREMENT,
student_id INT,
course_id INT,
enrollment_date DATE,
FOREIGN KEY (student_id) REFERENCES students(student_id),
FOREIGN KEY (course_id) REFERENCES courses(course_id)
);
In this example:
- student_id connects enrollments to the students table.
- course_id connects enrollments to the courses table.
- The enrollments table works like a bridge between students and courses.
This type of relationship is common in real database design.
How to Create an ER Diagram in MySQL Workbench
An ER diagram, or Entity Relationship diagram, visually shows tables and their relationships.
In MySQL Workbench, ER diagrams are usually created using EER diagrams. EER stands for Enhanced Entity Relationship.
To create an ER diagram:
- Open MySQL Workbench.
- Go to File.
- Select New Model.
- Click Add Diagram.
- Add tables to the diagram.
- Add columns and primary keys.
- Create relationships between tables.
- Save the model.
You can use the relationship tools in the left toolbar to connect tables.
For beginners, ER diagrams are helpful because they show how the database is designed before you start writing queries.
To understand this better with a practical example, you can also explore how an ER diagram is created for a hospital management system.
Here’s a quick visual overview of how MySQL Workbench takes you from database design to SQL querying in one workflow.
How to Write and Run SQL Queries in MySQL Workbench
The SQL editor is where you write and run SQL queries.
To open it:
- Open MySQL Workbench.
- Click your MySQL connection.
- Open a new SQL tab.
- Select your database using USE database_name;.
- Write your query.
- Click the lightning icon to run it.
Insert Data
INSERT INTO students (student_name, email, age, city)
VALUES (‘Aarav Sharma’, ‘[email protected]’, 21, ‘Chennai’);
View Data
SELECT * FROM students;
Filter Data
SELECT student_name, city
FROM students
WHERE city = ‘Chennai’;
Update Data
UPDATE students
SET city = ‘Bengaluru’
WHERE student_id = 1;
Delete Data
DELETE FROM students
WHERE student_id = 1;
Always be careful while using UPDATE and DELETE. Use a WHERE condition, otherwise you may update or delete many records by mistake.
How to View, Edit, and Export Query Results
After running a query, MySQL Workbench shows the output in the result grid.
The result grid displays data in rows and columns. It helps you quickly check whether your query worked correctly.
You can use the result grid to:
- View query output
- Check inserted records
- Edit table data in some cases
- Copy selected rows
- Export results
- Inspect column values
To export query results, look for the export option near the result grid. Depending on your version, you may be able to export results as CSV, JSON, Excel, or other formats.

This is useful when you want to use query results in reports, assignments, projects, or analysis.
Forward Engineering vs Reverse Engineering in MySQL Workbench
Forward engineering and reverse engineering are two important features in MySQL Workbench.
| Feature | Meaning | When to Use |
| Forward Engineering | Converts a visual database model into a real database | When you design the database first and then want to create it in MySQL |
| Reverse Engineering | Converts an existing database into a visual model | When you already have a database and want to understand its structure visually |
Forward Engineering Example
Suppose you create an ER diagram with students, courses, and enrollments tables.
Using forward engineering, MySQL Workbench can generate the SQL script and create those tables in your actual database.
Reverse Engineering Example
Suppose you already have a database created by someone else.
Using reverse engineering, MySQL Workbench can generate an ER diagram from that database so you can understand the tables and relationships visually.
Both features are useful for learning, project planning, and real-world database work.
Real-World Example: Designing a Student Management Database
Let us understand MySQL Workbench with a simple student management database.
Imagine a college wants to store student details, course details, and enrollment records.
The database may need three tables:
- students
- courses
- enrollments
The students table stores student name, email, age, and city.
The courses table stores course name and duration.
The enrollments table connects students with courses and stores the enrollment date.
This design helps answer questions like:
- Which students joined a course?
- How many students are enrolled in each course?
- Which city has the highest number of students?
- Which courses are most popular?
This is why database design matters. A good design makes querying easier, reporting cleaner, and data management more reliable.
Once you understand this workflow, you can try more SQL project ideas to practise database creation, table design, relationships, and queries.
Common MySQL Workbench Errors Beginners Face
Beginners often face small errors while using MySQL Workbench. Most of them are easy to fix once you understand the reason.
1. Cannot Connect to MySQL Server
This usually happens when MySQL Server is not running or the connection details are wrong.
Check the hostname, port, username, password, and server status.
2. Access Denied for User
This error usually means the username or password is incorrect.
Try entering the correct password or check whether your MySQL user has the required permissions.
3. Unknown Database
This happens when you try to use a database that does not exist.
Create the database first or check the spelling of the database name.
4. Table Already Exists
This happens when you try to create a table with a name that already exists.
Use a different table name or drop the old table only if you are sure you do not need it.
5. Foreign Key Constraint Fails
This usually happens when the foreign key value does not match a valid primary key in the parent table.
Check whether the referenced table and column already have the required value.
Common Mistakes to Avoid When Using MySQL Workbench
MySQL Workbench is beginner-friendly, but beginners still make a few common mistakes.
1. Confusing Schema and Database
In MySQL Workbench, schema and database are often used in a similar way. If you create a schema, you are usually creating a database.
2. Not Selecting the Database Before Running Queries
If you do not select the correct database, MySQL may not know where to create the table.
Use:
USE student_management;
before creating tables or running queries.
3. Forgetting Primary Keys
Every important table should usually have a primary key.
A primary key helps identify each row uniquely.
4. Creating Tables Without Relationships
If tables are not connected properly, your database design can become messy.
Use foreign keys to create meaningful relationships between tables.
5. Using Wrong Data Types
Do not store numbers as text or dates as plain strings.
Choose proper data types like INT, VARCHAR, DATE, and DECIMAL.
6. Running DELETE or UPDATE Without WHERE
This is a serious mistake.
Always add a WHERE condition when updating or deleting specific records.
Best Practices for Database Design in MySQL Workbench
Good database design makes querying easier and reduces errors later.
Follow these best practices:
- Use clear table names like students, courses, and orders.
- Use meaningful column names like student_id and course_name.
- Add primary keys to important tables.
- Use foreign keys to connect related tables.
- Avoid storing duplicate data.
- Choose the correct data type for every column.
- Keep table structure simple in the beginning.
- Use ER diagrams before creating complex databases.
- Test queries with sample data.
- Save your models and SQL scripts regularly.
A clean database design helps you write better queries and understand your project more easily.
Beginners can also learn basic database design best practices to understand how clean table structure, keys, relationships, and data types improve long-term database quality.
MySQL Workbench is not only used for writing SQL queries. It also supports visual database modelling, forward engineering, reverse engineering, server administration, and data migration.
This means beginners can use it for learning SQL, while professionals can use it for designing and managing real database systems.
Build Full Stack Skills With HCL GUVI
Learning MySQL Workbench is a great step if you want to design databases, write SQL queries, and understand how backend systems manage data. But to build real applications, you also need hands-on knowledge of frontend, backend, APIs, databases, and deployment.
Explore HCL GUVI’s Full Stack Development Course to build practical skills through real-world projects, guided learning, and job-focused training.
If you are preparing for placements or interviews, practising SQL interview questions can help you revise queries, joins, keys, and database concepts.
Final Thoughts
Learning how to use MySQL Workbench is useful for anyone starting with SQL, DBMS, backend development, or data analytics.
It helps you create databases, design tables, build relationships, draw ER diagrams, write SQL queries, and view results in one place.
Start with simple databases like student management, employee records, or product orders. Once you understand tables, keys, relationships, and queries, MySQL Workbench becomes much easier to use.
With regular practice, you can move from basic querying to proper database design and real-world project work.
FAQs
1. What is MySQL Workbench used for?
MySQL Workbench is used to create databases, design tables, build ER diagrams, write SQL queries, manage MySQL connections, and view query results.
2. How do I create a database in MySQL Workbench?
You can create a database by running CREATE DATABASE database_name; in the SQL editor or by right-clicking the Schemas panel and selecting Create Schema.
3. Is the schema the same as the database in MySQL Workbench?
For beginners using MySQL Workbench, schema and database can be understood as almost the same thing. When you create a schema, you are usually creating a database.
4. How do I write SQL queries in MySQL Workbench?
Open your MySQL connection, create a new SQL tab, select the database using USE database_name;, write your SQL query, and click the lightning icon to run it.
5. How do I create tables in MySQL Workbench?
You can create tables using SQL commands or by using the GUI. In the GUI, expand your schema, right-click Tables, choose Create Table, add columns, select data types, and click Apply.
6. What is an ER diagram in MySQL Workbench?
An ER diagram is a visual representation of tables and their relationships. In MySQL Workbench, EER diagrams help you design and understand database structure visually.
7. What is forward engineering in MySQL Workbench?
Forward engineering converts a visual database model or ER diagram into SQL scripts and creates the actual database structure in MySQL.
8. What is reverse engineering in MySQL Workbench?
Reverse engineering creates a visual database model from an existing database. It helps you understand tables, columns, and relationships visually.
9. Can beginners use MySQL Workbench?
Yes, beginners can use MySQL Workbench. It is helpful because it provides a visual interface for database design and an SQL editor for writing and running queries.
10. Do I need coding knowledge to use MySQL Workbench?
You do not need advanced coding knowledge, but you should learn basic SQL commands like CREATE, SELECT, INSERT, UPDATE, and DELETE to use MySQL Workbench effectively.
Success Stories

About the Author
Reemsha Khan
Always been a storyteller at heart. Now, I turn complex topics into simple, easy-to-understand stories through content. Hope you find it helpful.
View all posts by Reemsha Khan
Connect with me @















Did you enjoy this article?