


Full Stack Development Articles
Claude for Architecture and Engineering Documentation
Freelancing as a Python Developer: Getting Your First Client


Get In Touch For Details! Request More Information
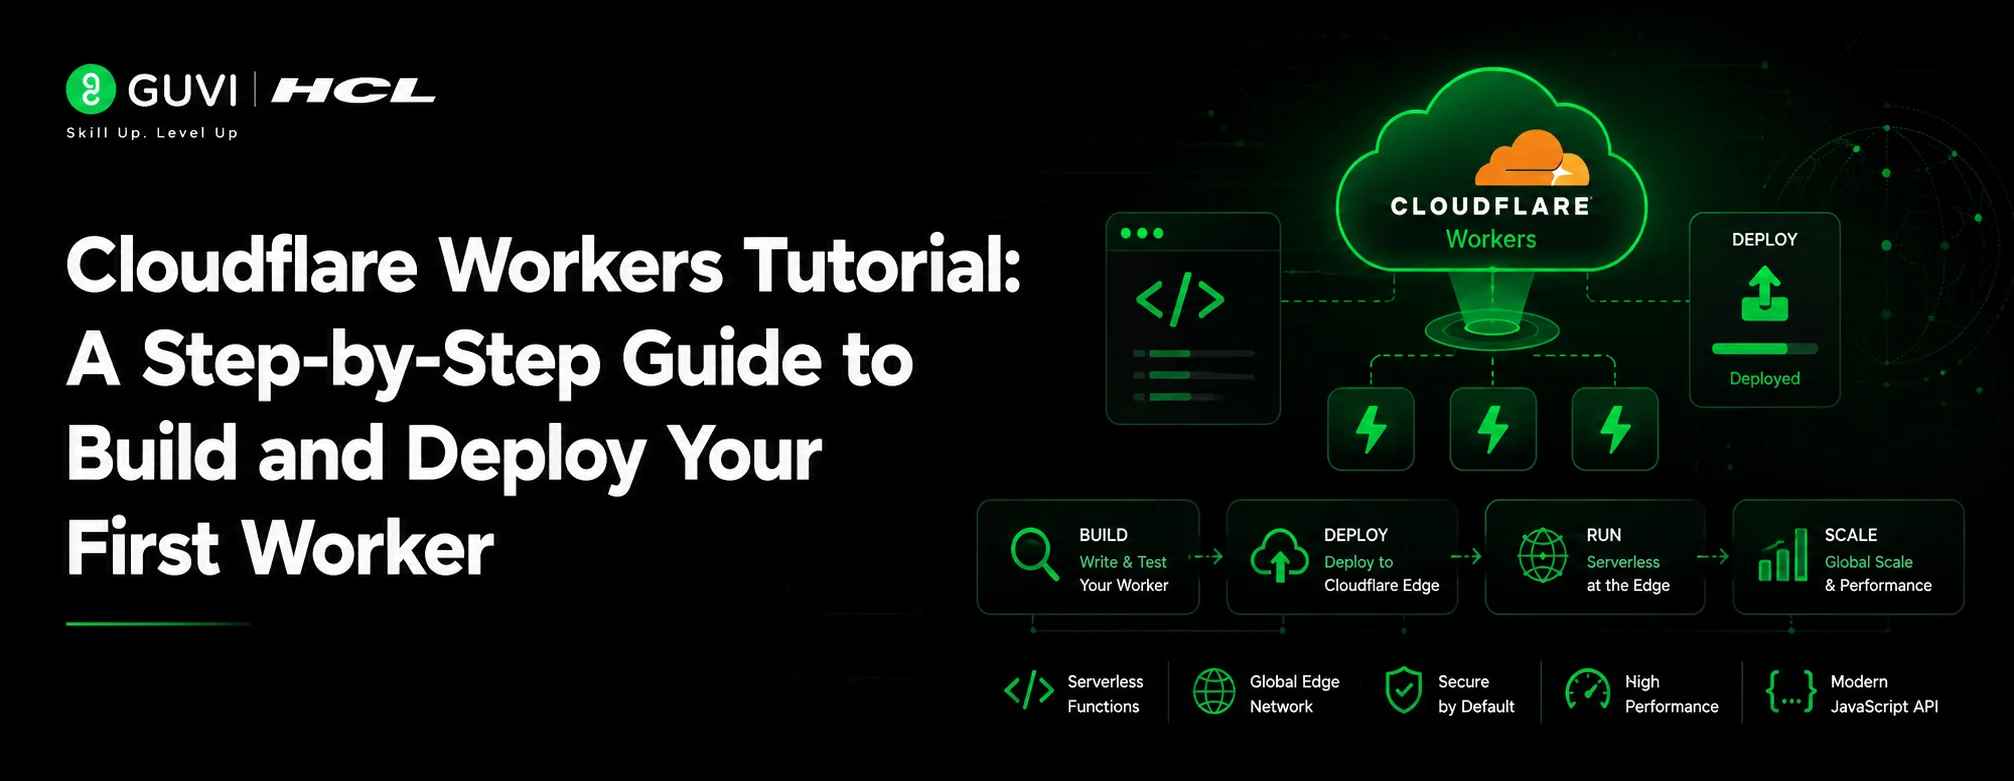
Cloudflare Workers Tutorial: A Step-by-Step Guide to Build and Deploy Your First Worker
Jul 21, 2026 5 Min Read 571 Views
(Last Updated)
Building and deploying applications no longer has to mean managing servers, configuring infrastructure, or worrying about scaling from day one. Cloudflare Workers gives developers a faster way to run serverless code closer to users, making it useful for APIs, redirects, caching, authentication, and lightweight backend logic.
In this step-by-step Cloudflare Workers tutorial, you will learn how to create your first Worker, run it locally, add API routes, use environment variables, connect KV storage, and deploy it with Wrangler CLI. Read the full blog to understand how Cloudflare Workers can help you build faster, simpler, and more scalable serverless applications.
TL;DR
- Cloudflare Workers run serverless code at the edge for APIs, redirects, caching, and backend logic.
- Wrangler CLI handles the full workflow: create, test, configure, and deploy Workers.
- The fetch() handler powers routing, JSON responses, headers, and status codes.
- Vars, secrets, and bindings make Workers production-ready with KV, D1, R2, Queues, and AI.
Table of contents
- What Are Cloudflare Workers?
- Prerequisites
- Step-by-Step Guide to Build and Deploy Your First Cloudflare Worker
- Step 1: Create a New Cloudflare Worker Project
- Step 2: Understand the Default Worker Code
- Step 3: Run the Worker Locally
- Step 4: Create a Simple API Route
- Step 5: Add Response Headers
- Step 6: Add Environment Variables
- Step 7: Use Secrets for Sensitive Values
- Step 8: Deploy the Cloudflare Worker
- Step 9: Connect a Custom Domain
- Step 10: Add KV Storage to Your Worker
- Step 11: Add Useful npm Scripts
- Step 12: Debug Common Cloudflare Workers Issues
- Cloudflare Workers Best Practices
- Keep Worker Logic Small
- Use Secrets for Sensitive Data
- Add Clear API Responses
- Cache Carefully
- Use Bindings Instead of External REST Calls
- Test Locally Before Deploying
- Final Cloudflare Worker Code Example
- Conclusion
- FAQs
- What is Cloudflare Workers used for?
- Is Cloudflare Workers good for beginners?
- What is Wrangler in Cloudflare Workers?
- Can Cloudflare Workers connect to a database?
- Can I deploy Cloudflare Workers for free?
What Are Cloudflare Workers?
Cloudflare Workers are useful when you want fast backend execution without server setup. They are commonly used for:
- Building serverless APIs
- Handling redirects and rewrites
- Creating authentication middleware
- Caching API responses
- Modifying request and response headers
- Running scheduled tasks
- Connecting apps with KV, D1, R2, Queues, and Workers AI
Cloudflare Workers can connect with platform resources through bindings. Bindings allow Workers to interact with tools such as KV, D1, R2, Durable Objects, Queues, AI, and environment variables.
Prerequisites
Before starting this Cloudflare Workers tutorial, you need:
- A Cloudflare account
- Node.js installed
- npm, yarn, or pnpm
- Basic JavaScript knowledge
- A terminal or command prompt
- A code editor such as VS Code
Wrangler, the Cloudflare Developer Platform CLI, is used to create, test, and deploy Worker projects. Cloudflare recommends installing Wrangler locally inside each project.
Step-by-Step Guide to Build and Deploy Your First Cloudflare Worker
Step 1: Create a New Cloudflare Worker Project
Open your terminal and run the following command:
npm create cloudflare@latest -- my-first-worker
Cloudflare’s official setup flow uses C3, also called create-cloudflare-cli, to create new Worker applications. During setup, choose the Hello World example, Worker only template, JavaScript, Git version control, and no immediate deployment.
Move into the project folder:
cd my-first-worker
The generated project usually includes:
my-first-worker/
│
├── src/
│   └── index.js
├── package.json
├── package-lock.json
├── wrangler.jsonc
└── node_modules/
The wrangler.jsonc file stores your Worker configuration. The src/index.js file contains the main Worker code.
Step 2: Understand the Default Worker Code
Open src/index.js. You will see a basic Worker like this:
export default {
  async fetch(request, env, ctx) {
    return new Response("Hello World!");
  },
};
The fetch() handler runs whenever your Worker receives an HTTP request. Cloudflare expects the handler to return a Response object or a Promise that resolves to a Response object.
Here is what each part does:
- request contains the incoming HTTP request.
- env gives access to bindings and environment variables.
- ctx helps manage background tasks.
- Response sends output back to the browser or API client.
Build job-ready full-stack development skills with HCL GUVI’s Full Stack Development Course. Learn frontend development, backend development, APIs, deployment workflows, and real-world web application development through structured, hands-on training designed for aspiring full-stack developers.
Step 3: Run the Worker Locally
Start the local development server:
npx wrangler dev
Wrangler starts a local preview server. Cloudflare’s guide uses http://localhost:8787 as the local Worker URL.
Open this URL in your browser:
http://localhost:8787
You should see:
Hello World!
This confirms that your Cloudflare Worker is running locally.
Step 4: Create a Simple API Route
Now replace the code inside src/index.js with this example:
export default {
  async fetch(request, env, ctx) {
    const url = new URL(request.url);

    if (url.pathname === "/") {
      return new Response("Welcome to my Cloudflare Worker!");
    }

    if (url.pathname === "/api/status") {
      return Response.json({
        status: "success",
        message: "Cloudflare Worker is running",
        timestamp: new Date().toISOString(),
      });
    }

    return new Response("Page not found", { status: 404 });
  },
};
Now test these URLs:
http://localhost:8787

http://localhost:8787/api/status
The /api/status route returns a JSON response. This is the simplest way to build a serverless API with Cloudflare Workers.
Step 5: Add Response Headers
Response headers help improve API clarity, security, and caching. Update the home route like this:
if (url.pathname === "/") {
  return new Response("Welcome to my Cloudflare Worker!", {
    headers: {
      "content-type": "text/plain",
      "cache-control": "public, max-age=60",
    },
  });
}
The content-type header tells the browser how to read the response. The cache-control header tells caches how long the response can be stored.
Step 6: Add Environment Variables
Environment variables help store application configuration. Cloudflare supports environment variables through Wrangler configuration files and dashboard settings. Text and JSON values are available through the env parameter in the Worker’s fetch handler.
Open wrangler.jsonc and add a vars section:
{
  "$schema": "./node_modules/wrangler/config-schema.json",
  "name": "my-first-worker",
  "main": "src/index.js",
  "compatibility_date": "2026-07-03",
  "vars": {
    "APP_NAME": "Cloudflare Worker Demo"
  }
}
Now update src/index.js:
export default {
  async fetch(request, env, ctx) {
    const url = new URL(request.url);

    if (url.pathname === "/") {
      return new Response(`Welcome to ${env.APP_NAME}`);
    }

    return new Response("Page not found", { status: 404 });
  },
};
Run the Worker again:
npx wrangler dev
You should see the environment variable in the browser response.
Step 7: Use Secrets for Sensitive Values
Plain environment variables should not store sensitive information. Cloudflare recommends using secrets for passwords, API keys, and tokens because secret values are hidden after they are defined.
For local development, create a .dev.vars file:
API_TOKEN="your-local-api-token"
Add this file to .gitignore:
.dev.vars
.env
Then access the secret in your Worker:
export default {
  async fetch(request, env, ctx) {
    return new Response(`Token exists: ${Boolean(env.API_TOKEN)}`);
  },
};
Never commit .dev.vars or .env files to Git.
Step 8: Deploy the Cloudflare Worker
Deploy your Worker with:
npx wrangler deploy
Cloudflare’s official guide uses npx wrangler deploy to publish the Worker to a workers.dev subdomain or a custom domain.
After deployment, your Worker will be available at a URL similar to:
https://my-first-worker.your-subdomain.workers.dev
Test your deployed API:
https://my-first-worker.your-subdomain.workers.dev/api/status

Step 9: Connect a Custom Domain
Production Workers should ideally run on a Worker route or custom domain instead of only a workers.dev URL. Cloudflare recommends custom domains when the Worker is your application’s origin server.
You can configure a custom domain in wrangler.jsonc like this:
{
  "routes": [
    {
      "pattern": "api.example.com",
      "custom_domain": true
    }
  ]
}
Cloudflare’s custom domain configuration uses custom_domain: true under the routes array.
Deploy again:
npx wrangler deploy
Your Worker can now serve traffic from the custom domain.
Step 10: Add KV Storage to Your Worker
Workers KV is Cloudflare’s key-value storage system. It is useful for high-read data such as cached API responses, user preferences, and configuration values. Cloudflare describes Workers KV as global, low-latency key-value storage for dynamic APIs and websites.
Add a KV binding inside wrangler.jsonc:
{
  "kv_namespaces": [
    {
      "binding": "MY_KV"
    }
  ]
}
Cloudflare now supports automatic provisioning for KV, R2, and D1 bindings when resource IDs are not added to the configuration file. Wrangler can create resources during development and deployment.
Example Worker using KV:
export default {
  async fetch(request, env, ctx) {
    const url = new URL(request.url);

    if (url.pathname === "/save") {
      await env.MY_KV.put("message", "Hello from KV");
      return new Response("Saved to KV");
    }

    if (url.pathname === "/read") {
      const message = await env.MY_KV.get("message");
      return new Response(message || "No message found");
    }

    return new Response("Try /save or /read");
  },
};
Test locally:
npx wrangler dev
Then visit:
http://localhost:8787/save

http://localhost:8787/read
Step 11: Add Useful npm Scripts
Open package.json and add helpful scripts:
{
  "scripts": {
    "dev": "wrangler dev",
    "deploy": "wrangler deploy"
  }
}
Now you can run:
npm run dev

npm run deploy
Wrangler commands can be added as package scripts for easier development and deployment.
Step 12: Debug Common Cloudflare Workers Issues
Worker Not Updating Locally
Check that:
- The file is saved.
- wrangler dev is still running.
- The browser page is refreshed.
- The correct route is being tested.
Deployment Fails
Check that:
- You are logged in to Cloudflare.
- wrangler.jsonc has the correct Worker name.
- The main file path is correct.
- Your Cloudflare account has the required permissions.
Environment Variable Not Found
Check that:
- The variable is inside vars.
- The variable name matches exactly.
- The Worker is restarted after config changes.
- Secrets are stored in .dev.vars for local use.
Custom Domain Not Working
Check that:
- The domain is active in Cloudflare.
- The route pattern is correct.
- The Worker was deployed after adding the route.
- DNS settings are properly configured.
Cloudflare Workers Best Practices
1. Keep Worker Logic Small
Workers are best for focused request handling. Keep route logic clean and move reusable logic into separate files.
2. Use Secrets for Sensitive Data
API keys, tokens, passwords, and private credentials should never sit inside source code or plain config files.
3. Add Clear API Responses
Use proper status codes such as 200, 400, 401, 404, and 500. Clear responses make debugging easier.
4. Cache Carefully
Use caching for public data. Avoid caching private user data unless the logic is safe and intentional.
5. Use Bindings Instead of External REST Calls
Bindings provide a cleaner way to connect Workers with Cloudflare platform resources such as KV, R2, D1, Queues, and AI.
6. Test Locally Before Deploying
Run npx wrangler dev before every deployment. Local testing helps catch routing, syntax, and environment issues early.
Final Cloudflare Worker Code Example
Here is the final beginner-friendly Worker:
export default {
  async fetch(request, env, ctx) {
    const url = new URL(request.url);

    if (url.pathname === "/") {
      return new Response(`Welcome to ${env.APP_NAME || "Cloudflare Workers"}`, {
        headers: {
          "content-type": "text/plain",
        },
      });
    }

    if (url.pathname === "/api/status") {
      return Response.json({
        status: "success",
        app: env.APP_NAME || "Cloudflare Workers",
        message: "Your Worker API is live",
        timestamp: new Date().toISOString(),
      });
    }

    if (url.pathname === "/save") {
      await env.MY_KV.put("message", "Hello from Cloudflare KV");
      return new Response("Message saved");
    }

    if (url.pathname === "/read") {
      const message = await env.MY_KV.get("message");
      return new Response(message || "No message found");
    }

    return new Response("Route not found", {
      status: 404,
    });
  },
};
Conclusion
Cloudflare Workers are a practical way to build fast serverless APIs and lightweight backend logic without managing infrastructure. In this Cloudflare Workers tutorial, you created a Worker project, ran it locally, added routes, used environment variables, connected KV storage, and deployed the project with Wrangler.
This workflow gives you a strong foundation for building serverless APIs, edge middleware, redirects, caching layers, and full-stack applications on Cloudflare.
FAQs
What is Cloudflare Workers used for?
Cloudflare Workers are used to build serverless APIs, redirects, middleware, caching logic, authentication flows, scheduled tasks, and backend functions that run on Cloudflare’s global network.
Is Cloudflare Workers good for beginners?
Yes. Beginners can start with a simple JavaScript Worker, test it locally with Wrangler, and deploy it with one command.
What is Wrangler in Cloudflare Workers?
Wrangler is Cloudflare’s command-line tool for creating, testing, configuring, and deploying Worker projects.
Can Cloudflare Workers connect to a database?
Yes. Workers can connect with Cloudflare D1, KV, R2, Durable Objects, Hyperdrive, and external APIs through supported bindings and integrations.
Can I deploy Cloudflare Workers for free?
Cloudflare Workers has a free starting option, but limits and pricing can change. Always review the latest Cloudflare pricing page before production deployment.
Success Stories

About the Author
Vaishali
I'm a seasoned writer with four years of experience across technical, non-technical, and just about every genre or niche you can imagine. Adaptable and curious, I enjoy exploring new topics and making information engaging and easy to understand. Fueled by a steady stream of tea, I approach each project with creativity, reliability, and genuine enthusiasm for storytelling.
View all posts by Vaishali
Connect with me @






























Did you enjoy this article?