

Full Stack Development Articles
k6 Load Testing Tutorial: Beginner’s Step-by-Step Guide
Vitest Unit Testing Tutorial: A Complete 2026 Guide
Packer Machine Image Tutorial: Build Reproducible Images Like a Pro


Get In Touch For Details! Request More Information

Understanding JavaScript Input Handling in Online IDEs
Sep 09, 2025 2 Min Read 2290 Views
(Last Updated)
If you’re just starting out with JavaScript input handling and trying to solve coding problems on platforms like HackerRank, CodeChef, or even simple browser-based IDEs, you might come across code that uses readline to read input from STDIN.
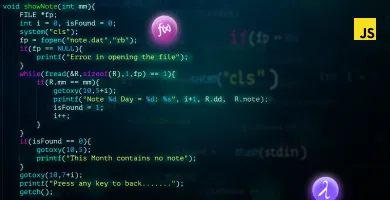
Here’s a common code structure used in these environments:
| // Getting input via STDIN const readline = require(“readline”); const inp = readline.createInterface({ input: process.stdin }); const userInput = []; inp.on(“line”, (data) => { userInput.push(data); }); inp.on(“close”, () => { //start-here //Your code goes here … replace the below line with your code logic let num = userInput[0]; console.log(num); //end-here }); |
Let’s break it down and understand how it works step by step.
Table of contents
- Why Do We Need JavaScript Input Handling?
- Step-by-Step Explanation
- Importing the readline Module
- Creating the Input Interface
- Collecting Input Lines
- Using the Input After It’s All Received
- Where This Structure Is Useful
- Conclusion
Why Do We Need JavaScript Input Handling?
In real-world JavaScript apps, we usually deal with input from forms, buttons, or APIs. But in coding challenges or command-line tools, we need to read input from standard input (STDIN) — which is where this code comes in.
Platforms like HackerRank, CodeChef, and Node.js online editors simulate command-line environments. So, your program needs to read input in the same way you would from a terminal.
Step-by-Step Explanation

1. Importing the readline Module
| const readline = require(“readline”); |
This line loads Node.js’s built-in readline module, which helps us read data one line at a time from the input stream.
2. Creating the Input Interface
| const inp = readline.createInterface({ input: process.stdin }); |
Here, we create an interface that listens to standard input (process.stdin). It allows us to collect user input line by line.
Discover: Best JavaScript Frameworks in 2025
3. Collecting Input Lines
| const userInput = []; inp.on(“line”, (data) => { userInput.push(data); }); |
This part listens for every line the user types (or is provided by the system in a coding platform). Each line is pushed into the userInput array.
4. Using the Input After It’s All Received
| inp.on(“close”, () => { // Code logic goes here let num = userInput[0]; console.log(num); }); |
When input collection is finished (usually when there’s no more input or the system signals the end of input), the “close” event is triggered. Inside this block:
- You can access all input stored in userInput[]
- In this example, we access the first line with userInput[0] and print it.
Sample Input/Output
Input
Hello World
Output
Hello World
The code simply echoes the first line of input back to the console.
Explore: What are Events in JavaScript? A Complete Guide

Where This Structure Is Useful

This pattern is especially useful when:
- You’re participating in coding contests.
- You need to process multiple lines of input.
- The input format is not known in advance, so you need to collect all data before processing.
If you want to learn more about JavaScript and how it enables developers to work seamlessly, consider enrolling in HCL GUVI’s IIT-M Pravartak-certified Full Stack Development Course that not only teaches you the basics but also makes you an experienced developer through hands-on projects guided by an actual mentor.
Conclusion
This basic input-handling structure in Node.js using readline is a go-to template when solving problems that involve reading from standard input. As you grow more comfortable, you’ll use this foundation to handle more complex input scenarios, such as parsing integers, working with arrays, or dealing with multiple test cases.
Success Stories

About the Author
Arun Kumar
As an autodidact Full Stack Mentor, I specialize in developing innovative and scalable web applications with extensive expertise in both front-end and back-end technologies. I am dedicated to advancing the developer community through insightful blog posts and tutorials that foster technical mastery and encourage ongoing professional growth.
View all posts by Arun Kumar
Connect with me @


Did you enjoy this article?