


Python Articles
Excel SQL Python for BPO Professionals Best Guide to Move Into Data Science
Go vs Python for Forward Deployed Engineering Workloads
Python for Forward Deployed Engineers: What You Actually Need to Know
Freelancing as a Python Developer: Getting Your First Client


Get In Touch For Details! Request More Information
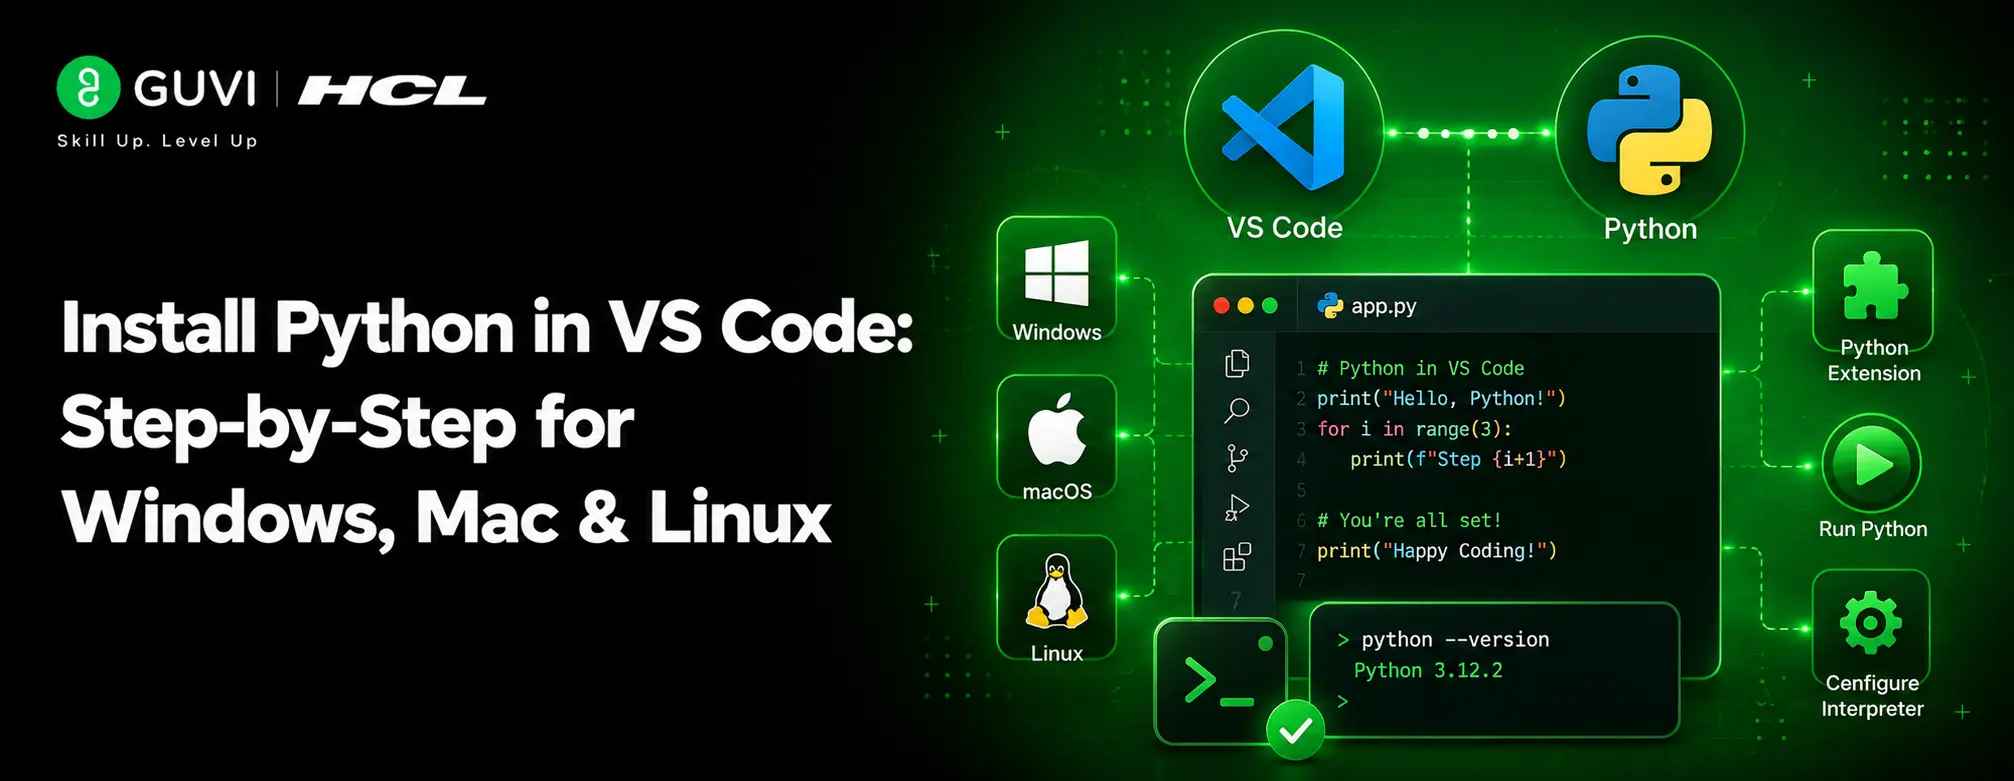
Install Python in VS Code 2026: Step-by-Step for Windows, Mac & Linux
Aug 04, 2026 8 Min Read 4563 Views
(Last Updated)
Setting up Python in Visual Studio Code doesn’t need to be complicated, even if you’re just starting your programming journey. The powerful combination offers features like syntax autocomplete, linting, debugging, and unit testing capabilities that can significantly boost your coding productivity.
Are you wondering how to Set Up Python in Visual Studio Code? The process is straightforward and identical in spirit across Windows, Mac, and Linux, even though a few commands differ slightly by OS.
Most developers prefer installing Python through the official installer or the Anaconda Distribution, which comes with pre-installed packages to start coding without complications.
Throughout this beginner-friendly tutorial, you’ll learn everything needed to Set Up Python in Visual Studio Code: verify your installation, run your first Python script, and enhance your development environment with essential extensions. Let’s get your Python environment ready in just a few minutes!
Table of contents
- TL;DR Summary
- How to Install Python and VSCode: Step-by-Step
- Step 1: Install Python (2026 version)
- Step 2: Verify Python Installation via Terminal
- Step 3: Install Visual Studio Code on Your OS
- Step 4: Install the Python Extension and Run Your First File
- VS Code Python Extension Settings: Interpreter, Linter, Formatter
- Python Not Recognized in VS Code Terminal — Fix Guide
- Best VS Code Extensions for Python Developers in 2026
- Virtual Environment in VS Code — Create and Activate
- How to Configure VS Code for Better Python Coding
- 1) Customize Editor Settings for Python
- 2) Using Code Snippets and Multi-Cursor Editing
- 3) Common Code Errors and How to Fix Them
- Debugging, Testing, and Version Control
- 1) Set Breakpoints and Use the Debug Panel
- 2) Run and Manage Unit Tests With Pytest or Unittest
- 3) Use Git Integration for Version Control
- 4) Enable GitHub Copilot for AI-assisted Coding
- Concluding Thoughts…
- FAQs
- Q1. How do I set up Python in Visual Studio Code for beginners?
- Q2. What are the essential steps to start coding in Python for beginners?
- Q3. How can I customize Visual Studio Code for Python development?
- Q4. What are some debugging techniques in Visual Studio Code for Python?
- Q5. How do I manage virtual environments in Visual Studio Code?
TL;DR Summary
- To Set Up Python in Visual Studio Code, install Python first, then VS Code, then the official Python extension, and finally run a test file to confirm everything works.
- The steps to Set Up Python in Visual Studio Code are the same across Windows, Mac, and Linux, only the terminal commands and installer file types differ slightly.
- If VS Code shows “Python is not recognized” after you Set Up Python in Visual Studio Code, it’s almost always a PATH issue or a wrong interpreter selection, not a broken install, covered in a dedicated fix guide below.
- Beyond the core Python extension, a handful of extensions (Pylance, Black Formatter, Python Test Explorer) make the biggest practical difference in 2026.
- Virtual environments keep project dependencies isolated, and VS Code can create and activate one in just a few clicks.
How to Install Python and VSCode: Step-by-Step
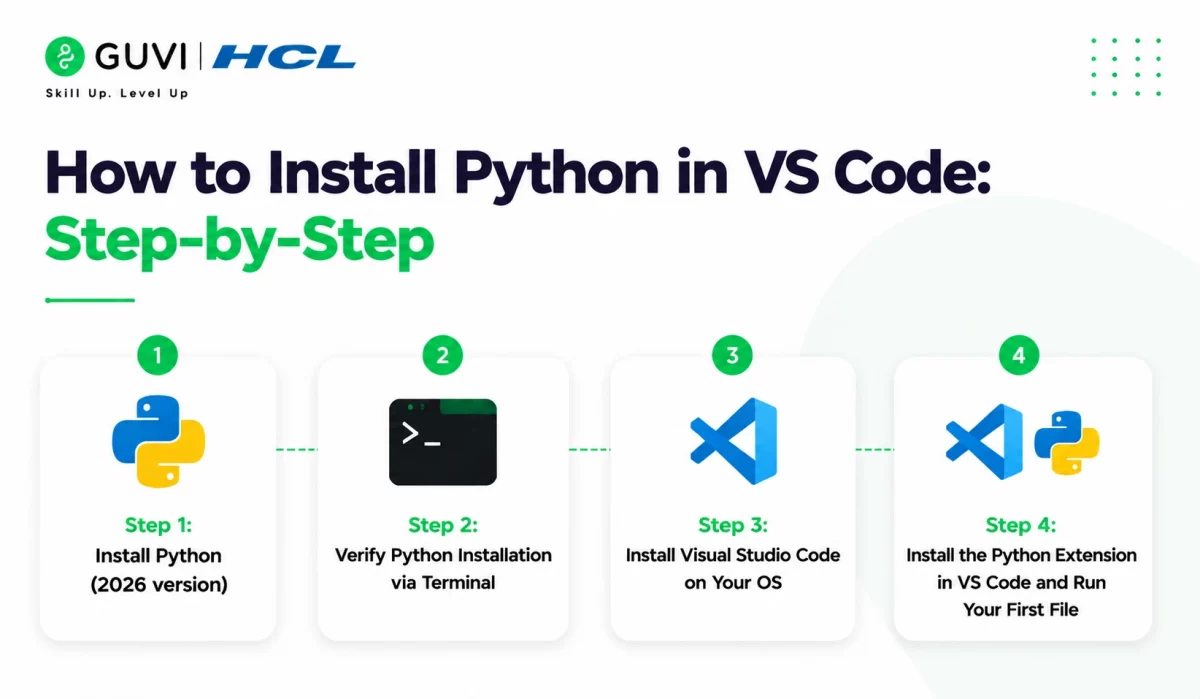
This is the essential first step to Set Up Python in Visual Studio Code. Getting Python and Visual Studio Code up and running is the first crucial step for any Python developer.
Here’s the complete sequence, from downloading Python to running your first script, on Windows, Mac, or Linux.
Step 1: Install Python (2026 version)
This is the version you should install as the first move to Set Up Python in Visual Studio Code. As of 2026, Python 3.14.2 is the latest stable release. However, Python 3.15 is currently in development with alpha releases available for testing. For beginners, it’s best to install the stable version:
- Visit the official Python website (python.org/downloads)
- Click the Download Python button that appears at the top of the page
- Run the downloaded installer
- Windows users: make sure to check the box that says “Add Python to PATH” during installation
- Mac users: run the downloaded .pkg installer and follow the prompts
- Linux users: most distributions include Python already; update it via your package manager if needed
The installer automatically handles the setup process, making Python available throughout your system.
Step 2: Verify Python Installation via Terminal
Before you continue to Set Up Python in Visual Studio Code, it’s essential to verify that Python is installed correctly:
For Windows:
py -3 --versionor
python --versionFor macOS/Linux:
python3 --versionIf successful, you’ll see the version number displayed (e.g., Python 3.14.2). This confirms Python is properly installed and accessible from your command line before you continue further.
Step 3: Install Visual Studio Code on Your OS
Now that Python is ready, the next step to Set Up Python in Visual Studio Code is installing the editor itself:
- Go to code.visualstudio.com/download
- Download the appropriate version for your operating system:
- Windows: choose between User Installer (recommended) or System Installer
- macOS: select the version for Intel or Apple Silicon chips
- Linux: download the
.deb(Ubuntu/Debian),.rpm(Fedora/RHEL), or.tar.gzpackage
This is a routine step in learning to Set Up Python in Visual Studio Code. Once downloaded, run the installer and follow the on-screen instructions. VS Code will automatically add itself to your PATH on Windows, allowing you to open it from the terminal with the code command.
Alternative installation methods:
- Windows: Microsoft Store provides an easy installation option for both Python and VS Code
- macOS (Homebrew):
brew install python3andbrew install --cask visual-studio-code - Linux:
sudo apt install python3(Ubuntu/Debian) orsudo dnf install python3(Fedora/RHEL) for Python, andsudo snap install code --classicfor VS Code
Step 4: Install the Python Extension and Run Your First File
With both tools installed, the final step to Set Up Python in Visual Studio Code is adding the Python extension and confirming it all works together:
- Open the Extensions view (Ctrl+Shift+X) and search for “Python”
- Install the official Python extension by Microsoft
- Create a new file named
hello.pyand add:msg = "Hello, Python World!" print(msg) - Click the Run Python File play button in the top-right corner, or right-click and select Run > Python File in Terminal
If VS Code opens a terminal panel and prints “Hello, Python World!”, you’ve successfully finished the core setup.
VS Code Python Extension Settings: Interpreter, Linter, Formatter
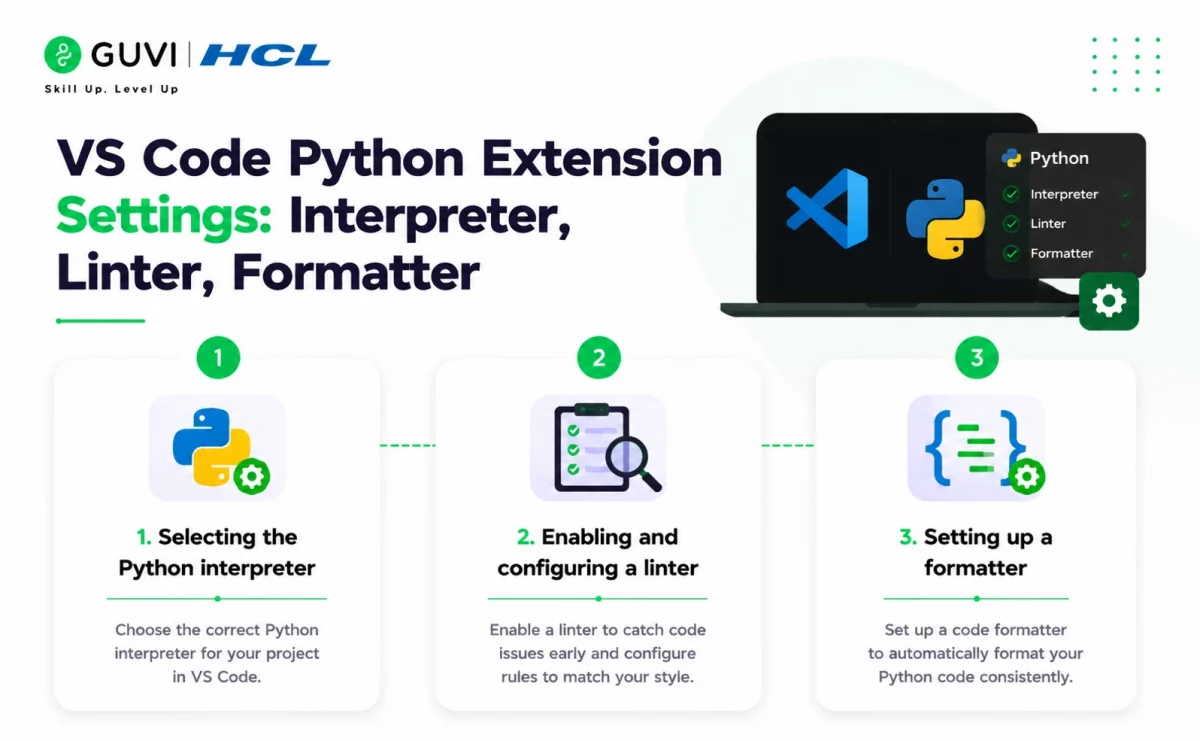
Once you Set Up Python in Visual Studio Code, three specific settings determine how smoothly your day-to-day coding actually goes.
1. Selecting the Python interpreter
This is one of the most important settings once you Set Up Python in Visual Studio Code. VS Code needs to know which Python installation to use when running your code:
- Press Ctrl+Shift+P (or Cmd+Shift+P on macOS) to open the Command Palette
- Type “Python: Select Interpreter” and press Enter
- Select your preferred Python version from the list (e.g., Python 3.14)
If you don’t see your Python version, select “Enter interpreter path” and browse to your Python installation location. VS Code displays the active interpreter in the bottom-right corner of the window.
2. Enabling and configuring a linter
Linting is a second key setting worth configuring once you Set Up Python in Visual Studio Code. It flags potential errors in your code before you even run it:
- Install a linter extension like Pylint through the marketplace
- Linting activates automatically once the extension is installed
- Adjust severity levels through the
pylint.severitysetting, controlling whether issues appear as errors, warnings, or information
3. Setting up a formatter
Formatters are the third key setting worth configuring once you Set Up Python in Visual Studio Code. They keep your code style consistent automatically.
VS Code supports Black (an “uncompromising” formatter with a default 88-character line length) and autopep8 (more configurable, closer to the PEP 8 standard of 79 characters). Set your preferred formatter in settings.json:
"[python]": {
    "editor.defaultFormatter": "ms-python.black-formatter",
    "editor.formatOnSave": true
}
Getting these three settings right, interpreter, linter, formatter, is what separates a basic attempt to Set Up Python in Visual Studio Code from one that genuinely speeds up your coding.
Python Not Recognized in VS Code Terminal — Fix Guide
This is one of the most common frustrations after you Set Up Python in Visual Studio Code. If VS Code’s integrated terminal shows 'python' is not recognized as an internal or external command (or the macOS/Linux equivalent command not found: python), work through these steps in order.
Step 1: Confirm Python is actually installed and on PATH. Open a regular system terminal (not VS Code’s) and run python --version or python3 --version. If this fails too, the problem is your Python installation, not VS Code, reinstall Python and check “Add Python to PATH” on Windows.
Step 2: Check which interpreter VS Code has selected. Press Ctrl+Shift+P, run “Python: Select Interpreter,” and confirm a valid Python installation is chosen. If the list is empty or shows “No interpreter,” VS Code hasn’t detected any Python installation at all.
Step 3: Restart VS Code’s integrated terminal. VS Code sometimes caches an old PATH from before you installed Python or made changes. Close the terminal panel entirely and open a fresh one (Ctrl+`), or restart VS Code itself.
Step 4: On Mac/Linux, use python3 explicitly. Many systems don’t map the bare python command to anything, while python3 reliably works. If your code or terminal commands use python, switch to python3.
Step 5: Check for a broken or empty virtual environment. If a .venv folder exists in your project but was created incorrectly (or its Python binary was deleted), VS Code may try to activate it and fail silently. Delete the folder and recreate the environment if this happens.
Step 6: Reinstall the Python extension as a last resort. Uninstall the Python extension in VS Code, restart the editor, and reinstall it, this resolves the rare cases where the extension’s own internal state gets corrupted.
Best VS Code Extensions for Python Developers in 2026
Beyond the core Python extension, these are the extensions that make the biggest practical difference once you Set Up Python in Visual Studio Code:
- Pylance – a language server offering advanced type checking, auto-completions, and quick access to documentation when you hover over symbols. It’s installed automatically alongside the Python extension.
- Black Formatter – automatically formats your code according to the PEP 8 style guide, maintaining consistent style throughout your projects.
- Python Indent – handles proper indentation automatically by parsing your Python file when you press Enter.
- autoDocstring – quickly generates documentation strings for your functions by typing triple quotes.
- Python Test Explorer – displays tests in the Test Explorer view, letting you run and debug tests directly from the interface.
- Jupyter – installed automatically with the Python extension, this lets you create and run
.ipynbnotebook files directly inside VS Code, with cell-by-cell execution. - GitHub Copilot – an AI coding assistant that suggests code completions and helps debug based on patterns in your existing code.
To install any of these once you Set Up Python in Visual Studio Code, open the Extensions view (Ctrl+Shift+X), search by name, and click Install, the same process for all of them.
Virtual Environment in VS Code — Create and Activate
This is one of the most important habits once you Set Up Python in Visual Studio Code. Virtual environments isolate your project’s dependencies, preventing conflicts between different projects that need different package versions.

To create one:
- Open the Command Palette (Ctrl+Shift+P)
- Type and select “Python: Create Environment”
- Choose between Venv or Conda environment types
- Select the Python interpreter to base the environment on
To activate and switch between environments:
- VS Code detects and activates a newly-created environment automatically once you create it
- To switch environments later, click the Python interpreter name in the Status Bar, or run “Python: Select Interpreter” from the Command Palette again
This is a smaller but useful detail once you Set Up Python in Visual Studio Code. VS Code provides a dedicated Python Environments extension that simplifies creating, deleting, and switching between environments, as well as installing packages without leaving the editor.
This extension-enhanced setup transforms VS Code into a powerful, customized Python IDE tailored to your specific development needs.
How to Configure VS Code for Better Python Coding
This is the natural next step once you Set Up Python in Visual Studio Code. Properly configuring it further transforms it into a powerful Python development environment. While VS Code works well with default settings, customizing your setup can significantly enhance your coding experience and productivity.
1) Customize Editor Settings for Python
Once you Set Up Python in Visual Studio Code, tailor its behavior specifically for Python development:
- Tab size: control indentation with
"editor.tabSize": 4 - Word wrap: enable with
"editor.wordWrap": true - Format on paste: set
"editor.formatOnPaste": true - Render whitespace: make whitespace visible with
"editor.renderWhitespace": "all"
Although VS Code offers a graphical settings editor, many developers prefer editing the settings.json file directly. Access it via Ctrl+Shift+P → Preferences: Open Settings (JSON).
2) Using Code Snippets and Multi-Cursor Editing
These two features become useful once you fully Set Up Python in Visual Studio Code. Snippets allow you to insert code templates quickly, while multi-cursor editing helps edit multiple lines simultaneously.
Creating custom snippets:
- Open Command Palette (Ctrl+Shift+P)
- Type “Snippets: Configure User Snippets”
- Select the Python language
For example, a simple Python function snippet:
"Python Function": {
    "prefix": "def",
    "body": [
        "def ${1:function_name}(${2:parameters}):",
        "\t${0:pass}"
    ],
    "description": "Create a Python function"
}
Multi-cursor editing techniques:
- Alt+Click: add cursors at multiple positions
- Ctrl+Alt+Up/Down: add cursors above/below
- Shift+Alt+I: add cursors at the end of selected lines
3) Common Code Errors and How to Fix Them
Even after a clean attempt to Set Up Python in Visual Studio Code, you might encounter these frequent Python errors as you start coding:
Syntax errors (using assignment instead of comparison):
# Incorrect
if x = 10:
    print("x is 10")

# Correct
if x == 10:
    print("x is 10")
Name errors (referencing undefined variables):
# Incorrect: misspelled variable name
my_variable = 5
print(my_vairable)  # NameError

# Correct
print(my_variable)
Type errors (operations on incompatible data types):
# Incorrect: adding a string and an integer
x = "5"
y = 10
result = x + y  # TypeError

# Correct
result = int(x) + y
This debugging capability is one of the biggest reasons to Set Up Python in Visual Studio Code in the first place. You can set breakpoints by clicking the margin next to line numbers and then pressing F5 to start debugging.
To add a quick dose of context, here are a couple of interesting facts about Python and VSCode that many beginners don’t realize:
Python Was Designed for Readability First: Python was created with the idea that code should read almost like plain English. This is why Python avoids excessive symbols and uses indentation instead of brackets, making it one of the most beginner-friendly programming languages.
VSCode Is Not Just for One Language: Although Visual Studio Code is widely used for Python today, it was originally designed as a lightweight editor for many languages. Its power comes from extensions, which is why installing the Python extension turns it into a full-featured Python IDE.
These small design choices are a big reason why Python and VSCode together are so popular among beginners and professionals alike.
Debugging, Testing, and Version Control
After you Set Up Python in Visual Studio Code and configure it, mastering debugging, testing, and version control skills will complete your development toolkit.
1) Set Breakpoints and Use the Debug Panel
- Set a breakpoint by clicking in the gutter next to a line number (a red dot appears)
- Press F5 to start debugging
- When execution reaches your breakpoint, it pauses
Once paused, the debug panel appears with several useful sections: Variables (inspect current values), Watch (monitor specific expressions), and Call Stack (see the execution path).
2) Run and Manage Unit Tests With Pytest or Unittest
- Install the Python extension (it supports pytest and unittest)
- Click the flask icon in the left sidebar
- Select “Configure Python Tests” and choose your testing framework
- VS Code will automatically discover your tests
Once you Set Up Python in Visual Studio Code and configure testing, run tests by clicking the play button next to individual tests or test files. The Test Explorer view displays results with green checkmarks for passed tests.
3) Use Git Integration for Version Control
This is another reason developers Set Up Python in Visual Studio Code specifically. VS Code provides built-in version control and Git support without requiring command-line knowledge:
- Initialize a repository through the Source Control view (Ctrl+Shift+G)
- Stage changes by clicking the + icon next to modified files
- Enter a commit message and click “Commit”
- Sync changes with remote repositories using the sync button
4) Enable GitHub Copilot for AI-assisted Coding
Enabling AI assistance is one final way to round out your Set Up Python in Visual Studio Code workflow.
- Install the GitHub Copilot extension
- Sign in with your GitHub account
- Hover over the Copilot icon in the Status Bar and select “Use AI Features”
This is one of the more advanced reasons to Set Up Python in Visual Studio Code with AI assistance enabled. Copilot primarily helps write test code and assists with debugging complex issues based on your code patterns.
Once you Set Up Python in Visual Studio Code, master Python the right way with HCL GUVI’s Python Course.
Complex concepts like decorators are broken down through real-world examples and hands-on practice.
Concluding Thoughts…
Setting up Python in Visual Studio Code might seem intimidating at first, but as you’ve seen throughout this guide, the process to Set Up Python in Visual Studio Code is actually straightforward and beginner-friendly across Windows, Mac, and Linux alike.
Remember that once you Set Up Python in Visual Studio Code, configuring it with appropriate linting, formatting, and customized settings will make your coding experience even more enjoyable. Similarly, mastering debugging techniques and testing practices will help you create more reliable code as you progress.
Start small with basic projects, then gradually explore more advanced features as your confidence grows. Soon enough, you’ll be writing Python code effortlessly within your perfectly configured Visual Studio Code environment!
FAQs
Q1. How do I set up Python in Visual Studio Code for beginners?
To set up Python in Visual Studio Code, first install Python from python.org. Then, install Visual Studio Code and add the Python extension from the marketplace. Create a new Python file, select the Python interpreter, and you’re ready to start coding.
Q2. What are the essential steps to start coding in Python for beginners?
Begin by installing Python and Visual Studio Code. Create a new Python file with a .py extension, write a simple script like “print(‘Hello, World!’)”, and run it using the play button or terminal in VSCode. Familiarize yourself with basic syntax and gradually explore more complex concepts.
Q3. How can I customize Visual Studio Code for Python development?
Enhance your Python development in VSCode by installing useful extensions like Pylance and Black Formatter. Configure linting tools, set up auto-formatting, and customize editor settings such as tab size and word wrap. You can also create custom code snippets for frequently used code blocks.
Q4. What are some debugging techniques in Visual Studio Code for Python?
To debug Python code in VSCode, set breakpoints by clicking next to line numbers, then press F5 to start debugging. Use the debug panel to inspect variables, watch expressions, and navigate through your code. You can also step through your code line by line using the debug toolbar buttons.
Q5. How do I manage virtual environments in Visual Studio Code?
Create a virtual environment in VSCode by opening the Command Palette (Ctrl+Shift+P), typing “Python: Create Environment”, and choosing between Venv or Conda. VSCode will detect the environment automatically. To switch between environments, click on the Python interpreter name in the Status Bar or use the “Python: Select Interpreter” command.
Success Stories

About the Author
Jebasta
I translate the language of data into stories that anyone can understand. As a writer with a data science background, I simplify analytics, AI, and decision-making so beginners and enthusiasts can confidently explore the world of data.
View all posts by Jebasta
Connect with me @









Did you enjoy this article?