


DevOps Articles
Claude for IT Help Desks: Reducing Ticket Volume
From Beginner to DevOps Engineer: How HCL GUVI Zen Class Helps You Get There


Get In Touch For Details! Request More Information
Keycloak SSO Tutorial: Set Up Single Sign-On in Minutes
Aug 18, 2026 3 Min Read 1130 Views
(Last Updated)
Building your own login system from scratch is risky and easy to get wrong. This Keycloak SSO tutorial shows you a better way. Keycloak handles authentication for you, so users log in once and get access to every connected app without typing a password again. By the end, you will have Keycloak running locally with a working login flow you can test yourself.
Table of contents
- TL;DR Summary
- What is Keycloak?
- Keycloak SSO Tutorial: Installation with Docker
- Creating Your First Realm
- Creating a Client for Your App
- Adding Your First User
- Testing the Login Flow
- 💡 Did You Know?
- Common Mistakes to Avoid
- Conclusion
- FAQs
- Is Keycloak free to use?
- What is a realm in Keycloak?
- What protocols does Keycloak support?
- Do I need Java experience for this Keycloak SSO tutorial?
- What is the difference between a realm and a client?
TL;DR Summary
- This Keycloak SSO tutorial shows you how to install Keycloak with Docker, create a realm, and set up your first client for single sign-on.
- Keycloak is a free, open-source identity tool that supports OIDC, OAuth 2.0, and SAML 2.0 out of the box.
- A “realm” is an isolated space with its own users, roles, and clients, think of it as a separate tenant.
- Setup takes under 10 minutes using a single Docker command.
- Keycloak also supports LDAP federation, built-in MFA, and social login with zero custom code.
What is Keycloak?
Keycloak is an open-source identity and access management tool built by Red Hat. It gives you Single Sign-On (SSO) out of the box, so users authenticate once and gain access to every application connected to that same Keycloak instance.
It supports OpenID Connect (OIDC), OAuth 2.0, and SAML 2.0, so it works with almost any framework. Keycloak also includes LDAP federation, built-in MFA, and social login with Google or GitHub, all without writing custom authentication code.
Identity and access management is a core skill across modern DevOps and backend roles in 2026. If you want to build the broader infrastructure foundation that tools like Keycloak plug into, HCL GUVI’s DevOps Course covers CI/CD, cloud infrastructure, and real-world projects with NSDC certification.
Keycloak SSO Tutorial: Installation with Docker
The fastest way to get Keycloak running locally is with Docker. You need Docker installed and at least 2 GB of free RAM.
Run this command in your terminal:
docker run -p 8080:8080 -e KEYCLOAK_ADMIN=admin -e KEYCLOAK_ADMIN_PASSWORD=admin quay.io/keycloak/keycloak:latest start-dev
This pulls the latest Keycloak image and starts it in development mode, with an admin username and password you set yourself.
Once the container finishes starting, open http://localhost:8080 in your browser. Log in with the admin credentials you just set, and you will land on the Keycloak Admin Console.
Creating Your First Realm
A realm in Keycloak is like a separate tenant. Each realm has its own isolated set of users, roles, clients, and authentication flows that never overlap with other realms.
Keycloak starts you in the default master realm, which should be reserved for managing Keycloak itself, not your actual applications.
To create a new realm:
- Click the realm dropdown in the top-left corner (it shows “master” by default).
- Click Create Realm.
- Enter a name, for example my-app, and click Create.
You are now working inside your new realm. Every client and user you create from here onward belongs to this isolated space.
Creating a Client for Your App
A client in Keycloak represents an application that uses Keycloak for authentication. Every app you want to protect with SSO needs its own client.
- In your realm, go to Clients and click Create Client.
- Set a Client ID, for example my-react-app.
- Confirm Standard flow is enabled, this handles the standard login redirect process.
- Click Next, then set your Valid redirect URIs, for example http://localhost:3000/*.
- Choose confidential access type for server-side apps, or public for single-page apps where the client secret cannot be hidden.
- Click Save.
Your application is now registered and ready to authenticate users through Keycloak.
Adding Your First User
Without a user, there is nothing to log in with. To create one:
- In the left navigation, go to Users and click Create New User.
- Enter a username and any optional details.
- Under Required User Actions, you can force the user to set a password, configure MFA, or verify their email on first login.
- Save the user, then go to the Credentials tab to set their initial password.
This same process scales naturally to LDAP or Active Directory federation later, so you are not stuck manually creating every user by hand in production.

Testing the Login Flow
With a realm, client, and user all in place, this Keycloak SSO tutorial is ready for its final step, an actual login.
Navigate to your application and trigger the login action. You should be redirected to Keycloak’s hosted login page. Enter the credentials for the user you just created. On success, Keycloak redirects you back to your application with an authorization code, which your app exchanges for an access token behind the scenes.
You can inspect that access token using any JWT decoder to see the claims Keycloak includes, such as the user’s roles under realm_access.roles.
💡 Did You Know?
- Keycloak’s default redirect URI settings are intentionally permissive to simplify local development and testing. These default settings are not secure for production environments and should be tightened before deployment. For production, configure exact Valid Redirect URIs, use a production-grade database such as PostgreSQL, and enable proper SSL certificates to strengthen security.
Common Mistakes to Avoid
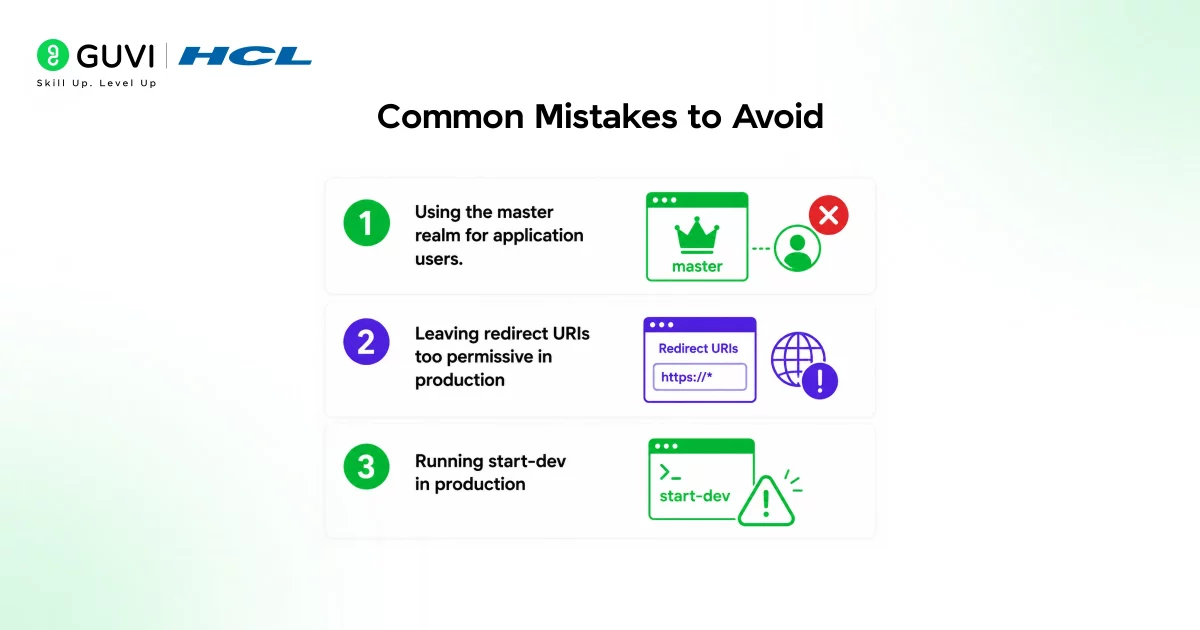
- Using the master realm for application users. The master realm exists to manage Keycloak itself. Mixing your application’s users into it creates unnecessary security risk. Always create a dedicated realm per application or environment.
- Leaving redirect URIs too permissive in production. Wildcard redirect URIs are fine for local development but become a real vulnerability once deployed publicly. Lock them down to your exact domain before launch.
- Running start-dev in production. Development mode skips several production safeguards. Before deploying for real users, switch to a hardened production configuration with a proper database and SSL.
Conclusion
This Keycloak SSO tutorial walked you through the full beginner workflow: installing Keycloak with Docker, creating an isolated realm, registering a client for your app, adding a user, and testing the complete login flow. Single sign-on is one of those problems genuinely better solved by a dedicated tool than by custom code, and Keycloak makes that tool free and approachable for any team.
FAQs
1. Is Keycloak free to use?
Yes. Keycloak is fully open-source and free, with no licensing cost for the core SSO features covered in this Keycloak SSO tutorial.
2. What is a realm in Keycloak?
An isolated tenant with its own users, roles, clients, and authentication flows. Each application or environment should typically get its own dedicated realm.
3. What protocols does Keycloak support?
OpenID Connect (OIDC), OAuth 2.0, and SAML 2.0, making it compatible with nearly any modern application framework.
4. Do I need Java experience for this Keycloak SSO tutorial?
No. Running Keycloak with Docker means you never touch Java directly. The Admin Console is entirely browser-based.
5. What is the difference between a realm and a client?
A realm is the isolated tenant containing everything. A client is one specific application registered inside that realm.
Success Stories

About the Author
Jebasta
I translate the language of data into stories that anyone can understand. As a writer with a data science background, I simplify analytics, AI, and decision-making so beginners and enthusiasts can confidently explore the world of data.
View all posts by Jebasta
Connect with me @




























Did you enjoy this article?