


Full Stack Development Articles
Claude for Architecture and Engineering Documentation
Freelancing as a Python Developer: Getting Your First Client

Get In Touch For Details! Request More Information
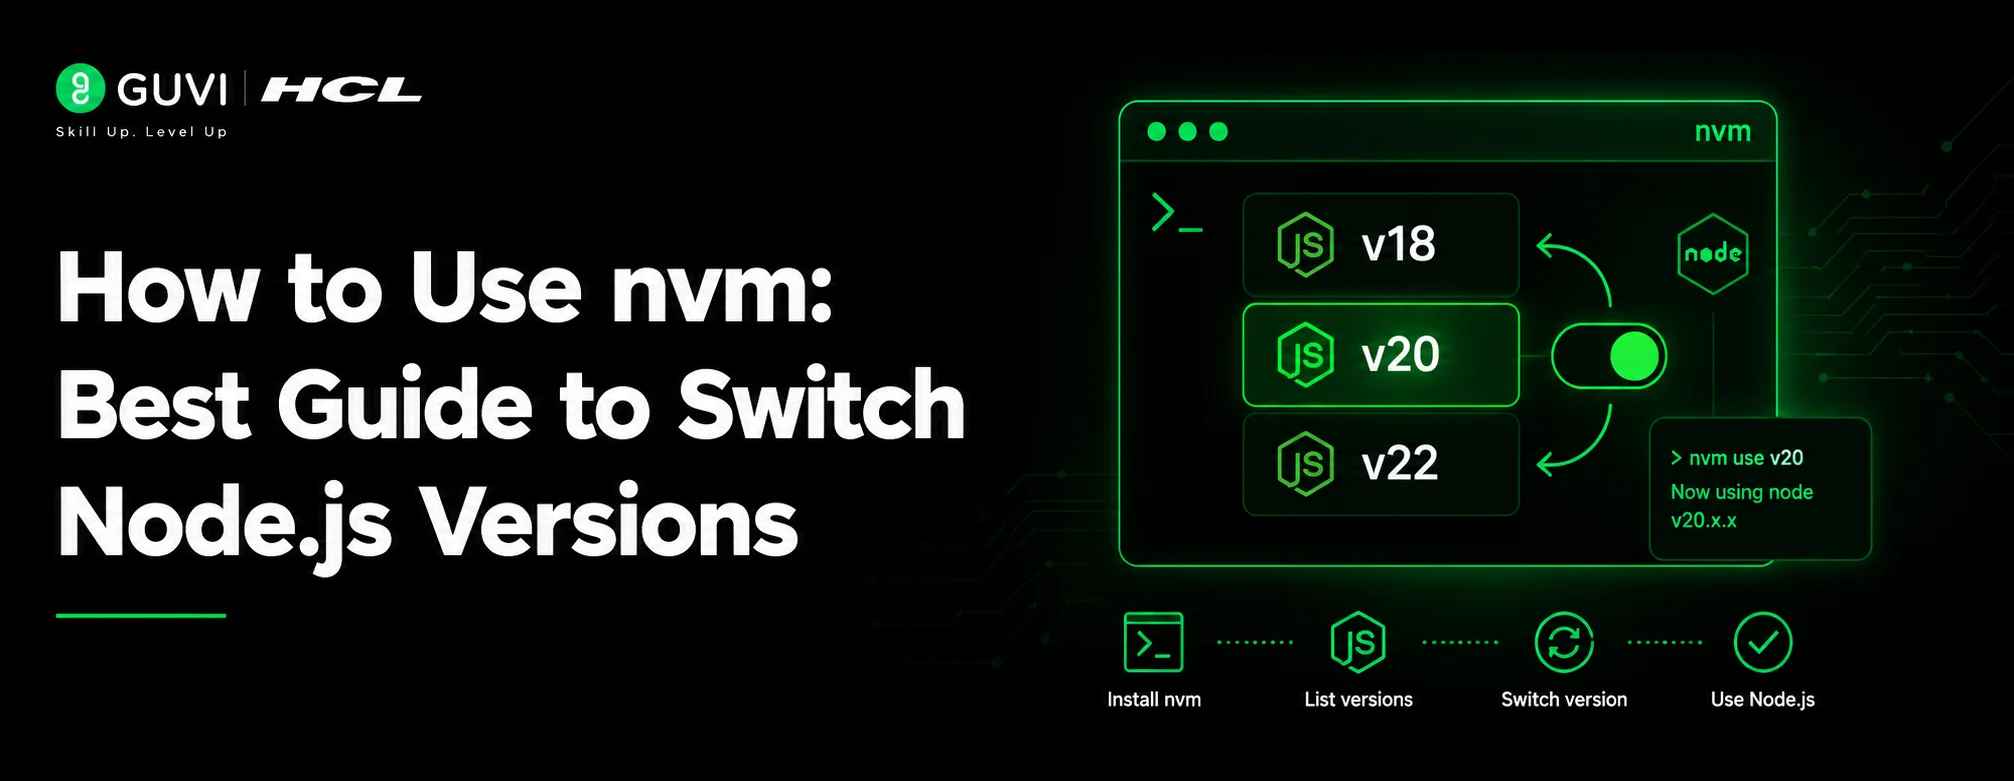
How to Use nvm: Best Guide to Switch Node.js Versions
Jul 09, 2026 7 Min Read 363 Views
(Last Updated)
Table of contents
- TL;DR Summary
- What is nvm in Node.js?
- What does nvm do?
- Simple Example
- Why Should You Use nvm?
- Key Benefits of nvm
- nvm vs Manual Node.js Installation: What is the Difference?
- Which one should beginners choose?
- What Do You Need Before Installing nvm?
- Prerequisites for macOS and Linux
- What about Windows users?
- How to Install nvm Step by Step
- Step 1: Install nvm using curl
- Step 2: Restart your terminal
- Step 3: Verify nvm installation
- How to Install Node.js Versions Using nvm
- Install the latest Node.js version
- Install the latest LTS version
- Install a specific Node.js version
- How to Switch Node.js Versions Using nvm
- Step 1: Check installed versions
- Step 2: Switch to a specific version
- Step 3: Switch to another version
- How to Set a Default Node.js Version in nvm
- Set the latest installed Node.js as default
- Set a specific version as default
- Check your default version
- How to Use .nvmrc for Project-Specific Node.js Versions
- Step 1: Create a .nvmrc file
- Step 2: Use the project version
- Step 3: Commit .nvmrc to Git
- Useful nvm Commands for Beginners
- Beginner Tip
- Real-World Example of Using nvm
- Example: Three projects with different versions
- Common Mistakes to Avoid While Using nvm
- Forgetting to restart the terminal
- Using official nvm commands directly on native Windows
- Installing Node.js but not switching to it
- Not setting a default Node.js version
- Ignoring the .nvmrc file
- Best Practices for Using nvm
- Use LTS versions for serious projects
- Add .nvmrc to every serious project
- Check Node version before installing packages
- Keep global packages limited
- Document setup steps in README
- Career Relevance: Why nvm Matters for Learners
- Skills you build by using nvm
- Build Full Stack Skills With HCL GUVI
- Conclusion
- FAQS
- What is nvm used for?
- How do I switch Node.js versions using nvm?
- How do I install a Node.js version with nvm?
- How do I check my current Node.js version?
- How do I set a default Node.js version in nvm?
- What is a .nvmrc file?
- Does nvm work on Windows?
- Should I use the latest Node.js version or LTS?
- Why is nvm command not found after installation?
- Can I use nvm for React and Next.js projects?
TL;DR Summary
nvm is a Node Version Manager that lets you install, switch, and manage multiple Node.js versions from the command line. To switch versions, install nvm, run nvm install <version>, then use nvm use <version> to activate the required Node.js version. You can also set a default version with nvm alias default <version> and use a .nvmrc file to make teams work on the same version. nvm is especially useful when different projects need different Node.js versions.
nvm helps you switch Node.js versions without uninstalling and reinstalling Node.js again and again.
This is useful because different projects may require different Node.js versions based on their dependencies, frameworks, or deployment environment.
If you are learning JavaScript, React, Node.js, Express, Next.js, or full-stack development, nvm can save you from many version-related errors. In this guide you will learn how to use nvm.
What is nvm in Node.js?
nvm stands for Node Version Manager.
It is a command-line tool that lets you install and use multiple Node.js versions on the same system.
Instead of depending on one global Node.js installation, you can switch versions based on the project you are working on.
What does nvm do?
nvm helps you:
- Install different Node.js versions
- Switch between Node.js versions
- Set a default Node.js version
- Use project-specific versions
- Test apps on different Node versions
- Avoid dependency compatibility issues
- Manage Node.js without disturbing your system installation
For example, one project may need Node.js 18, while another project may need Node.js 22.
With nvm, you can switch between both versions using simple terminal commands.
Simple Example
Suppose your React project works with Node.js 18.
Your new backend project needs Node.js 22.
Instead of uninstalling Node.js 18 and installing Node.js 22 manually, you can run:
nvm use 18
for the React project and:
nvm use 22
for the backend project.
This keeps your workflow clean and avoids unnecessary setup stress.
Why Should You Use nvm?
You should use nvm because Node.js versions change over time, and not every project works perfectly with the latest version.
Some projects depend on older packages.
Some frameworks need a specific Node.js version.
Some production environments use LTS versions for stability.
nvm helps you match the right Node.js version with the right project.
Key Benefits of nvm
nvm is useful because it lets you:
- Work on old and new projects on the same machine
- Test whether your app works on multiple Node.js versions
- Match your local setup with production servers
- Avoid breaking projects after a Node.js update
- Set project-specific versions using .nvmrc
- Learn Node.js without worrying about system-level conflicts
This is especially helpful for students and freshers who work on multiple projects, tutorials, internships, and portfolio apps.
Node.js officially recommends using Active LTS or Maintenance LTS releases for production applications. LTS releases typically receive critical bug fixes for around 30 months, which is why using nvm install –lts is safer for serious projects than randomly using the newest Node.js version.
nvm vs Manual Node.js Installation: What is the Difference?
nvm and manual Node.js installation both help you use Node.js, but they are not the same.
Manual installation usually gives you one active Node.js version.
nvm lets you keep multiple versions and switch between them whenever needed.
| Factor | nvm | Manual Node.js Installation |
| Main purpose | Manage multiple Node.js versions | Install one Node.js version |
| Version switching | Easy with nvm use | Requires reinstalling or changing system setup |
| Best for | Developers working on multiple projects | Beginners using only one project |
| Project-specific version | Possible with .nvmrc | Not built in |
| Default version control | Possible with nvm alias default | Depends on system path |
| Risk of conflicts | Lower when used correctly | Higher if projects need different versions |
| Team workflow | Better because version can be documented | Harder to keep consistent |
| Learning value | Strong for real development workflows | Basic setup only |
Which one should beginners choose?
Choose nvm if you are learning web development seriously or working on more than one project.
Manual installation is fine for a very basic start.
But once you work with React, Node.js, Express, Next.js, or open-source projects, nvm becomes much more useful.
What Do You Need Before Installing nvm?
Before installing nvm, make sure you understand your operating system, terminal, and basic command-line knowledge.
The original nvm project is made for Unix-like environments.
It works on macOS, Linux, and Windows through WSL.
Prerequisites for macOS and Linux
You need:
- Terminal access
- curl or wget
- Bash or Zsh shell
- Basic command-line knowledge
- Internet connection
Most macOS and Linux systems already have a compatible shell.
If curl or wget is missing, install it first.
What about Windows users?
The official nvm project works on Windows through WSL.
WSL stands for Windows Subsystem for Linux.
If you want native Windows support, many developers use a separate tool called nvm-windows.
However, nvm-windows is a different project from the official nvm repository.
So, if you are following official nvm commands, use macOS, Linux, or WSL.
How to Install nvm Step by Step
The safest way to install nvm is to follow the official nvm GitHub instructions.
Since install commands can change over time, always verify the latest command from the official repository before publishing or teaching it.
Step 1: Install nvm using curl
Use the official install script format:
curl -o- https://raw.githubusercontent.com/nvm-sh/nvm/v0.40.5/install.sh | bash
If you prefer wget, use:
wget -qO- https://raw.githubusercontent.com/nvm-sh/nvm/v0.40.5/install.sh | bash
These commands download and run the nvm install script.
The script usually adds nvm configuration to your shell profile file.
Step 2: Restart your terminal
After installation, close and reopen your terminal.
This reloads your shell configuration.
You can also manually source your profile file if needed.
For Bash:
source ~/.bashrc
For Zsh:
source ~/.zshrc
Step 3: Verify nvm installation
Run:
nvm –version
If nvm is installed correctly, you will see a version number.
If you see nvm: command not found, your shell profile may not have loaded the nvm configuration correctly.
How to Install Node.js Versions Using nvm
After installing nvm, you can install Node.js versions from the terminal.
You can install the latest version, the latest LTS version, or a specific version.
Install the latest Node.js version
Run:
nvm install node
Here, node is an alias for the latest available Node.js version.
This is useful when you want to test the newest features.
Install the latest LTS version
Run:
nvm install –lts
LTS stands for Long-Term Support.
For most learners and production projects, LTS versions are safer because they are more stable.
Install a specific Node.js version
Run:
nvm install 22
or:
nvm install 22.12.0
The first command installs the latest available Node.js 22 version.
The second command installs the exact version you mention.
As of 2026, Node.js 20 reached end-of-life on April 30, 2026, which means it no longer receives official security patches or bug fixes. This is why tools like nvm are useful: developers can quickly switch from older Node.js versions to supported LTS versions like Node.js 22 or newer when projects need updates.
How to Switch Node.js Versions Using nvm
Switching versions is the main reason developers use nvm.
Once a version is installed, you can activate it with nvm use.
Step 1: Check installed versions
Run:
nvm ls
This shows the Node.js versions installed on your system.
The active version is usually marked with an arrow.
Step 2: Switch to a specific version
Run:
nvm use 22
Now check the active Node.js version:
node -v
If the output shows Node.js 22, the switch works..
Step 3: Switch to another version
If another project needs Node.js 20, run:
nvm use 20
Then confirm:
node -v
This simple workflow helps you move between projects without changing your system Node.js installation.
How to Set a Default Node.js Version in nvm
When you open a new terminal, nvm uses the default Node.js version.
You can set this default version using nvm alias default.
Set the latest installed Node.js as default
Run:
nvm alias default node
This points the default version to the latest installed Node.js version.
Set a specific version as default
Run:
nvm alias default 22
or:
nvm alias default 22.12.0
Now every new terminal session will start with that version.
Check your default version
Run:
nvm ls
You will see the default alias in the output.
This is useful when you want your system to always start with the same Node.js version.
How to Use .nvmrc for Project-Specific Node.js Versions
A .nvmrc file tells nvm which Node.js version a project needs.
This is useful when multiple developers work on the same project.
It also helps you avoid version mismatch errors.
Step 1: Create a .nvmrc file
Inside your project folder, create a file named:
.nvmrc
Add the required Node.js version inside it:
22
or:
22.12.0
Do not add extra text.
The file should contain only the version value.
Step 2: Use the project version
Inside the project folder, run:
nvm use
nvm will read the .nvmrc file and switch to the version written inside it.

If that version is not installed, run:
nvm install
nvm will install the version mentioned in .nvmrc.
Step 3: Commit .nvmrc to Git
Add .nvmrc to your project repository.
This helps your teammates, mentors, or future self use the same Node.js version.
For students, this is a good habit when submitting projects or building portfolio apps.
Useful nvm Commands for Beginners
Here are the most useful nvm commands you will use often.
| Task | Command |
| Check nvm version | nvm –version |
| Install latest Node.js | nvm install node |
| Install latest LTS Node.js | nvm install –lts |
| Install specific version | nvm install 22 |
| Use specific version | nvm use 22 |
| Check active Node version | node -v |
| List installed versions | nvm ls |
| List remote versions | nvm ls-remote |
| Set default version | nvm alias default 22 |
| Use version from .nvmrc | nvm use |
| Install version from .nvmrc | nvm install |
| Remove a version | nvm uninstall 20 |
| Find Node path | nvm which 22 |
Beginner Tip
Do not memorise every nvm command at once.
Start with these four:
nvm install
nvm use
nvm ls
node -v
These commands are enough for most beginner workflows.
Real-World Example of Using nvm
Imagine a fresher in Bengaluru is working on three projects.
One is a college React project.
One is a Node.js backend internship project.
One is an open-source Next.js project.
Each project may need a different Node.js version.
Example: Three projects with different versions
The learner’s system may look like this:
| Project | Required Node.js Version | Why |
| College React project | Node.js 18 | Older dependencies |
| Internship Express API | Node.js 20 | Backend runtime compatibility |
| Open-source Next.js app | Node.js 22 | Newer framework requirement |
Without nvm, the learner may keep uninstalling and reinstalling Node.js.
With nvm, the workflow becomes:
cd college-react-app
nvm use 18
npm install
npm start
Then:
cd internship-api
nvm use 20
npm install
npm run dev
And:
cd nextjs-open-source-app
nvm use 22
npm install
npm run dev
This is how developers manage multiple real-world projects without breaking their setup.
Common Mistakes to Avoid While Using nvm
nvm is simple once installed, but beginners often face a few common errors.
Most of these issues happen because the shell is not configured properly or the wrong Node.js version is active.
1. Forgetting to restart the terminal
After installing nvm, many beginners immediately run nvm –version.
If the shell profile is not reloaded, the command may fail.
Fix it by restarting the terminal or running source ~/.bashrc or source ~/.zshrc.
2. Using official nvm commands directly on native Windows
The official nvm project is for POSIX shells.
It works on macOS, Linux, and Windows WSL.
If you are using native Windows Command Prompt or PowerShell, use a Windows-compatible version manager such as nvm-windows instead.
3. Installing Node.js but not switching to it
Running nvm install 22 installs Node.js 22.
But your current terminal may still use another version.
Run nvm use 22 and confirm with node -v.
4. Not setting a default Node.js version
If you do not set a default version, new terminals may not use the version you expect.
Fix this with:
nvm alias default 22
This makes your preferred version active in new shell sessions.
5. Ignoring the .nvmrc file
Many projects mention the required Node.js version in .nvmrc.
If you ignore it, you may face dependency errors.
Always check for .nvmrc when cloning a project.
Best Practices for Using nvm
Using nvm properly helps you avoid setup issues and project conflicts.
These habits are useful for students, freshers, and working developers.
Use LTS versions for serious projects
For production-like projects, prefer Node.js LTS versions.
LTS versions are more stable and better suited for long-term projects.
Use:
nvm install –lts
when you are unsure which version to choose.
Add .nvmrc to every serious project
Add a .nvmrc file to your project root.
This helps everyone use the same Node.js version.
It also makes your project easier to run after months.
Check Node version before installing packages
Before running npm install, check the active version:
node -v
This avoids installing dependencies under the wrong Node.js version.
Keep global packages limited
Avoid installing too many global npm packages.
Global packages may behave differently across Node.js versions.
Prefer project-level dependencies whenever possible.
Document setup steps in README
Add a short setup section to your project README.
For example:
nvm use
npm install
npm run dev
This makes your project more professional and easier for others to run.
Career Relevance: Why nvm Matters for Learners
nvm is a small tool, but it teaches an important developer habit: environment management.
In real jobs, developers work with many repositories, frameworks, and deployment environments.
Each may need a different Node.js version.
If you know how to use nvm, you can debug setup issues faster and work more confidently on JavaScript projects.
For freshers, this is useful in internships, open-source contributions, backend projects, React projects, and full-stack developer roles.
Skills you build by using nvm
By using nvm, you learn:
- Node.js version management
- Terminal basics
- Project setup workflow
- Dependency compatibility
- .nvmrc usage
- Team development habits
- Debugging setup errors
- Full-stack project readiness
These skills may look small, but they make your development workflow much more professional.
Build Full Stack Skills With HCL GUVI
nvm helps you manage different Node.js versions smoothly, especially when working on React, Express, Next.js, and full-stack projects. But to build real-world applications confidently, you also need strong foundations in JavaScript, backend development, APIs, databases, Git, debugging, and deployment.
Explore HCL GUVI’s Full Stack Development Course to build practical development skills through hands-on projects, mentor-led learning, and career-focused training.
Conclusion
nvm is one of the simplest tools for managing multiple Node.js versions on the same system. It helps you install, switch, and set default Node.js versions without disturbing your project setup. For beginners, the most useful commands are nvm install, nvm use, nvm ls, and node -v. As you work on React, Node.js, Express, or Next.js projects, using .nvmrc will help you maintain version consistency. Learn nvm early because version management is a real-world skill every JavaScript developer needs.
FAQS
1. What is nvm used for?
nvm is used to install, switch, and manage multiple Node.js versions on the same system. It helps developers use the right Node.js version for each project.
2. How do I switch Node.js versions using nvm?
Use nvm use <version> to switch Node.js versions. For example, nvm use 22 switches your terminal to Node.js 22 if it is already installed.
3. How do I install a Node.js version with nvm?
Use nvm install <version> to install a specific Node.js version. For example, nvm install 22 installs the latest available Node.js 22 version.
4. How do I check my current Node.js version?
Run node -v in your terminal. This shows the currently active Node.js version.
5. How do I set a default Node.js version in nvm?
Use nvm alias default <version> to set a default version. For example, nvm alias default 22 makes Node.js 22 the default in new terminals.
6. What is a .nvmrc file?
A .nvmrc file stores the Node.js version required by a project. When you run nvm use inside that project, nvm reads the file and switches to that version.
7. Does nvm work on Windows?
The official nvm project works on Windows through WSL. For native Windows Command Prompt or PowerShell, developers usually use a separate tool called nvm-windows.
8. Should I use the latest Node.js version or LTS?
Use LTS for serious projects because it is more stable. Use the latest version mainly when you want to test new features.
9. Why is nvm command not found after installation?
This usually happens when your terminal has not loaded the nvm configuration. Restart the terminal or source your shell profile file such as ~/.bashrc or ~/.zshrc.
10. Can I use nvm for React and Next.js projects?
Yes, nvm is very useful for React, Next.js, Express, and Node.js projects. It helps you match the Node.js version required by each project.
Success Stories

About the Author
Reemsha Khan
Always been a storyteller at heart. Now, I turn complex topics into simple, easy-to-understand stories through content. Hope you find it helpful.
View all posts by Reemsha Khan
Connect with me @























Did you enjoy this article?