

'%3e%3cpath%20d='M20.134%2023.75H14.266L13.42%2026H10.18L15.4%2013.4H19L24.22%2026H20.98L20.134%2023.75ZM17.2%2015.866L15.238%2021.14H19.162L17.2%2015.866ZM24.9185%2013.724C24.9185%2012.752%2025.7105%2011.96%2026.6825%2011.96C27.6545%2011.96%2028.4465%2012.752%2028.4465%2013.724C28.4465%2014.696%2027.6545%2015.488%2026.6825%2015.488C25.7105%2015.488%2024.9185%2014.696%2024.9185%2013.724ZM25.2065%2016.64H28.1765V26H25.2065V16.64Z'%20fill='url(%23paint0_linear_1812_470)'/%3e%3c/g%3e%3cdefs%3e%3cfilter%20id='filter0_dd_1812_470'%20x='7.18018'%20y='9.95996'%20width='24.2661'%20height='20.04'%20filterUnits='userSpaceOnUse'%20color-interpolation-filters='sRGB'%3e%3cfeFlood%20flood-opacity='0'%20result='BackgroundImageFix'/%3e%3cfeColorMatrix%20in='SourceAlpha'%20type='matrix'%20values='0%200%200%200%200%200%200%200%200%200%200%200%200%200%200%200%200%200%20127%200'%20result='hardAlpha'/%3e%3cfeOffset%20dy='1'/%3e%3cfeGaussianBlur%20stdDeviation='1.5'/%3e%3cfeColorMatrix%20type='matrix'%20values='0%200%200%200%200.0627451%200%200%200%200%200.109804%200%200%200%200%200.156863%200%200%200%200.1%200'/%3e%3cfeBlend%20mode='normal'%20in2='BackgroundImageFix'%20result='effect1_dropShadow_1812_470'/%3e%3cfeColorMatrix%20in='SourceAlpha'%20type='matrix'%20values='0%200%200%200%200%200%200%200%200%200%200%200%200%200%200%200%200%200%20127%200'%20result='hardAlpha'/%3e%3cfeOffset%20dy='1'/%3e%3cfeGaussianBlur%20stdDeviation='1'/%3e%3cfeColorMatrix%20type='matrix'%20values='0%200%200%200%200.0627451%200%200%200%200%200.109804%200%200%200%200%200.156863%200%200%200%200.06%200'/%3e%3cfeBlend%20mode='normal'%20in2='effect1_dropShadow_1812_470'%20result='effect2_dropShadow_1812_470'/%3e%3cfeBlend%20mode='normal'%20in='SourceGraphic'%20in2='effect2_dropShadow_1812_470'%20result='shape'/%3e%3c/filter%3e%3clinearGradient%20id='paint0_linear_1812_470'%20x1='10'%20y1='21.5'%20x2='29'%20y2='21.5'%20gradientUnits='userSpaceOnUse'%3e%3cstop%20stop-color='%236729FF'/%3e%3cstop%20offset='1'%20stop-color='%238A5CFF'/%3e%3c/linearGradient%3e%3c/defs%3e%3c/svg%3e)
'%3e%3cpath%20d='M10.9424%2022.8545C11.3105%2022.8545%2011.6092%2023.1525%2011.6094%2023.5205V30.1875C11.6094%2030.5557%2011.3105%2030.8545%2010.9424%2030.8545H8.27637C7.9082%2030.8545%207.60938%2030.5557%207.60938%2030.1875V23.5205C7.60951%2023.1525%207.90828%2022.8545%208.27637%2022.8545H10.9424ZM17.6104%2017.5205C17.9785%2017.5205%2018.2773%2017.8193%2018.2773%2018.1875V30.1875C18.2773%2030.5557%2017.9785%2030.8545%2017.6104%2030.8545H14.9434C14.5754%2030.8542%2014.2773%2030.5555%2014.2773%2030.1875V18.1875C14.2773%2017.8195%2014.5754%2017.5208%2014.9434%2017.5205H17.6104ZM24.2754%2020.1875C24.6433%2020.1878%2024.9414%2020.4865%2024.9414%2020.8545V30.1875C24.9414%2030.5555%2024.6433%2030.8542%2024.2754%2030.8545H21.6084C21.2402%2030.8545%2020.9414%2030.5557%2020.9414%2030.1875V20.8545C20.9414%2020.4863%2021.2402%2020.1875%2021.6084%2020.1875H24.2754ZM30.9424%2016.1875C31.3105%2016.1875%2031.6094%2016.4863%2031.6094%2016.8545V30.1875C31.6094%2030.5557%2031.3105%2030.8545%2030.9424%2030.8545H28.2764C27.9082%2030.8545%2027.6094%2030.5557%2027.6094%2030.1875V16.8545C27.6094%2016.4863%2027.9082%2016.1875%2028.2764%2016.1875H30.9424ZM29.6094%208.1875C30.7139%208.1875%2031.6094%209.08301%2031.6094%2010.1875C31.6094%2011.292%2030.7139%2012.1875%2029.6094%2012.1875C29.2368%2012.1863%2028.8723%2012.0798%2028.5576%2011.8809L24.9277%2014.0391C24.9314%2014.0889%2024.9424%2014.1367%2024.9424%2014.1875C24.9436%2015.2062%2024.1783%2016.0619%2023.166%2016.1748C22.1536%2016.2876%2021.2183%2015.6208%2020.9951%2014.627L17.6475%2012.9688C17.0271%2013.5698%2016.0864%2013.6931%2015.332%2013.2725L11.4756%2016.1514C11.5624%2016.3756%2011.6077%2016.6139%2011.6094%2016.8545C11.6092%2017.9589%2010.7138%2018.8545%209.60938%2018.8545C8.50496%2018.8545%207.60951%2017.9589%207.60938%2016.8545C7.60938%2015.7498%208.50488%2014.8545%209.60938%2014.8545C9.96191%2014.8564%2010.3076%2014.9524%2010.6104%2015.1328L14.4287%2012.2832C14.1184%2011.5355%2014.2896%2010.6748%2014.8623%2010.1025C15.4347%209.53038%2016.2955%209.35961%2017.043%209.66992C17.7905%209.98068%2018.2777%2010.711%2018.2764%2011.5205C18.2732%2011.6071%2018.2644%2011.6937%2018.25%2011.7793L21.1934%2013.2373C21.4939%2012.6739%2022.0476%2012.2898%2022.6807%2012.2051C23.3132%2012.1205%2023.9478%2012.3454%2024.3857%2012.8096L27.7236%2010.8262C27.6506%2010.6211%2027.6121%2010.4053%2027.6094%2010.1875C27.6106%209.0835%2028.5054%208.18872%2029.6094%208.1875Z'%20fill='url(%23paint0_linear_1812_508)'/%3e%3c/g%3e%3cdefs%3e%3cfilter%20id='filter0_dd_1812_508'%20x='4.60938'%20y='6.1875'%20width='30'%20height='28.667'%20filterUnits='userSpaceOnUse'%20color-interpolation-filters='sRGB'%3e%3cfeFlood%20flood-opacity='0'%20result='BackgroundImageFix'/%3e%3cfeColorMatrix%20in='SourceAlpha'%20type='matrix'%20values='0%200%200%200%200%200%200%200%200%200%200%200%200%200%200%200%200%200%20127%200'%20result='hardAlpha'/%3e%3cfeOffset%20dy='1'/%3e%3cfeGaussianBlur%20stdDeviation='1.5'/%3e%3cfeColorMatrix%20type='matrix'%20values='0%200%200%200%200.0627451%200%200%200%200%200.109804%200%200%200%200%200.156863%200%200%200%200.1%200'/%3e%3cfeBlend%20mode='normal'%20in2='BackgroundImageFix'%20result='effect1_dropShadow_1812_508'/%3e%3cfeColorMatrix%20in='SourceAlpha'%20type='matrix'%20values='0%200%200%200%200%200%200%200%200%200%200%200%200%200%200%200%200%200%20127%200'%20result='hardAlpha'/%3e%3cfeOffset%20dy='1'/%3e%3cfeGaussianBlur%20stdDeviation='1'/%3e%3cfeColorMatrix%20type='matrix'%20values='0%200%200%200%200.0627451%200%200%200%200%200.109804%200%200%200%200%200.156863%200%200%200%200.06%200'/%3e%3cfeBlend%20mode='normal'%20in2='effect1_dropShadow_1812_508'%20result='effect2_dropShadow_1812_508'/%3e%3cfeBlend%20mode='normal'%20in='SourceGraphic'%20in2='effect2_dropShadow_1812_508'%20result='shape'/%3e%3c/filter%3e%3clinearGradient%20id='paint0_linear_1812_508'%20x1='7.60938'%20y1='19.521'%20x2='31.6094'%20y2='19.521'%20gradientUnits='userSpaceOnUse'%3e%3cstop%20stop-color='%236729FF'/%3e%3cstop%20offset='1'%20stop-color='%238A5CFF'/%3e%3c/linearGradient%3e%3c/defs%3e%3c/svg%3e)
'%3e%3cpath%20d='M29.2646%2023.1094C29.4038%2023.0408%2029.5668%2023.0408%2029.7061%2023.1094L29.7568%2023.1338C30.8936%2023.6938%2030.8937%2025.3073%2029.7568%2025.8672L21.0049%2030.1758C20.1262%2030.6084%2019.0926%2030.6084%2018.2139%2030.1758L9.46191%2025.8672C8.3249%2025.3073%208.32502%2023.6938%209.46191%2023.1338L9.5127%2023.1094C9.65194%2023.0408%209.81488%2023.0408%209.9541%2023.1094L18.2139%2027.1758C19.0926%2027.6084%2020.1262%2027.6084%2021.0049%2027.1758L29.2646%2023.1094ZM29.2646%2018.1094C29.4038%2018.0408%2029.5668%2018.0408%2029.7061%2018.1094L29.7568%2018.1338C30.8936%2018.6938%2030.8937%2020.3073%2029.7568%2020.8672L21.0049%2025.1758C20.1262%2025.6084%2019.0926%2025.6084%2018.2139%2025.1758L9.46191%2020.8672C8.32488%2020.3073%208.32505%2018.6938%209.46191%2018.1338L9.5127%2018.1094C9.65194%2018.0408%209.81487%2018.0408%209.9541%2018.1094L18.2139%2022.1758C19.0926%2022.6084%2020.1262%2022.6084%2021.0049%2022.1758L29.2646%2018.1094ZM18.2139%208.82422C19.0926%208.39162%2020.1262%208.39162%2021.0049%208.82422L29.7568%2013.1338C30.8936%2013.6938%2030.8937%2015.3073%2029.7568%2015.8672L21.0049%2020.1758C20.1262%2020.6084%2019.0926%2020.6085%2018.2139%2020.1758L9.46191%2015.8672C8.32488%2015.3073%208.32502%2013.6938%209.46191%2013.1338L18.2139%208.82422Z'%20fill='url(%23paint0_linear_1812_474)'/%3e%3c/g%3e%3cdefs%3e%3cfilter%20id='filter0_dd_1812_474'%20x='5.60938'%20y='6.5'%20width='28'%20height='28'%20filterUnits='userSpaceOnUse'%20color-interpolation-filters='sRGB'%3e%3cfeFlood%20flood-opacity='0'%20result='BackgroundImageFix'/%3e%3cfeColorMatrix%20in='SourceAlpha'%20type='matrix'%20values='0%200%200%200%200%200%200%200%200%200%200%200%200%200%200%200%200%200%20127%200'%20result='hardAlpha'/%3e%3cfeOffset%20dy='1'/%3e%3cfeGaussianBlur%20stdDeviation='1.5'/%3e%3cfeColorMatrix%20type='matrix'%20values='0%200%200%200%200.0627451%200%200%200%200%200.109804%200%200%200%200%200.156863%200%200%200%200.1%200'/%3e%3cfeBlend%20mode='normal'%20in2='BackgroundImageFix'%20result='effect1_dropShadow_1812_474'/%3e%3cfeColorMatrix%20in='SourceAlpha'%20type='matrix'%20values='0%200%200%200%200%200%200%200%200%200%200%200%200%200%200%200%200%200%20127%200'%20result='hardAlpha'/%3e%3cfeOffset%20dy='1'/%3e%3cfeGaussianBlur%20stdDeviation='1'/%3e%3cfeColorMatrix%20type='matrix'%20values='0%200%200%200%200.0627451%200%200%200%200%200.109804%200%200%200%200%200.156863%200%200%200%200.06%200'/%3e%3cfeBlend%20mode='normal'%20in2='effect1_dropShadow_1812_474'%20result='effect2_dropShadow_1812_474'/%3e%3cfeBlend%20mode='normal'%20in='SourceGraphic'%20in2='effect2_dropShadow_1812_474'%20result='shape'/%3e%3c/filter%3e%3clinearGradient%20id='paint0_linear_1812_474'%20x1='8.60938'%20y1='19.5002'%20x2='30.6096'%20y2='19.5002'%20gradientUnits='userSpaceOnUse'%3e%3cstop%20stop-color='%236729FF'/%3e%3cstop%20offset='1'%20stop-color='%238A5CFF'/%3e%3c/linearGradient%3e%3c/defs%3e%3c/svg%3e)
'%3e%3cpath%20d='M21.7207%2028.6406C22.9675%2028.6407%2024.0267%2029.5026%2024.3945%2030.6279C24.5363%2031.0618%2024.1674%2031.5%2023.7109%2031.5H15.5117C15.0552%2031.5%2014.6855%2031.0618%2014.8271%2030.6279C15.1949%2029.5025%2016.2551%2028.6406%2017.502%2028.6406H21.7207ZM25.8193%2021.9229C26.0053%2022.2016%2025.9683%2022.5727%2025.7314%2022.8096C24.4407%2024.1004%2023.6153%2025.7631%2023.2969%2027.5469C22.8085%2027.3489%2022.2774%2027.2344%2021.7188%2027.2344H17.5C16.9414%2027.2344%2016.4102%2027.3488%2015.9219%2027.5469C15.6034%2025.7632%2014.7781%2024.1003%2013.4873%2022.8096C13.2505%2022.5727%2013.2135%2022.2016%2013.3994%2021.9229L18.9062%2013.6621V20.333C18.0897%2020.6243%2017.5%2021.3971%2017.5%2022.3125C17.5%2023.4757%2018.4462%2024.4219%2019.6094%2024.4219C20.7725%2024.4219%2021.7188%2023.4757%2021.7188%2022.3125C21.7188%2021.3971%2021.1291%2020.6243%2020.3125%2020.333V13.6621L25.8193%2021.9229ZM19.6094%2021.6094C19.9973%2021.6094%2020.3125%2021.9246%2020.3125%2022.3125C20.3125%2022.7004%2019.9973%2023.0156%2019.6094%2023.0156C19.2214%2023.0156%2018.9062%2022.7004%2018.9062%2022.3125C18.9062%2021.9246%2019.2214%2021.6094%2019.6094%2021.6094ZM11.1719%207.5C11.5605%207.5%2011.875%207.81448%2011.875%208.20312V8.90625H17.6299C17.9211%208.08965%2018.6939%207.5%2019.6094%207.5C20.5248%207.5%2021.2976%208.08965%2021.5889%208.90625L27.3438%208.90625V8.20312C27.3438%207.81448%2027.6582%207.5%2028.0469%207.5H30.9062C31.2949%207.5%2031.6094%207.81448%2031.6094%208.20312V11.0156C31.6094%2011.4043%2031.2949%2011.7188%2030.9062%2011.7188H28.0469C27.6582%2011.7188%2027.3438%2011.4043%2027.3438%2011.0156V10.3125H24.4561C26.8962%2011.8369%2028.5049%2014.5051%2028.6973%2017.5039C29.5409%2017.78%2030.1562%2018.5653%2030.1562%2019.5C30.1562%2020.6632%2029.21%2021.6094%2028.0469%2021.6094C26.8837%2021.6094%2025.9375%2020.6632%2025.9375%2019.5C25.9375%2018.6028%2026.5027%2017.8396%2027.2939%2017.5352C27.0539%2014.1921%2024.7213%2011.3743%2021.4766%2010.5703C21.1256%2011.2489%2020.4247%2011.7188%2019.6094%2011.7188C18.7941%2011.7188%2018.0931%2011.2489%2017.7422%2010.5703C14.4975%2011.3744%2012.1649%2014.1921%2011.9248%2017.5352C12.716%2017.8396%2013.2812%2018.6028%2013.2812%2019.5C13.2812%2020.6632%2012.335%2021.6094%2011.1719%2021.6094C10.0087%2021.6094%209.0625%2020.6632%209.0625%2019.5C9.0625%2018.5653%209.67783%2017.78%2010.5215%2017.5039C10.7138%2014.5051%2012.3225%2011.8272%2014.7627%2010.3027H11.875V11.0156C11.875%2011.4043%2011.5605%2011.7188%2011.1719%2011.7188H8.3125C7.92386%2011.7188%207.60938%2011.4043%207.60938%2011.0156V8.20312C7.60938%207.81448%207.92386%207.5%208.3125%207.5H11.1719Z'%20fill='url(%23paint0_linear_1812_524)'/%3e%3c/g%3e%3cdefs%3e%3cfilter%20id='filter0_dd_1812_524'%20x='4.60938'%20y='5.5'%20width='30'%20height='30'%20filterUnits='userSpaceOnUse'%20color-interpolation-filters='sRGB'%3e%3cfeFlood%20flood-opacity='0'%20result='BackgroundImageFix'/%3e%3cfeColorMatrix%20in='SourceAlpha'%20type='matrix'%20values='0%200%200%200%200%200%200%200%200%200%200%200%200%200%200%200%200%200%20127%200'%20result='hardAlpha'/%3e%3cfeOffset%20dy='1'/%3e%3cfeGaussianBlur%20stdDeviation='1.5'/%3e%3cfeColorMatrix%20type='matrix'%20values='0%200%200%200%200.0627451%200%200%200%200%200.109804%200%200%200%200%200.156863%200%200%200%200.1%200'/%3e%3cfeBlend%20mode='normal'%20in2='BackgroundImageFix'%20result='effect1_dropShadow_1812_524'/%3e%3cfeColorMatrix%20in='SourceAlpha'%20type='matrix'%20values='0%200%200%200%200%200%200%200%200%200%200%200%200%200%200%200%200%200%20127%200'%20result='hardAlpha'/%3e%3cfeOffset%20dy='1'/%3e%3cfeGaussianBlur%20stdDeviation='1'/%3e%3cfeColorMatrix%20type='matrix'%20values='0%200%200%200%200.0627451%200%200%200%200%200.109804%200%200%200%200%200.156863%200%200%200%200.06%200'/%3e%3cfeBlend%20mode='normal'%20in2='effect1_dropShadow_1812_524'%20result='effect2_dropShadow_1812_524'/%3e%3cfeBlend%20mode='normal'%20in='SourceGraphic'%20in2='effect2_dropShadow_1812_524'%20result='shape'/%3e%3c/filter%3e%3clinearGradient%20id='paint0_linear_1812_524'%20x1='7.60938'%20y1='19.5'%20x2='31.6094'%20y2='19.5'%20gradientUnits='userSpaceOnUse'%3e%3cstop%20stop-color='%236729FF'/%3e%3cstop%20offset='1'%20stop-color='%238A5CFF'/%3e%3c/linearGradient%3e%3c/defs%3e%3c/svg%3e)
'%3e%3cpath%20d='M33.9999%200.400391H5.9999C2.90711%200.400391%200.399902%202.9076%200.399902%206.00039V34.0004C0.399902%2037.0932%202.90711%2039.6004%205.9999%2039.6004H33.9999C37.0927%2039.6004%2039.5999%2037.0932%2039.5999%2034.0004V6.00039C39.5999%202.9076%2037.0927%200.400391%2033.9999%200.400391Z'%20fill='white'%20stroke='%23E4E8EC'%20stroke-width='0.8'/%3e%3cg%20filter='url(%23filter0_dd_4322_3743)'%3e%3cpath%20d='M27.874%2013.3767C26.7727%2013.323%2025.7215%2013.55%2024.7897%2013.9943C24.5776%2014.0953%2024.3758%2014.2161%2024.1725%2014.3334C23.9762%2014.4466%2023.8022%2014.5904%2023.6152%2014.7175C23.6135%2014.7187%2023.6117%2014.7199%2023.61%2014.721L22.9464%2015.181L21.929%2013.9332L21.5398%2016.1558L21.388%2017.023L21.1564%2018.346L23.1154%2018.461L23.301%2018.4718L25.7471%2018.6154L24.7615%2017.4069L25.2915%2017.0205L25.7217%2016.7215C26.3093%2016.3732%2027.0018%2016.1869%2027.7351%2016.2227C29.7261%2016.3199%2031.2613%2018.0127%2031.1641%2020.0037C31.0507%2022.3259%2028.6157%2023.9488%2026.4149%2023.2429C25.5114%2022.953%2024.8454%2022.2337%2024.1381%2021.6335C23.4004%2021.0075%2022.6626%2020.3813%2021.9248%2019.7553C21.8396%2019.683%2021.7543%2019.6106%2021.6691%2019.5383L19.4169%2017.6273L19.3504%2017.5708L19.3503%2017.5725L16.7577%2015.3667C16.6695%2015.2872%2016.5788%2015.2104%2016.4862%2015.1358C16.4862%2015.1358%2016.4808%2015.1311%2016.4806%2015.1312C15.4545%2014.306%2014.1691%2013.7854%2012.7564%2013.7164C9.19933%2013.5427%206.16411%2016.2953%205.99042%2019.8524C5.81674%2023.4095%208.56936%2026.4447%2012.1264%2026.6184C13.2277%2026.6721%2014.2789%2026.4451%2015.2107%2026.0009C15.4228%2025.8998%2015.6246%2025.779%2015.8279%2025.6618C16.0242%2025.5485%2016.1982%2025.4047%2016.3852%2025.2776C16.387%2025.2764%2016.3887%2025.2752%2016.3905%2025.2741L17.054%2024.8142L18.0715%2026.0618L18.4606%2023.8392L18.6124%2022.972L18.844%2021.6491L16.885%2021.5341L16.6994%2021.5232L14.2534%2021.3796L15.2388%2022.5881L14.7088%2022.9746L14.2786%2023.2736C13.691%2023.622%2012.9985%2023.8082%2012.2652%2023.7724C10.2742%2023.6752%208.73905%2021.9824%208.83626%2019.9914C8.94965%2017.6692%2011.3846%2016.0463%2013.5854%2016.7523C14.4889%2017.0421%2015.1549%2017.7614%2015.8622%2018.3616C16.5999%2018.9877%2017.3378%2019.6138%2018.0755%2020.2398C18.1608%2020.3121%2018.246%2020.3846%2018.3312%2020.4569L20.5831%2022.3678L20.6497%2022.4243L20.6498%2022.4226L23.2423%2024.6284C23.3305%2024.7079%2023.4213%2024.7848%2023.5138%2024.8593L23.5195%2024.8639C24.5455%2025.6891%2025.8309%2026.2098%2027.2436%2026.2787C30.8007%2026.4524%2033.8359%2023.6998%2034.0096%2020.1427C34.1837%2016.5856%2031.4311%2013.5504%2027.874%2013.3767Z'%20fill='url(%23paint0_linear_4322_3743)'/%3e%3c/g%3e%3c/g%3e%3cdefs%3e%3cfilter%20id='filter0_dd_4322_3743'%20x='1.18237'%20y='10.1689'%20width='37.6354'%20height='22.8584'%20filterUnits='userSpaceOnUse'%20color-interpolation-filters='sRGB'%3e%3cfeFlood%20flood-opacity='0'%20result='BackgroundImageFix'/%3e%3cfeColorMatrix%20in='SourceAlpha'%20type='matrix'%20values='0%200%200%200%200%200%200%200%200%200%200%200%200%200%200%200%200%200%20127%200'%20result='hardAlpha'/%3e%3cfeOffset%20dy='1.6001'/%3e%3cfeGaussianBlur%20stdDeviation='2.40015'/%3e%3cfeColorMatrix%20type='matrix'%20values='0%200%200%200%200.0627451%200%200%200%200%200.109804%200%200%200%200%200.156863%200%200%200%200.1%200'/%3e%3cfeBlend%20mode='normal'%20in2='BackgroundImageFix'%20result='effect1_dropShadow_4322_3743'/%3e%3cfeColorMatrix%20in='SourceAlpha'%20type='matrix'%20values='0%200%200%200%200%200%200%200%200%200%200%200%200%200%200%200%200%200%20127%200'%20result='hardAlpha'/%3e%3cfeOffset%20dy='1.6001'/%3e%3cfeGaussianBlur%20stdDeviation='1.6001'/%3e%3cfeColorMatrix%20type='matrix'%20values='0%200%200%200%200.0627451%200%200%200%200%200.109804%200%200%200%200%200.156863%200%200%200%200.06%200'/%3e%3cfeBlend%20mode='normal'%20in2='effect1_dropShadow_4322_3743'%20result='effect2_dropShadow_4322_3743'/%3e%3cfeBlend%20mode='normal'%20in='SourceGraphic'%20in2='effect2_dropShadow_4322_3743'%20result='shape'/%3e%3c/filter%3e%3clinearGradient%20id='paint0_linear_4322_3743'%20x1='6.0167'%20y1='19.3147'%20x2='33.9835'%20y2='20.6802'%20gradientUnits='userSpaceOnUse'%3e%3cstop%20stop-color='%236729FF'/%3e%3cstop%20offset='1'%20stop-color='%238A5CFF'/%3e%3c/linearGradient%3e%3cclipPath%20id='clip0_4322_3743'%3e%3crect%20width='40'%20height='40'%20fill='white'/%3e%3c/clipPath%3e%3c/defs%3e%3c/svg%3e)

'%3e%3cpath%20d='M14.6667%2024.6663C14.399%2024.6663%2014.1477%2024.562%2013.9593%2024.373L10.293%2020.7067C10.1043%2020.5187%2010%2020.2673%2010%2019.9997C10%2019.732%2010.1043%2019.4807%2010.2933%2019.2923L13.9597%2015.626C14.1477%2015.4373%2014.399%2015.333%2014.6667%2015.333C15.218%2015.333%2015.6667%2015.7817%2015.6667%2016.333C15.6667%2016.6007%2015.5623%2016.852%2015.3733%2017.0403L12.414%2019.9997L15.3737%2022.9593C15.5627%2023.1473%2015.6667%2023.3987%2015.6667%2023.6663C15.6667%2024.2177%2015.218%2024.6663%2014.6667%2024.6663Z'%20fill='%230A0F14'/%3e%3cpath%20d='M14.6667%2024.6663C14.399%2024.6663%2014.1477%2024.562%2013.9593%2024.373L10.293%2020.7067C10.1043%2020.5187%2010%2020.2673%2010%2019.9997C10%2019.732%2010.1043%2019.4807%2010.2933%2019.2923L13.9597%2015.626C14.1477%2015.4373%2014.399%2015.333%2014.6667%2015.333C15.218%2015.333%2015.6667%2015.7817%2015.6667%2016.333C15.6667%2016.6007%2015.5623%2016.852%2015.3733%2017.0403L12.414%2019.9997L15.3737%2022.9593C15.5627%2023.1473%2015.6667%2023.3987%2015.6667%2023.6663C15.6667%2024.2177%2015.218%2024.6663%2014.6667%2024.6663Z'%20fill='url(%23paint0_linear_1812_1508)'/%3e%3cpath%20d='M25.334%2024.9993C24.7827%2024.9993%2024.334%2024.5507%2024.334%2023.9993C24.334%2023.7317%2024.4383%2023.4803%2024.6273%2023.292L27.5867%2020.3327L24.627%2017.373C24.4383%2017.1843%2024.334%2016.933%2024.334%2016.666C24.334%2016.1147%2024.7827%2015.666%2025.334%2015.666C25.6017%2015.666%2025.853%2015.7703%2026.0413%2015.9593L29.7077%2019.6257C29.8967%2019.8143%2030.0007%2020.0657%2030.0007%2020.3327C30.0007%2020.6003%2029.8963%2020.8517%2029.7073%2021.04L26.041%2024.7063C25.853%2024.8953%2025.6017%2024.9993%2025.334%2024.9993Z'%20fill='%230A0F14'/%3e%3cpath%20d='M25.334%2024.9993C24.7827%2024.9993%2024.334%2024.5507%2024.334%2023.9993C24.334%2023.7317%2024.4383%2023.4803%2024.6273%2023.292L27.5867%2020.3327L24.627%2017.373C24.4383%2017.1843%2024.334%2016.933%2024.334%2016.666C24.334%2016.1147%2024.7827%2015.666%2025.334%2015.666C25.6017%2015.666%2025.853%2015.7703%2026.0413%2015.9593L29.7077%2019.6257C29.8967%2019.8143%2030.0007%2020.0657%2030.0007%2020.3327C30.0007%2020.6003%2029.8963%2020.8517%2029.7073%2021.04L26.041%2024.7063C25.853%2024.8953%2025.6017%2024.9993%2025.334%2024.9993Z'%20fill='url(%23paint1_linear_1812_1508)'/%3e%3cpath%20d='M17%2027.6663C16.4487%2027.6663%2016%2027.2177%2016%2026.6663C16%2026.5337%2016.026%2026.404%2016.0767%2026.2813L22.077%2012.9473C22.2337%2012.574%2022.596%2012.333%2023%2012.333C23.5513%2012.333%2024%2012.7817%2024%2013.333C24%2013.4657%2023.974%2013.5953%2023.9233%2013.718L17.923%2027.052C17.7663%2027.4253%2017.404%2027.6663%2017%2027.6663Z'%20fill='%230A0F14'/%3e%3cpath%20d='M17%2027.6663C16.4487%2027.6663%2016%2027.2177%2016%2026.6663C16%2026.5337%2016.026%2026.404%2016.0767%2026.2813L22.077%2012.9473C22.2337%2012.574%2022.596%2012.333%2023%2012.333C23.5513%2012.333%2024%2012.7817%2024%2013.333C24%2013.4657%2023.974%2013.5953%2023.9233%2013.718L17.923%2027.052C17.7663%2027.4253%2017.404%2027.6663%2017%2027.6663Z'%20fill='url(%23paint2_linear_1812_1508)'/%3e%3c/g%3e%3cdefs%3e%3clinearGradient%20id='paint0_linear_1812_1508'%20x1='10'%20y1='19.9997'%20x2='15.6667'%20y2='19.9997'%20gradientUnits='userSpaceOnUse'%3e%3cstop%20stop-color='%236729FF'/%3e%3cstop%20offset='1'%20stop-color='%238A5CFF'/%3e%3c/linearGradient%3e%3clinearGradient%20id='paint1_linear_1812_1508'%20x1='24.334'%20y1='20.3327'%20x2='30.0007'%20y2='20.3327'%20gradientUnits='userSpaceOnUse'%3e%3cstop%20stop-color='%236729FF'/%3e%3cstop%20offset='1'%20stop-color='%238A5CFF'/%3e%3c/linearGradient%3e%3clinearGradient%20id='paint2_linear_1812_1508'%20x1='16'%20y1='19.9997'%20x2='24'%20y2='19.9997'%20gradientUnits='userSpaceOnUse'%3e%3cstop%20stop-color='%236729FF'/%3e%3cstop%20offset='1'%20stop-color='%238A5CFF'/%3e%3c/linearGradient%3e%3cclipPath%20id='clip0_1812_1508'%3e%3crect%20width='20'%20height='20'%20fill='white'%20transform='translate(10%2010)'/%3e%3c/clipPath%3e%3c/defs%3e%3c/svg%3e)
'/%3e%3cpath%20d='M28%2025.5C28.5523%2025.5%2029%2025.0523%2029%2024.5C29%2023.9477%2028.5523%2023.5%2028%2023.5H20C19.4477%2023.5%2019%2023.9477%2019%2024.5C19%2025.0523%2019.4477%2025.5%2020%2025.5H28Z'%20fill='url(%23paint1_linear_1812_1498)'/%3e%3cdefs%3e%3clinearGradient%20id='paint0_linear_1812_1498'%20x1='11'%20y1='20'%20x2='18'%20y2='20'%20gradientUnits='userSpaceOnUse'%3e%3cstop%20stop-color='%236729FF'/%3e%3cstop%20offset='1'%20stop-color='%238A5CFF'/%3e%3c/linearGradient%3e%3clinearGradient%20id='paint1_linear_1812_1498'%20x1='19'%20y1='24.5'%20x2='29'%20y2='24.5'%20gradientUnits='userSpaceOnUse'%3e%3cstop%20stop-color='%236729FF'/%3e%3cstop%20offset='1'%20stop-color='%238A5CFF'/%3e%3c/linearGradient%3e%3c/defs%3e%3c/svg%3e)
'%3e%3cpath%20d='M31.009%2019.258V16.9295C31.009%2016.687%2030.7179%2016.5414%2030.5239%2016.687C28.1469%2018.5789%2023.8779%2019.5491%2019.609%2019.5491C15.3886%2019.5491%2011.1196%2018.5789%208.69409%2016.687C8.50005%2016.5414%208.20898%2016.687%208.20898%2016.9295V19.258V19.4521C8.20898%2022.1687%2013.3026%2024.4002%2019.609%2024.4002C25.9154%2024.4002%2031.009%2022.1687%2031.009%2019.4036C31.009%2019.3551%2031.009%2019.3065%2031.009%2019.258Z'%20fill='%230A0F14'/%3e%3cpath%20d='M31.009%2019.258V16.9295C31.009%2016.687%2030.7179%2016.5414%2030.5239%2016.687C28.1469%2018.5789%2023.8779%2019.5491%2019.609%2019.5491C15.3886%2019.5491%2011.1196%2018.5789%208.69409%2016.687C8.50005%2016.5414%208.20898%2016.687%208.20898%2016.9295V19.258V19.4521C8.20898%2022.1687%2013.3026%2024.4002%2019.609%2024.4002C25.9154%2024.4002%2031.009%2022.1687%2031.009%2019.4036C31.009%2019.3551%2031.009%2019.3065%2031.009%2019.258Z'%20fill='url(%23paint0_linear_1812_1488)'/%3e%3cpath%20d='M31.009%2025.758V23.4295C31.009%2023.187%2030.7179%2023.0414%2030.5239%2023.187C28.1469%2025.0789%2023.8779%2026.0491%2019.609%2026.0491C15.3886%2026.0491%2011.1196%2025.0789%208.69409%2023.187C8.50005%2023.0414%208.20898%2023.187%208.20898%2023.4295V25.758V25.9521C8.20898%2028.6687%2013.3026%2030.9002%2019.609%2030.9002C25.9154%2030.9002%2031.009%2028.6687%2031.009%2025.9036C31.009%2025.8551%2031.009%2025.8065%2031.009%2025.758Z'%20fill='%230A0F14'/%3e%3cpath%20d='M31.009%2025.758V23.4295C31.009%2023.187%2030.7179%2023.0414%2030.5239%2023.187C28.1469%2025.0789%2023.8779%2026.0491%2019.609%2026.0491C15.3886%2026.0491%2011.1196%2025.0789%208.69409%2023.187C8.50005%2023.0414%208.20898%2023.187%208.20898%2023.4295V25.758V25.9521C8.20898%2028.6687%2013.3026%2030.9002%2019.609%2030.9002C25.9154%2030.9002%2031.009%2028.6687%2031.009%2025.9036C31.009%2025.8551%2031.009%2025.8065%2031.009%2025.758Z'%20fill='url(%23paint1_linear_1812_1488)'/%3e%3cpath%20d='M19.609%2018.0927C25.905%2018.0927%2031.009%2015.8557%2031.009%2013.0962C31.009%2010.3366%2025.905%208.09961%2019.609%208.09961C13.3129%208.09961%208.20898%2010.3366%208.20898%2013.0962C8.20898%2015.8557%2013.3129%2018.0927%2019.609%2018.0927Z'%20fill='%230A0F14'/%3e%3cpath%20d='M19.609%2018.0927C25.905%2018.0927%2031.009%2015.8557%2031.009%2013.0962C31.009%2010.3366%2025.905%208.09961%2019.609%208.09961C13.3129%208.09961%208.20898%2010.3366%208.20898%2013.0962C8.20898%2015.8557%2013.3129%2018.0927%2019.609%2018.0927Z'%20fill='url(%23paint2_linear_1812_1488)'/%3e%3c/g%3e%3cdefs%3e%3clinearGradient%20id='paint0_linear_1812_1488'%20x1='8.20898'%20y1='20.5145'%20x2='31.009'%20y2='20.5145'%20gradientUnits='userSpaceOnUse'%3e%3cstop%20stop-color='%236729FF'/%3e%3cstop%20offset='1'%20stop-color='%238A5CFF'/%3e%3c/linearGradient%3e%3clinearGradient%20id='paint1_linear_1812_1488'%20x1='8.20898'%20y1='27.0145'%20x2='31.009'%20y2='27.0145'%20gradientUnits='userSpaceOnUse'%3e%3cstop%20stop-color='%236729FF'/%3e%3cstop%20offset='1'%20stop-color='%238A5CFF'/%3e%3c/linearGradient%3e%3clinearGradient%20id='paint2_linear_1812_1488'%20x1='8.20898'%20y1='13.0962'%20x2='31.009'%20y2='13.0962'%20gradientUnits='userSpaceOnUse'%3e%3cstop%20stop-color='%236729FF'/%3e%3cstop%20offset='1'%20stop-color='%238A5CFF'/%3e%3c/linearGradient%3e%3cclipPath%20id='clip0_1812_1488'%3e%3crect%20width='24'%20height='24'%20fill='white'%20transform='translate(7.60938%207.5)'/%3e%3c/clipPath%3e%3c/defs%3e%3c/svg%3e)


'/%3e%3cpath%20d='M21.8957%207.53398L22.8013%208.98336L24.4594%209.39648C24.7344%209.46523%2024.8426%209.79773%2024.6607%2010.0152L23.5619%2011.324L23.6813%2013.0284C23.7013%2013.3109%2023.4182%2013.5171%2023.1551%2013.4109L21.5707%2012.7702L19.9863%2013.4109C19.7238%2013.5171%2019.4401%2013.3115%2019.4601%2013.0284L19.5794%2011.324L18.4807%2010.0152C18.2982%209.79836%2018.4069%209.46523%2018.6819%209.39648L20.3401%208.98336L21.2457%207.53398C21.3951%207.29336%2021.7457%207.29336%2021.8957%207.53398Z'%20fill='%230A0F14'/%3e%3cpath%20d='M21.8957%207.53398L22.8013%208.98336L24.4594%209.39648C24.7344%209.46523%2024.8426%209.79773%2024.6607%2010.0152L23.5619%2011.324L23.6813%2013.0284C23.7013%2013.3109%2023.4182%2013.5171%2023.1551%2013.4109L21.5707%2012.7702L19.9863%2013.4109C19.7238%2013.5171%2019.4401%2013.3115%2019.4601%2013.0284L19.5794%2011.324L18.4807%2010.0152C18.2982%209.79836%2018.4069%209.46523%2018.6819%209.39648L20.3401%208.98336L21.2457%207.53398C21.3951%207.29336%2021.7457%207.29336%2021.8957%207.53398Z'%20fill='url(%23paint1_linear_1812_1874)'/%3e%3cdefs%3e%3clinearGradient%20id='paint0_linear_1812_1874'%20x1='6.6875'%20y1='17.5217'%20x2='22.7875'%20y2='17.5217'%20gradientUnits='userSpaceOnUse'%3e%3cstop%20stop-color='%236729FF'/%3e%3cstop%20offset='1'%20stop-color='%238A5CFF'/%3e%3c/linearGradient%3e%3clinearGradient%20id='paint1_linear_1812_1874'%20x1='18.3906'%20y1='10.3964'%20x2='24.7505'%20y2='10.3964'%20gradientUnits='userSpaceOnUse'%3e%3cstop%20stop-color='%236729FF'/%3e%3cstop%20offset='1'%20stop-color='%238A5CFF'/%3e%3c/linearGradient%3e%3c/defs%3e%3c/svg%3e)

'/%3e%3cdefs%3e%3clinearGradient%20id='paint0_linear_1812_1827'%20x1='6.1333'%20y1='15.9947'%20x2='25.8635'%20y2='15.9947'%20gradientUnits='userSpaceOnUse'%3e%3cstop%20stop-color='%236729FF'/%3e%3cstop%20offset='1'%20stop-color='%238A5CFF'/%3e%3c/linearGradient%3e%3c/defs%3e%3c/svg%3e)
'%3e%3cmask%20id='mask0_1812_1767'%20style='mask-type:luminance'%20maskUnits='userSpaceOnUse'%20x='6'%20y='6'%20width='20'%20height='20'%3e%3cpath%20d='M6%206H26V26H6V6Z'%20fill='white'/%3e%3c/mask%3e%3cg%20mask='url(%23mask0_1812_1767)'%3e%3cpath%20d='M19.8244%2013.5H18.4994V9.33333C18.4994%208.875%2018.1244%208.5%2017.666%208.5H14.3327C13.8743%208.5%2013.4993%208.875%2013.4993%209.33333V13.5H12.1743C11.4327%2013.5%2011.0577%2014.4%2011.5827%2014.925L15.4077%2018.75C15.7327%2019.075%2016.2577%2019.075%2016.5827%2018.75L20.4077%2014.925C20.9327%2014.4%2020.566%2013.5%2019.8244%2013.5ZM10.166%2021.8333C10.166%2022.2917%2010.541%2022.6667%2010.9993%2022.6667H20.9994C21.4577%2022.6667%2021.8327%2022.2917%2021.8327%2021.8333C21.8327%2021.375%2021.4577%2021%2020.9994%2021H10.9993C10.541%2021%2010.166%2021.375%2010.166%2021.8333Z'%20fill='%230A0F14'/%3e%3cpath%20d='M19.8244%2013.5H18.4994V9.33333C18.4994%208.875%2018.1244%208.5%2017.666%208.5H14.3327C13.8743%208.5%2013.4993%208.875%2013.4993%209.33333V13.5H12.1743C11.4327%2013.5%2011.0577%2014.4%2011.5827%2014.925L15.4077%2018.75C15.7327%2019.075%2016.2577%2019.075%2016.5827%2018.75L20.4077%2014.925C20.9327%2014.4%2020.566%2013.5%2019.8244%2013.5ZM10.166%2021.8333C10.166%2022.2917%2010.541%2022.6667%2010.9993%2022.6667H20.9994C21.4577%2022.6667%2021.8327%2022.2917%2021.8327%2021.8333C21.8327%2021.375%2021.4577%2021%2020.9994%2021H10.9993C10.541%2021%2010.166%2021.375%2010.166%2021.8333Z'%20fill='url(%23paint0_linear_1812_1767)'/%3e%3c/g%3e%3c/g%3e%3cdefs%3e%3clinearGradient%20id='paint0_linear_1812_1767'%20x1='10.166'%20y1='15.5833'%20x2='21.8327'%20y2='15.5833'%20gradientUnits='userSpaceOnUse'%3e%3cstop%20stop-color='%236729FF'/%3e%3cstop%20offset='1'%20stop-color='%238A5CFF'/%3e%3c/linearGradient%3e%3cclipPath%20id='clip0_1812_1767'%3e%3crect%20width='20'%20height='20'%20fill='white'%20transform='translate(6%206)'/%3e%3c/clipPath%3e%3c/defs%3e%3c/svg%3e)
'/%3e%3cdefs%3e%3clinearGradient%20id='paint0_linear_1812_1798'%20x1='6'%20y1='15.9814'%20x2='26'%20y2='15.9814'%20gradientUnits='userSpaceOnUse'%3e%3cstop%20stop-color='%236729FF'/%3e%3cstop%20offset='1'%20stop-color='%238A5CFF'/%3e%3c/linearGradient%3e%3c/defs%3e%3c/svg%3e)

'/%3e%3cdefs%3e%3clinearGradient%20id='paint0_linear_1812_3580'%20x1='8.33301'%20y1='19.5873'%20x2='31.667'%20y2='19.5873'%20gradientUnits='userSpaceOnUse'%3e%3cstop%20stop-color='%236729FF'/%3e%3cstop%20offset='1'%20stop-color='%238A5CFF'/%3e%3c/linearGradient%3e%3c/defs%3e%3c/svg%3e)


Deployment and Best Practices
Deployment and Best Practices
Production Builds
When you're ready to release your Angular application, you should create an optimized production build. The Angular CLI automatically enables several optimizations that improve performance and reduce bundle size.
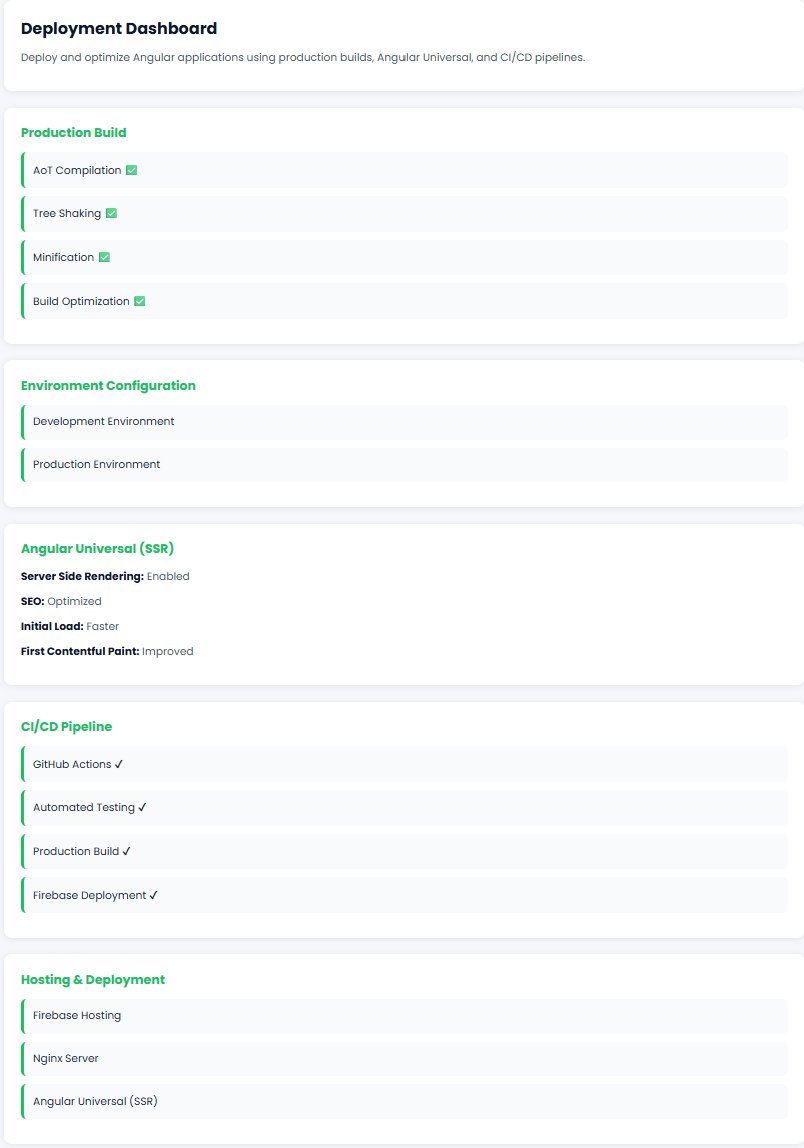
Production builds include:
- Ahead-of-Time (AoT) compilation
- Tree-shaking to remove unused code
- JavaScript and CSS minification
- Build optimization
- Dead code elimination
Generate a production build using:
ng build --configuration production
The optimized files are generated inside the dist/ folder.
Analyzing Bundle Size
Large bundles increase page load time. You can inspect your application's bundle using source-map-explorer.
Install the package:
npm install -g source-map-explorer
Generate source maps during the production build:
ng build --configuration production --source-map
Analyze the generated bundle:
source-map-explorer dist/my-app/*.js
This helps identify large dependencies and opportunities for optimization.
Environment-specific Configuration
Angular supports different configuration files for development and production environments.
environment.ts (Development)
export const environment = {
production: false,
apiUrl: 'http://localhost:3000/api'
};
**environment.prod.ts (Production)**
export const environment = {
production: true,
apiUrl: 'https://api.myapp.com'
};
Use the environment values inside your services:
import { environment } from '../environments/environment';
private apiUrl = environment.apiUrl;
When you create a production build, Angular automatically replaces environment.ts with environment.prod.ts.
Angular Universal
Angular applications normally render entirely in the browser. Angular Universal enables Server-Side Rendering (SSR), where pages are rendered on the server before being sent to the client.
SSR improves:
- Search Engine Optimization (SEO)
- Initial page load speed
- First Contentful Paint (FCP)
- Social media previews
- User experience on slower networks
Adding Angular Universal
Enable SSR in an existing Angular application:
ng add @angular/ssr
Angular automatically configures the necessary server files and build settings.
Running the SSR Application
Start the development server with SSR enabled:
npm run dev:ssr
Build the production application:
npm run build:ssr
Serve the production build:
npm run serve:ssr
When Should You Use Angular Universal?
Angular Universal is recommended for:
- Public websites
- Marketing pages
- Blogs
- News portals
- E-commerce websites
- Applications requiring better SEO
For authenticated dashboards and internal business applications, client-side rendering is often sufficient.
CI/CD and Deployment
Continuous Integration and Continuous Deployment (CI/CD) automate building, testing, and deploying Angular applications whenever changes are pushed to a repository.
A typical CI/CD pipeline performs the following steps:
- Pull the latest source code.
- Install project dependencies.
- Run automated tests.
- Generate a production build.
- Deploy the application.
Example GitHub Actions Workflow
Create the following workflow inside:
.github/workflows/angular.yml
name: Angular CI
on:push:branches:- main
jobs:build:runs-on: ubuntu-latest
steps:- uses: actions/checkout@v4
- uses: actions/setup-node@v4with:node-version: 20
- run: npm ci
- run: npm run test -- --watch=false --browsers=ChromeHeadless
- run: npm run build -- --configuration production
This workflow automatically builds and tests the Angular application whenever code is pushed to the main branch.
Deploying to Firebase Hosting
Firebase Hosting provides a simple way to deploy Angular applications.
Install Firebase CLI:
npm install -g firebase-tools
Log in to Firebase:
firebase login
Initialize hosting:
firebase init hosting
Generate the production build:
ng build --configuration production
Deploy the application:
firebase deploy
Deploying with Nginx
When deploying to your own server, configure Nginx to redirect all application routes to index.html. This allows Angular's router to handle navigation correctly.
server {
listen 80;
root /var/www/my-app/dist;
index index.html;
location / {
try_files $uri $uri/ /index.html;
}
location ~* \.(js|css|png|jpg|ico)$ {
expires 1y;
add_header Cache-Control "public, immutable";
}
}
Without the try_files directive, refreshing any route other than the root URL (/) results in a 404 Not Found error because the web server attempts to locate a physical file instead of allowing Angular Router to manage the route.

Angular Handbook
Harini A
Recommended Handbooks

C++ Handbook

Python Basics Handbook

Javascript Handbook

ReactJS Projects Handbook

Computer Networks Tutorial

Operating System Tutorial

DBMS and SQL Tutorial

Java Tutorial

C Language Tutorial

PHP Tutorial

Android Tutorial

Linux Guide Tutorial

Data Structures and Algorithms Tutorial

Computer Architecture

HTML 5 References Tutorial

Docker Tutorial

GIT (Using Github) Tutorial

Go Language Tutorial

GIT Guide

CSS Tutorial

Advanced Data Structures

Spring Framework Tutorial

Spring Boot Tutorial

Kotlin Tutorial

Apache Cordova Tutorial

Python Tutorial

SASS-SCSS Tutorial

MongoDB Tutorial

Numpy Tutorial

PL-SQL Tutorial

Python Built-in Functions Tutorial

Pandas Tutorial

Elasticsearch Tutorial

Matplotlib Tutorial

Web Scraping Tutorial

Networking with Python

Tkinter Tutorial

Java Programs Tutorial

Java Examples Tutorial

Servlet Tutorial

JSP Tutorial

Java Type Conversion Tutorial

Java 8 Tutorial

Java 9 Tutorial

Java 10 Tutorial

Java 11 Tutorial

Java Util Library Tutorial

Building a Contact Us Form in ReactJS

Building a Age Calculator App Using ReactJS

Movie Recommendation System Project Using Content-Based Filtering

Recipe Finder App using ReactJS

Sales Data Analysis Project for Beginners Using Data Science

Student Performance Analysis Project for Beginners Using Data Science

Word Counter Tool Using ReactJS

Customer Churn Prediction Project Using Classification Techniques

Basic Expense Tracker App using ReactJS

Simple Binary to Decimal Converter in React

Real-Time Unit Converter in React

House Price Prediction Using Machine Learning (XGBoost)

Weather Data Analysis and Visualization Using Python

Expandable Accordion Component using React

OTP Verification Component using React

Cricket Data Analysis Using Python

Credit Card Fraud Detection for Beginners using Data Science

Deep learning Tutorial

Software Development Life Cycle Tutorial

Stock Price Prediction for Beginners using Data Science

Apache Kafka Tutorial

Django Handbook

Computer Programming Tutorial

Tensorflow Tutorial

Java OOPs Concepts Tutorial

Building an Image Classification System Using CNN

News Recommendation System Using Machine Learning

Fake Review Detection System using Machine Learning

Product Feedback App Using Full Stack Development - Customer Review and Rating System