
Step-by-Step Guide: MongoDB Install on Windows in 5 Simple Steps
Sep 30, 2024 5 Min Read 2868 Views
(Last Updated)
Embarking on a MongoDB install on Windows marks a significant first step towards harnessing the power of one of the most popular NoSQL databases used in web application development and real-time storage.
This guide aims to walk you through each critical phase, from initial download to configuring MongoDB as a Windows service, ensuring a robust installation foundation.
By focusing on a step-by-step approach, you’ll be equipped to verify your installation, connect to MongoDB, and start leveraging its full potential, laying down the groundwork for advanced development and database management tasks.
Table of contents
- Installing MongoDB in 5 Simple Steps:
- 1) System Requirements and Pre-installation Checklist
- 2) Downloading and Setting Up MongoDB
- 3) Installing MongoDB on Windows
- 4) Configuring MongoDB as a Windows Service
- 5) Verifying Installation and Connecting to MongoDB
- Concluding Thoughts...
- FAQs
- Can I install MongoDB locally?
- How to run MongoDB in the terminal?
- Where is MongoDB located?
- What is MongoDB used for?
Installing MongoDB in 5 Simple Steps:
1) System Requirements and Pre-installation Checklist
Supported Windows Versions
MongoDB 7.0 Community Edition is compatible with the following 64-bit Windows versions on x86_64 architecture:
- Windows Server 2022
- Windows Server 2019
- Windows 11
It is important to note that MongoDB does not support the Windows Subsystem for Linux (WSL). For Linux installations, a supported Linux system is required.
Required Hardware Specifications
To ensure MongoDB runs smoothly on your system, the following hardware specifications are recommended:
- Disk Space: At least 10 GB of free disk space, plus additional space necessary for your data.
- RAM: Minimum of 4 GB, though more may be required depending on your usage patterns.
- CPU: MongoDB requires x86_64 microarchitectures. For Intel, a Sandy Bridge or later Core processor is necessary. For AMD, a Bulldozer or later processor is required.
Checking System Compatibility
Before installing MongoDB on Windows, ensure your system does not have Hyper-V running if you plan to use VirtualBox, as Microsoft does not support VirtualBox on Hyper-V. Additionally, check the MongoDB version compatibility:
- For MongoDB versions prior to 7.0, Windows Server 2016 is supported.
- For MongoDB 7.0 and later, Windows Server 2019 is recommended.
To check the MongoDB version you are currently using, you can run the command:
mongod --versionThis pre-installation checklist ensures that your system meets all requirements to achieve optimal performance and stability when running MongoDB.
Before diving into the next section, ensure you’re solid on full-stack development essentials like front-end frameworks, back-end technologies, and database management. If you are looking for a detailed Full Stack Development career program, you can join GUVI’s Full Stack Development Career Program with Placement Assistance. You will be able to master the MERN stack (MongoDB, Express.js, React, Node.js) and build real-life projects.
Additionally, if you want to explore MongoDB in a self-paced course, try GUVI’s self-paced MongoDB certification course.
2) Downloading and Setting Up MongoDB
Navigating to MongoDB Official Website
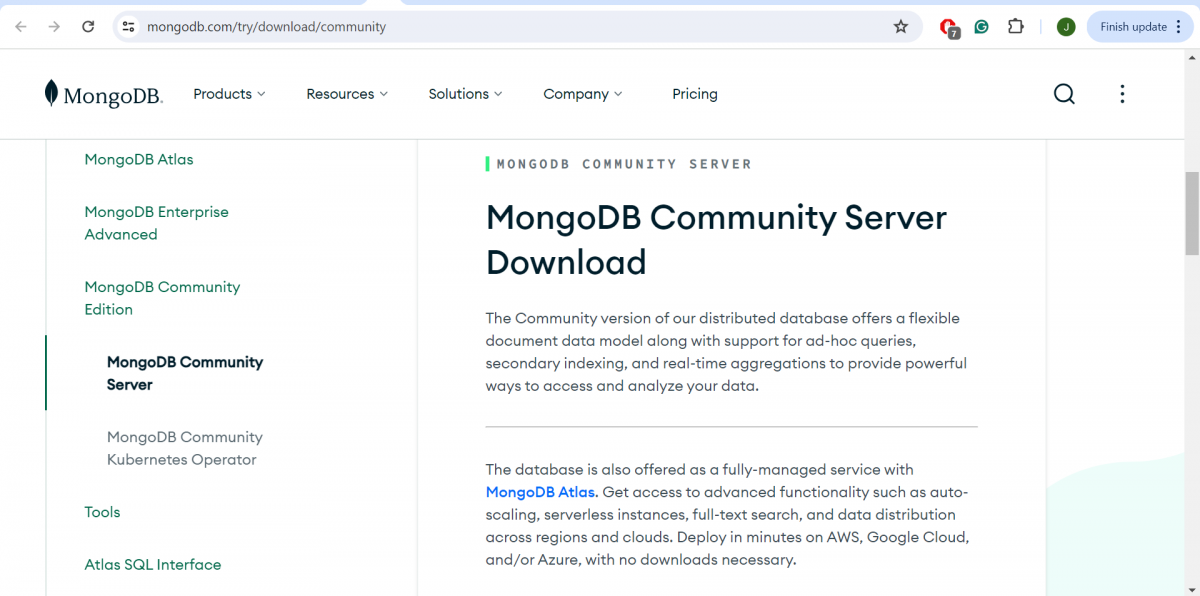
To begin the MongoDB installation process on your Windows system, first, navigate to the MongoDB official download page. This page will guide you to the MongoDB Community Server download section, where you can start the process of downloading the necessary installation package.
Selecting the Correct MongoDB Version
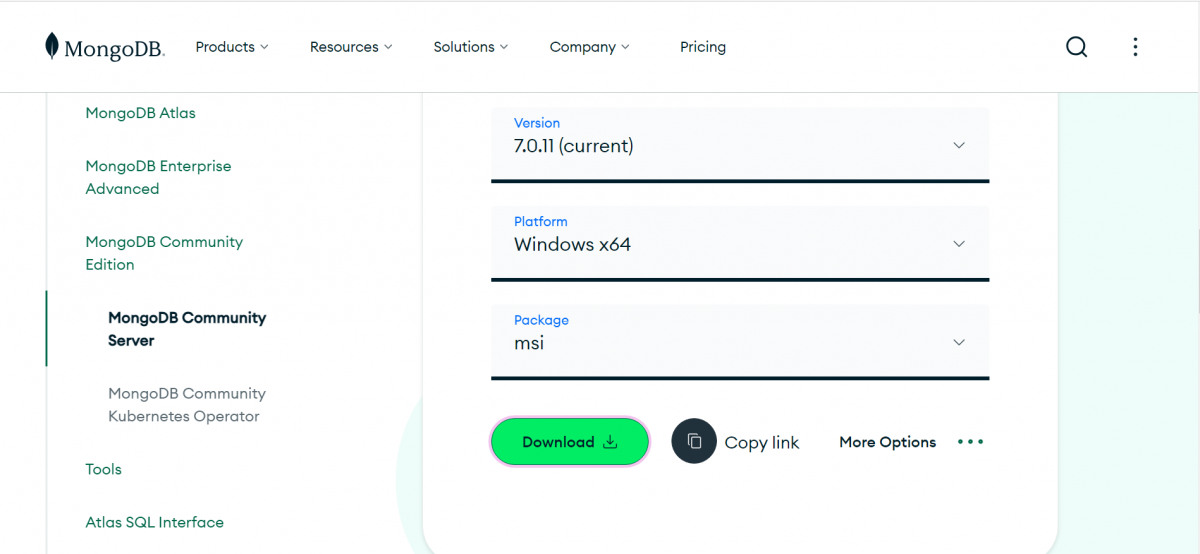
- Once you are on the MongoDB download page, you will need to make several selections to ensure you download the correct installer for your system.
- Start by selecting the appropriate version of MongoDB. For most users, the latest stable release is recommended for optimal security and performance.
- However, if you have specific requirements, you may choose an older version.
- Ensure your selections match your Windows system specifications, especially choosing the 64-bit version as the 32-bit versions are not compatible with MongoDB.
Downloading the MongoDB Installer (MSI Package)
- After selecting the version and confirming your operating system as Windows, proceed to choose the ‘MSI’ as the package type.
- This option is specifically for Windows users and provides an installer package file format used by Windows. Once all options are correctly set, click the green ‘Download’ button.
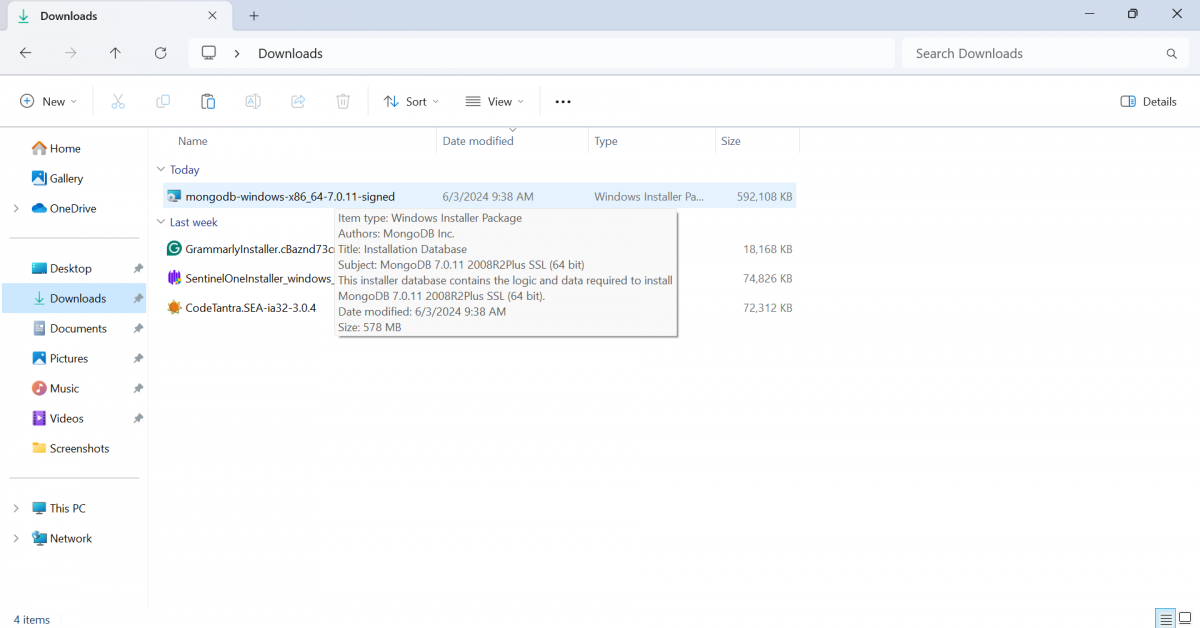
- The MongoDB
.msiinstaller file will begin downloading and should appear in your default download location, typically theDownloadsfolder.
- Navigate to this folder, and double-click on the
.msifile to launch the installation wizard, which will guide you through the setup process.
Must Read: MongoDB vs. MySQL: Which Database Should You Learn?
3) Installing MongoDB on Windows
Running the MongoDB Installer
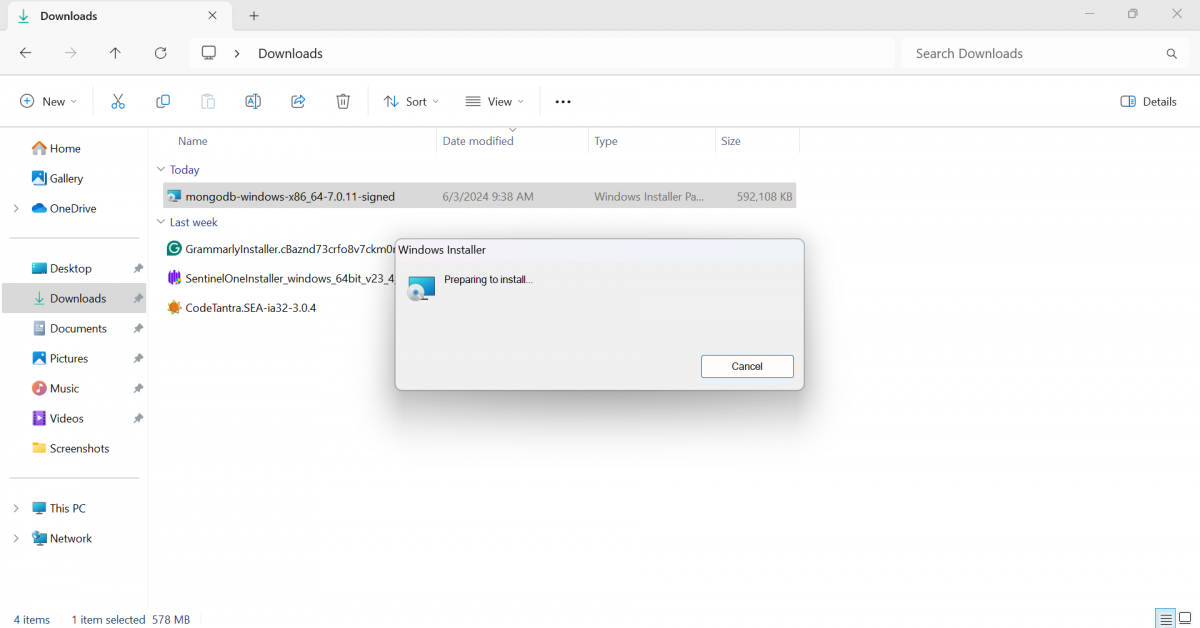
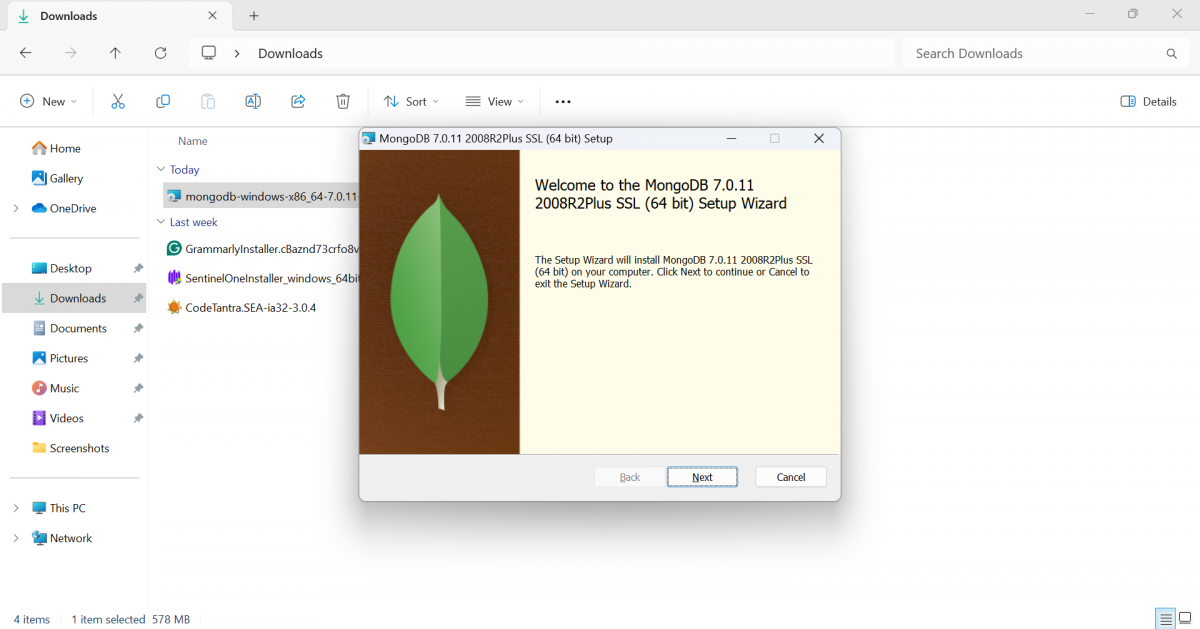
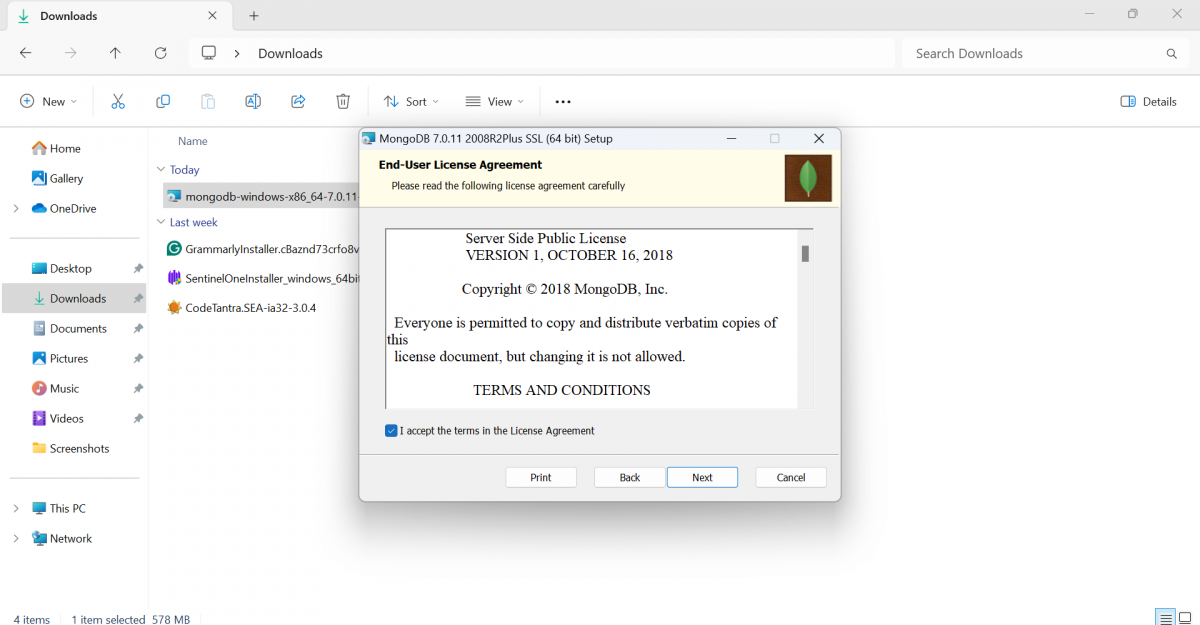
- Initiate the Installation: Locate the downloaded MongoDB
.msifile in yourDownloadsfolder. Double-click on the file to start the installation wizard which will guide you through the setup process.
Choosing the Installation Type
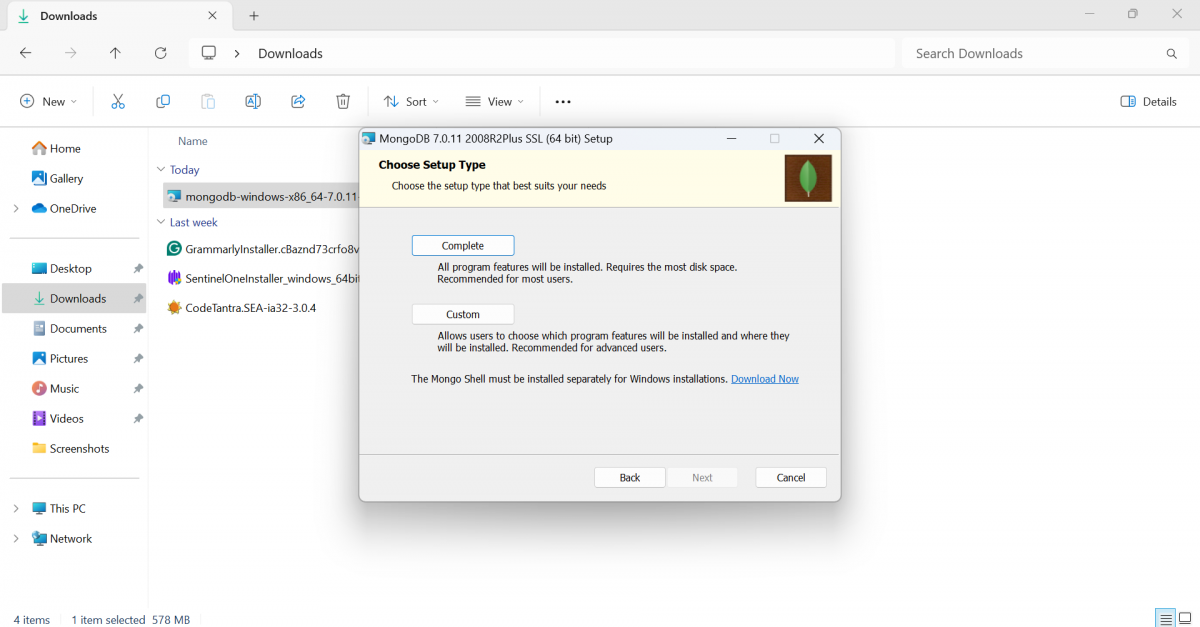
- Setup Options: In the installation wizard, you will be prompted to choose between ‘Complete’ and ‘Custom’ setup types.
- Complete Setup: This option installs MongoDB with all features to the default location and is recommended for most users.
- Custom Setup: This allows you to select specific components to install and choose installation locations.
Configuring Network Options and Data Directories
- Service Configuration: Decide if you want to run MongoDB as a Windows service. This can be set during the installation.
- Run as Service: Choose to run MongoDB as a service, which will start MongoDB automatically with Windows.
- Data Directory and Log Directory: Specify paths for data storage and logs. If these directories do not exist, the installer will create them and set appropriate permissions.
- Network Configuration: Configure network settings during installation to bind MongoDB to a specific IP address or leave the default localhost (127.0.0.1).

Completing the Installation Process
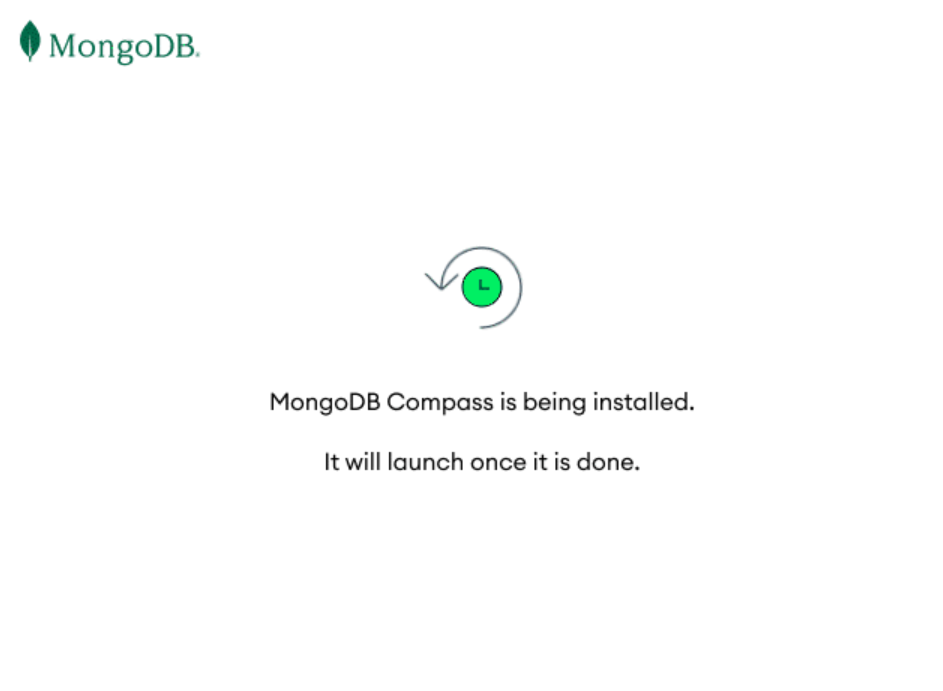
- Install MongoDB Compass (Optional): You can choose to install MongoDB Compass along with the MongoDB server. This GUI tool helps in managing your database.

- Finalize Installation: Review your settings and click ‘Install’ to begin the installation process. A progress bar will display the installation status.

- Launch MongoDB: Once the installation is complete, you can start MongoDB using the
mongodcommand in the command prompt if it’s not set to run as a service. Ensure that themongod.exeprocess is running successfully by checking for the ‘waiting for connections’ message in the console output.
Also Explore: A Comprehensive Guide to Data Modeling in MongoDB [2024]
4) Configuring MongoDB as a Windows Service
Understanding the Benefits of MongoDB as a Service
Running MongoDB as a Windows service provides several advantages that enhance both the manageability and reliability of your database system. Here are the key benefits:
- Automatic Startup: MongoDB starts automatically with the system, ensuring availability without manual intervention.
- Runs in the Background: Operates quietly in the background, freeing you from maintaining an open terminal session.
- Control and Manageability: Offers straightforward commands for starting, stopping, and restarting MongoDB, simplifying database management.
- Enhanced Security: Configuring MongoDB as a service allows for more robust security settings and user permissions.
- Scalability: Facilitates easier scaling in multi-server environments, streamlining operations across different machines.
Setting up MongoDB Service via the Command Line
To install MongoDB as a service on your Windows machine, follow these steps:
- Open Command Prompt as Administrator: This ensures you have the necessary permissions to create a service.
- Navigate to Your MongoDB Installation: Change the directory to where
mongod.exeis located, typicallyC:\Program Files\MongoDB\Server\4.2\bin. - Run the Installation Command: Execute the command:
mongod --config "C:\mongodb\mongod.cfg" --install- Ensure your configuration file (
mongod.cfg) specifies thesystemLog.pathandstorage.dbPath.
Verifying MongoDB Service Status
After setting up MongoDB as a service, it’s important to verify that it is running correctly:
- Check Service Status: Use the
services.msccommand to open the Windows Services management console. Locate the MongoDB service and check its status. - Using Command Line: Alternatively, you can check the service status using the command:
sc query MongoDB- Look for
STATEin the output to confirm if the service is running (RUNNINGstate).
By configuring MongoDB as a Windows service, you ensure that your database system is robust, secure, and efficiently managed, ready to support your applications reliably.
Must Explore: Top 7 Reasons To Learn MongoDB!
5) Verifying Installation and Connecting to MongoDB
Testing MongoDB Installation
- Verify the MongoDB Service: Ensure that the MongoDB server is running by opening the Command Prompt and typing:
mongod --version- This command returns the version of MongoDB installed, confirming the installation was successful.
- Check for Active Connections: Use the command:
netstat -an | find "27017"- This checks if MongoDB’s default port 27017 is active, indicating the server is running and listening for connections.
Launching and Using the Mongo Shell
- Open the Mongo Shell: After confirming the MongoDB service is active, launch the Mongo shell by typing:
mongoin the Command Prompt. This connects to your MongoDB instance running on localhost with the default port.
- Navigating the Shell: Once inside the Mongo shell, you can interact with your MongoDB instance. Start by checking the current database with:
dbwhich should return test, the default database.
Performing Basic MongoDB Operations
- Listing Databases: To view all available databases, use the command:
show dbsThis displays all databases currently on the MongoDB server.
- Switching Databases: To switch to a specific database, use:
use <database_name>Replace <database_name> with the name of the database you want to access.
- Creating and Querying Collections: This formats the output for better readability.
- Create a Collection: If you need to create a new collection, type:
db.createCollection('newCollection')- Insert Data: Add data to the collection using:
db.newCollection.insert({name: "test", value: "1"})- Find Data: Retrieve the data by running:
db.newCollection.find().pretty()By following these steps, you can verify that MongoDB has been installed correctly on your system, connect to the MongoDB instance using the Mongo shell, and perform basic operations to interact with your data. This ensures that your MongoDB installation is ready for further development and data management tasks.
Also Explore The Ultimate Battle: MongoDB vs SQL – Top Differences [2024]
Kickstart your Full Stack Development journey by enrolling in GUVI’s certified Full Stack Development Career Program with Placement Assistance where you will master the MERN stack (MongoDB, Express.js, React, Node.js) and build interesting real-life projects. This program is crafted by our team of experts to help you upskill and assist you in placements.
Alternatively, if you want to explore MongoDB in a self-paced course, try GUVI’s self-paced MongoDB certification course.
Concluding Thoughts…
Through the detailed steps outlined in this guide, beginning with system requirements and rounding off with verifying MongoDB’s installation and connectivity, the foundation for MongoDB on a Windows system has been thoroughly established.
Not only does this set the stage for leveraging MongoDB’s dynamic NoSQL database capabilities for web application development and real-time storage management, but it also equips you with the fundamental knowledge to tackle advanced database management and development tasks with confidence.
Also Find Out How to Install React.js on Windows: A Complete Guide
FAQs
Can I install MongoDB locally?
Yes, MongoDB can be installed locally on your machine. You can download the appropriate installer from the MongoDB website and follow the installation instructions provided. Refer to the guide above to learn how in detail.
How to run MongoDB in the terminal?
To run MongoDB in the terminal, you need to start the MongoDB server by executing the ‘mongod’ command. Then, you can use the ‘mongo’ command to interact with the MongoDB instance.
Where is MongoDB located?
MongoDB is typically located in the ‘bin’ directory of the installation directory on your system. The exact location may vary depending on how MongoDB was installed and your system configuration.
What is MongoDB used for?
MongoDB is a popular NoSQL database used for storing and managing unstructured data. It is commonly used in web development, mobile app development, and big data applications for its scalability, flexibility, and ease of use.




![The Ultimate Battle: MongoDB vs SQL - Top Differences [2024] 14 featured-image-MongoDB vs SQL](https://www.guvi.in/blog/wp-content/uploads/2024/05/1-2.png)

![A Comprehensive Guide to Data Modeling in MongoDB [2024] 16 Feature Image - A Comprehensive Guide to Data Modeling in MongoDB](https://www.guvi.in/blog/wp-content/uploads/2024/05/Feature-image.webp)
Did you enjoy this article?